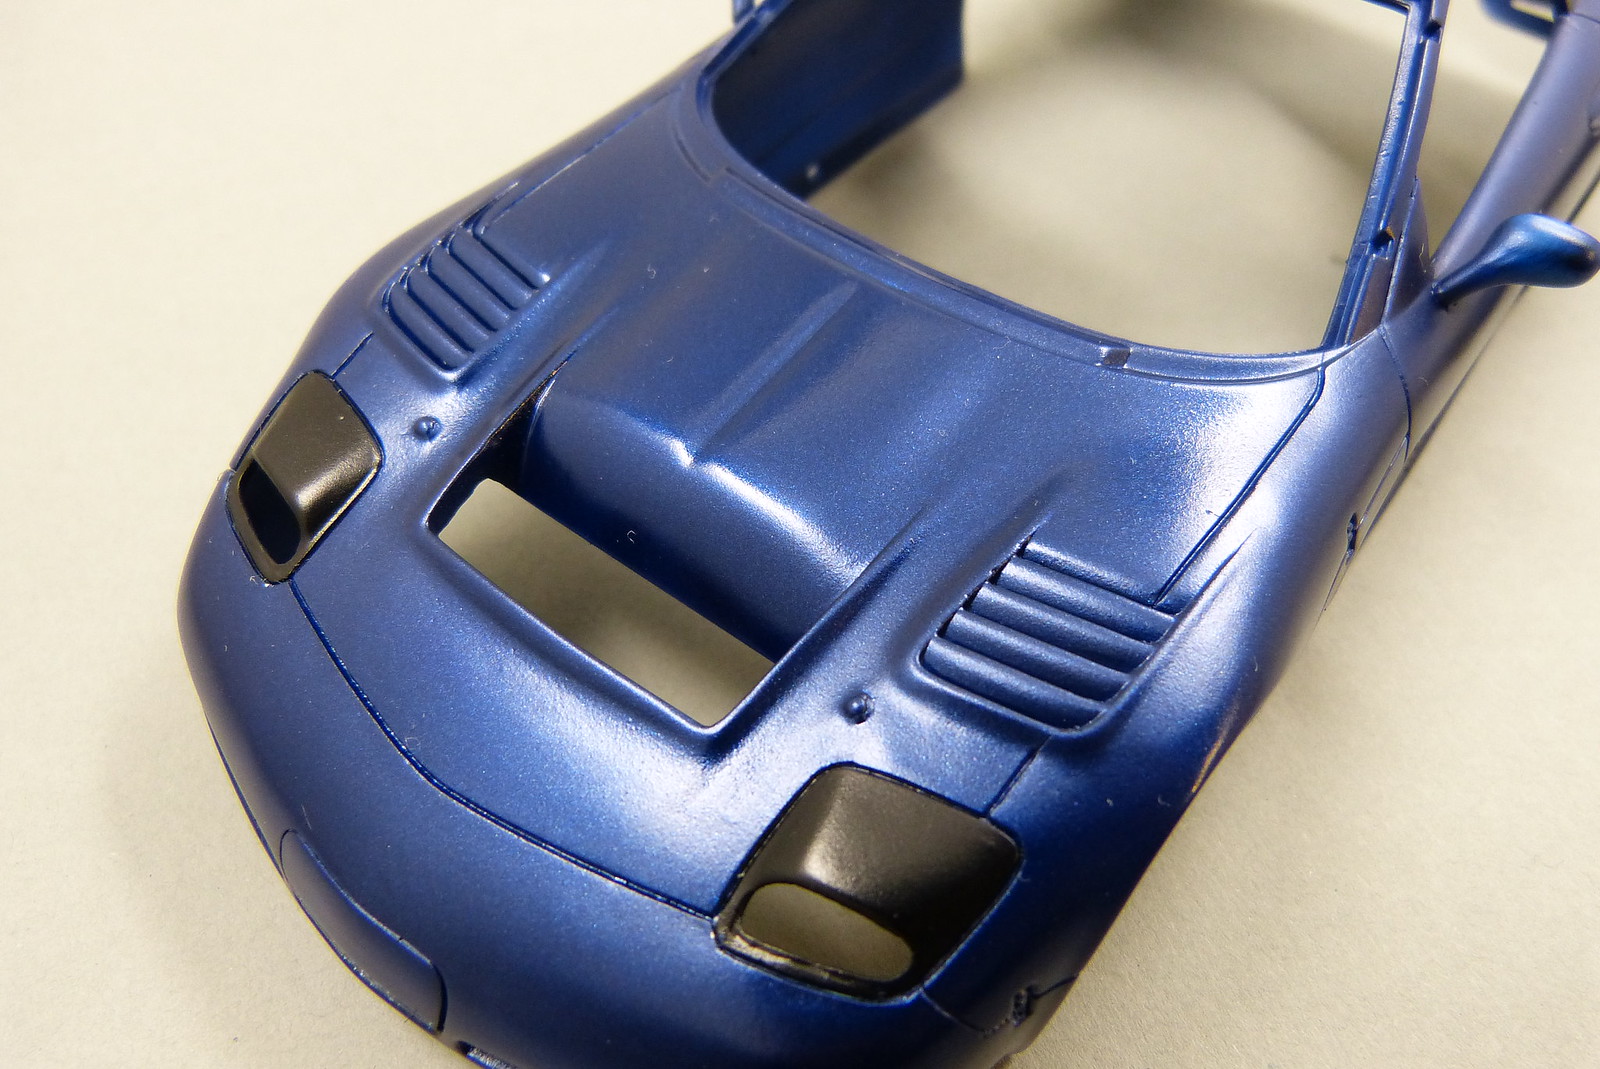
As promised I (finally) put the second layer of paint onto the body.
All went very well, apart from a dust particle getting caught in the still tacky paint.
As I hadn't finished painting yet, I used a piece of sanding sponge to remove the dust particle and paint the area again.
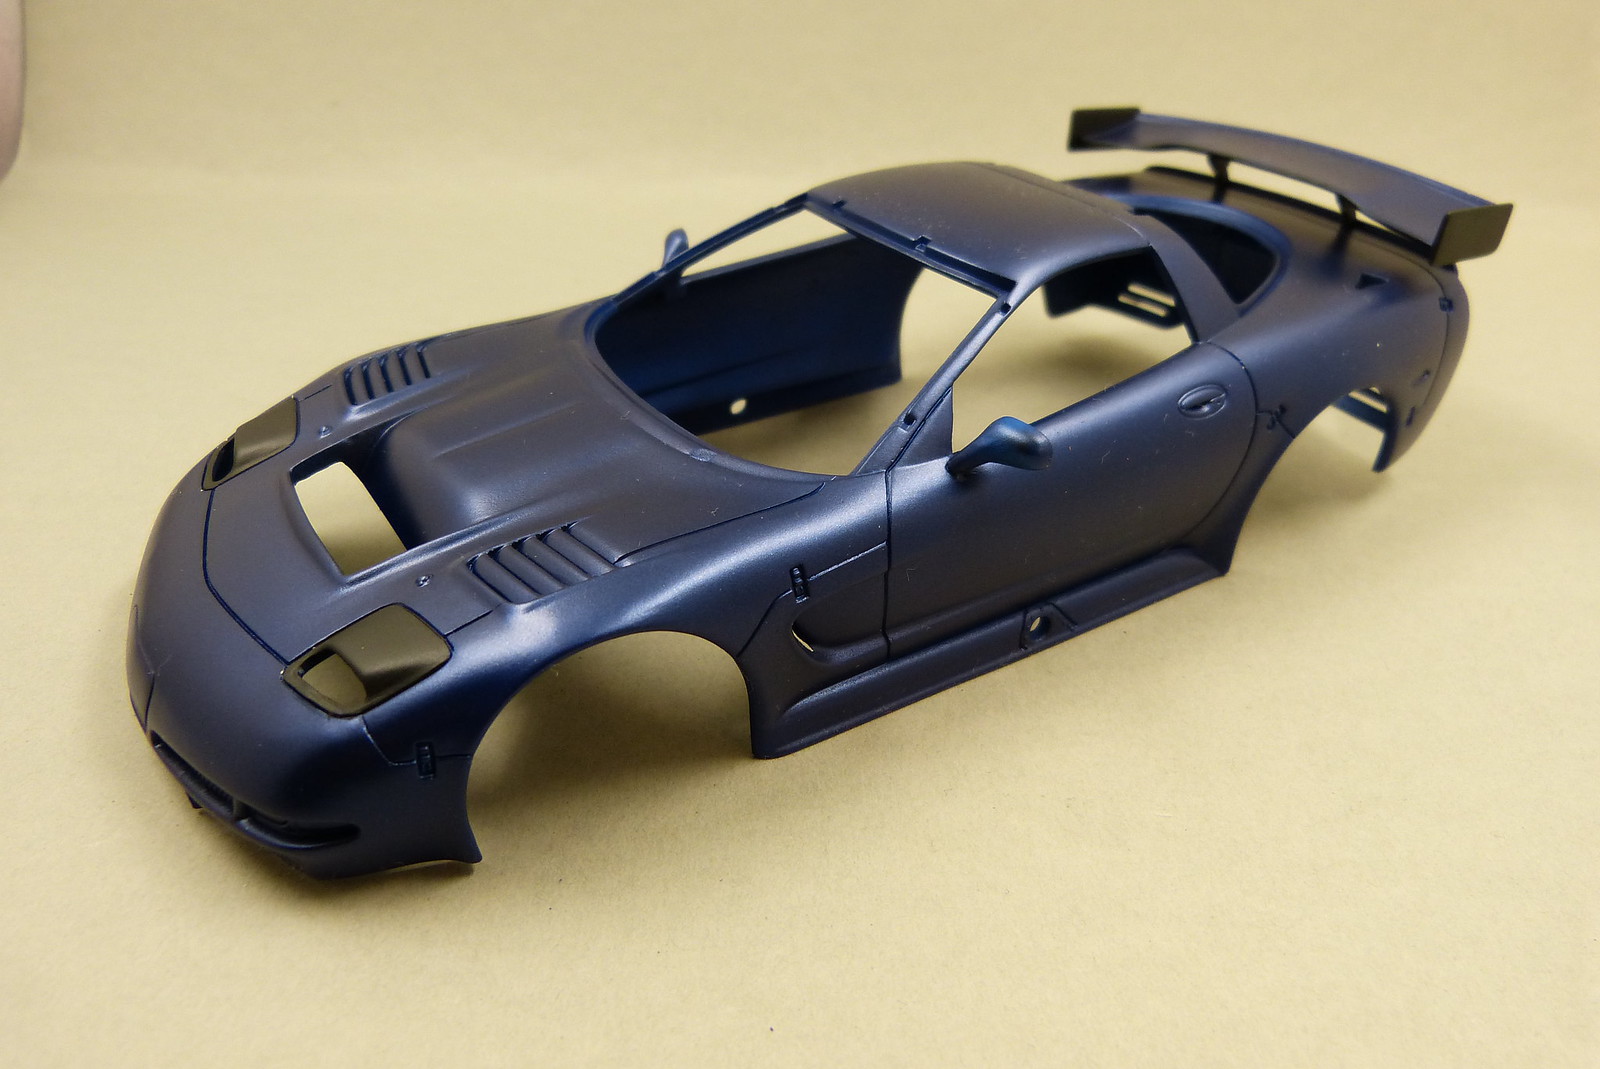
The colour has now a nice and even shade across the body, so no further painting (of the blue that is) will be necessary.
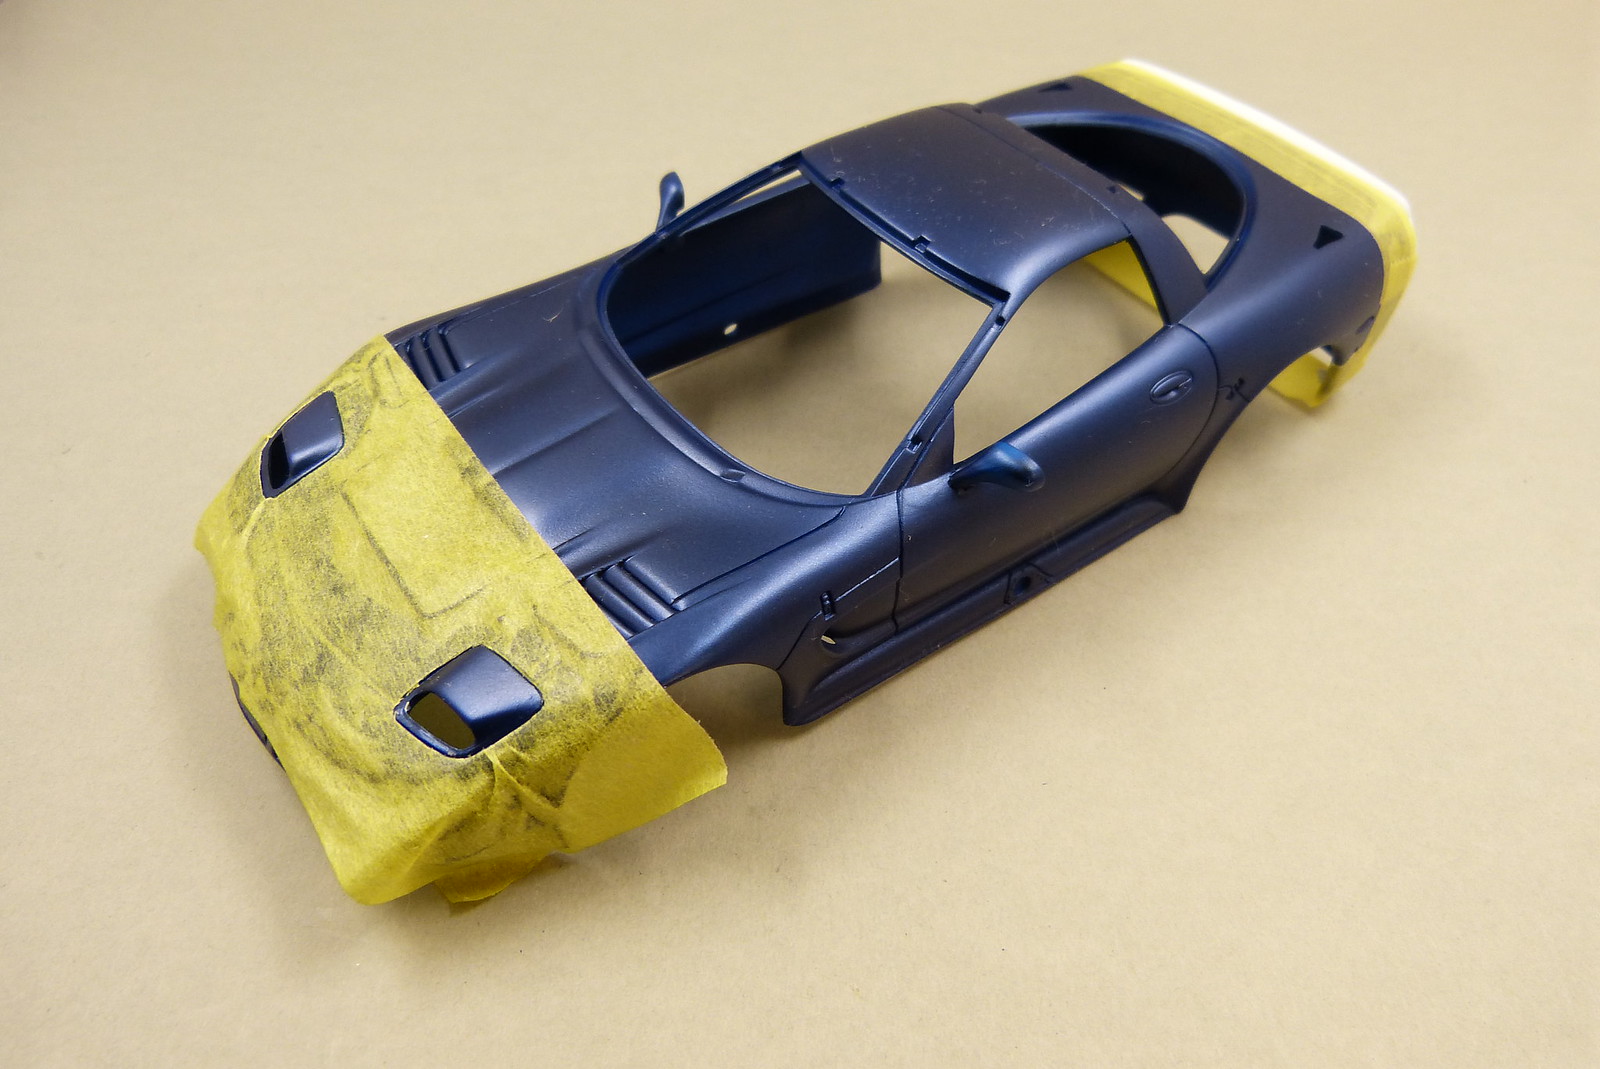
After the paint had hardened I went about the task of painting the rear of the body and part of the rear wing black.
This was the first time I used the new Tamiya flexible masking tape (the white one) for the masking process. It worked perfectly.
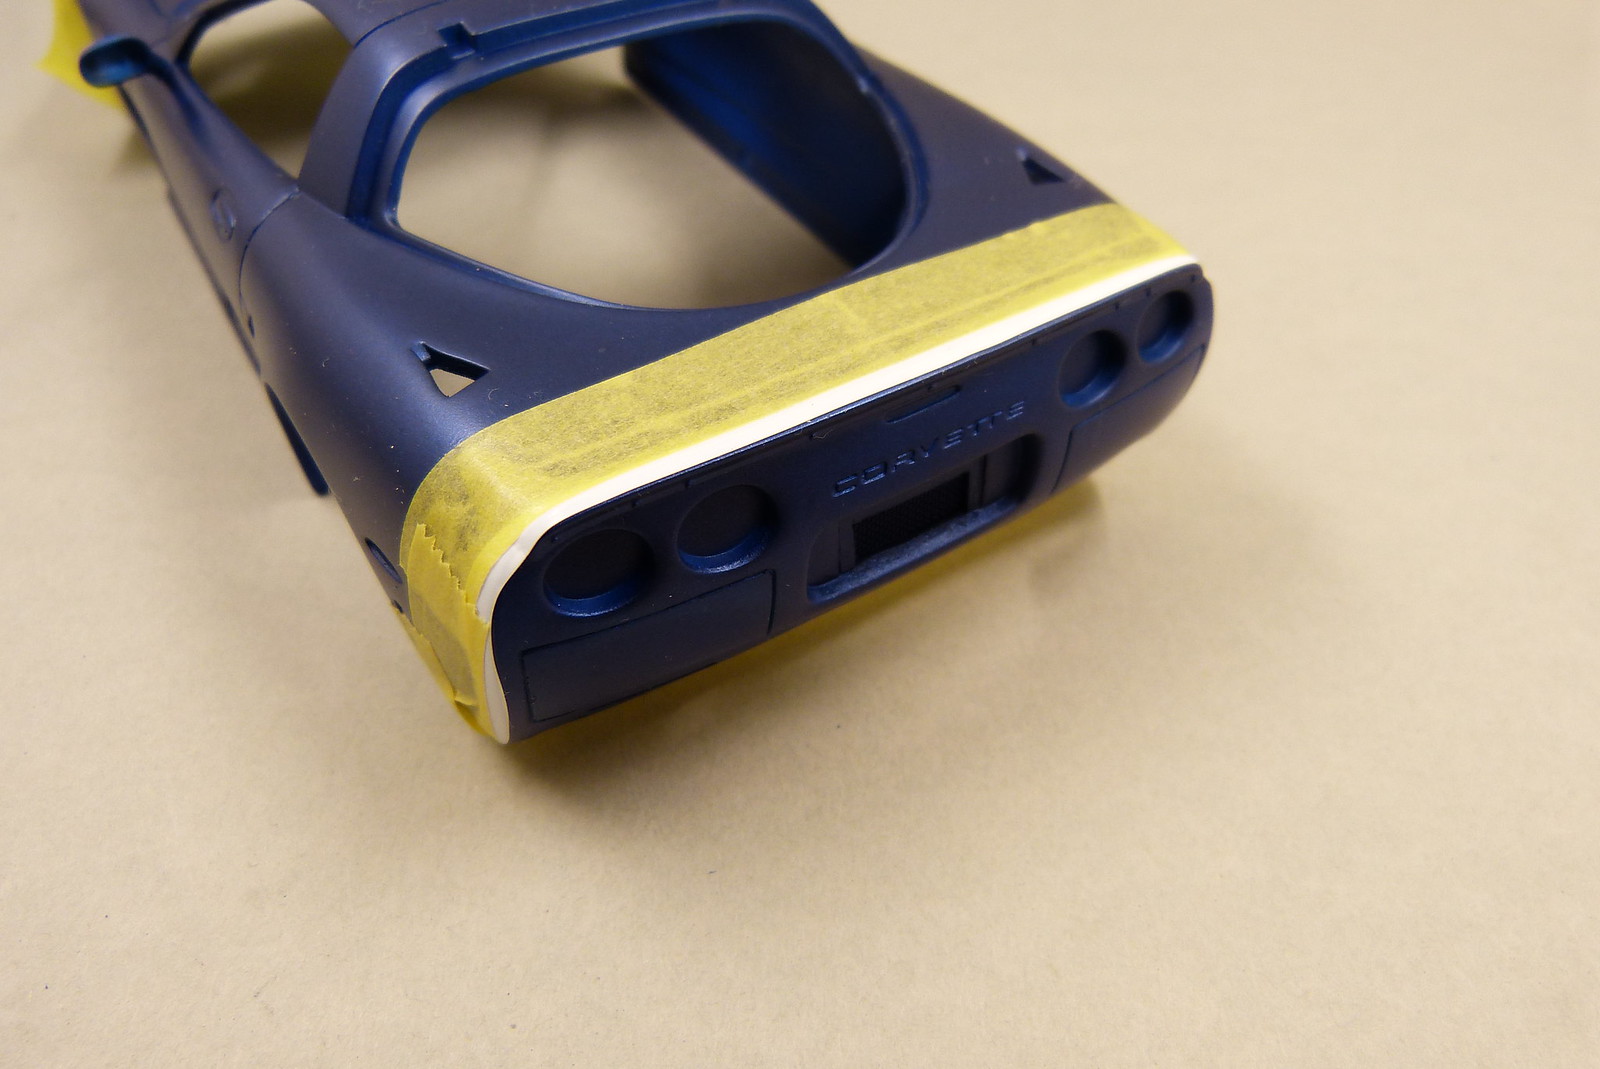

I painted the required areas with a single coat of black (80% X-18, 20% XF-1). The paint went down beautifully. Everything is (almost) ready for a coat of clear so I can start the decalling process.
There's just one spot on the rear wing that needs to be tended to. For some reasong a very small spot of blue paint came loose after removing the masking tape. Rather strange I think. I did burnish the tape down to prevent paint creeping under it, but can't remember being too forceful in burnishing the tape down.
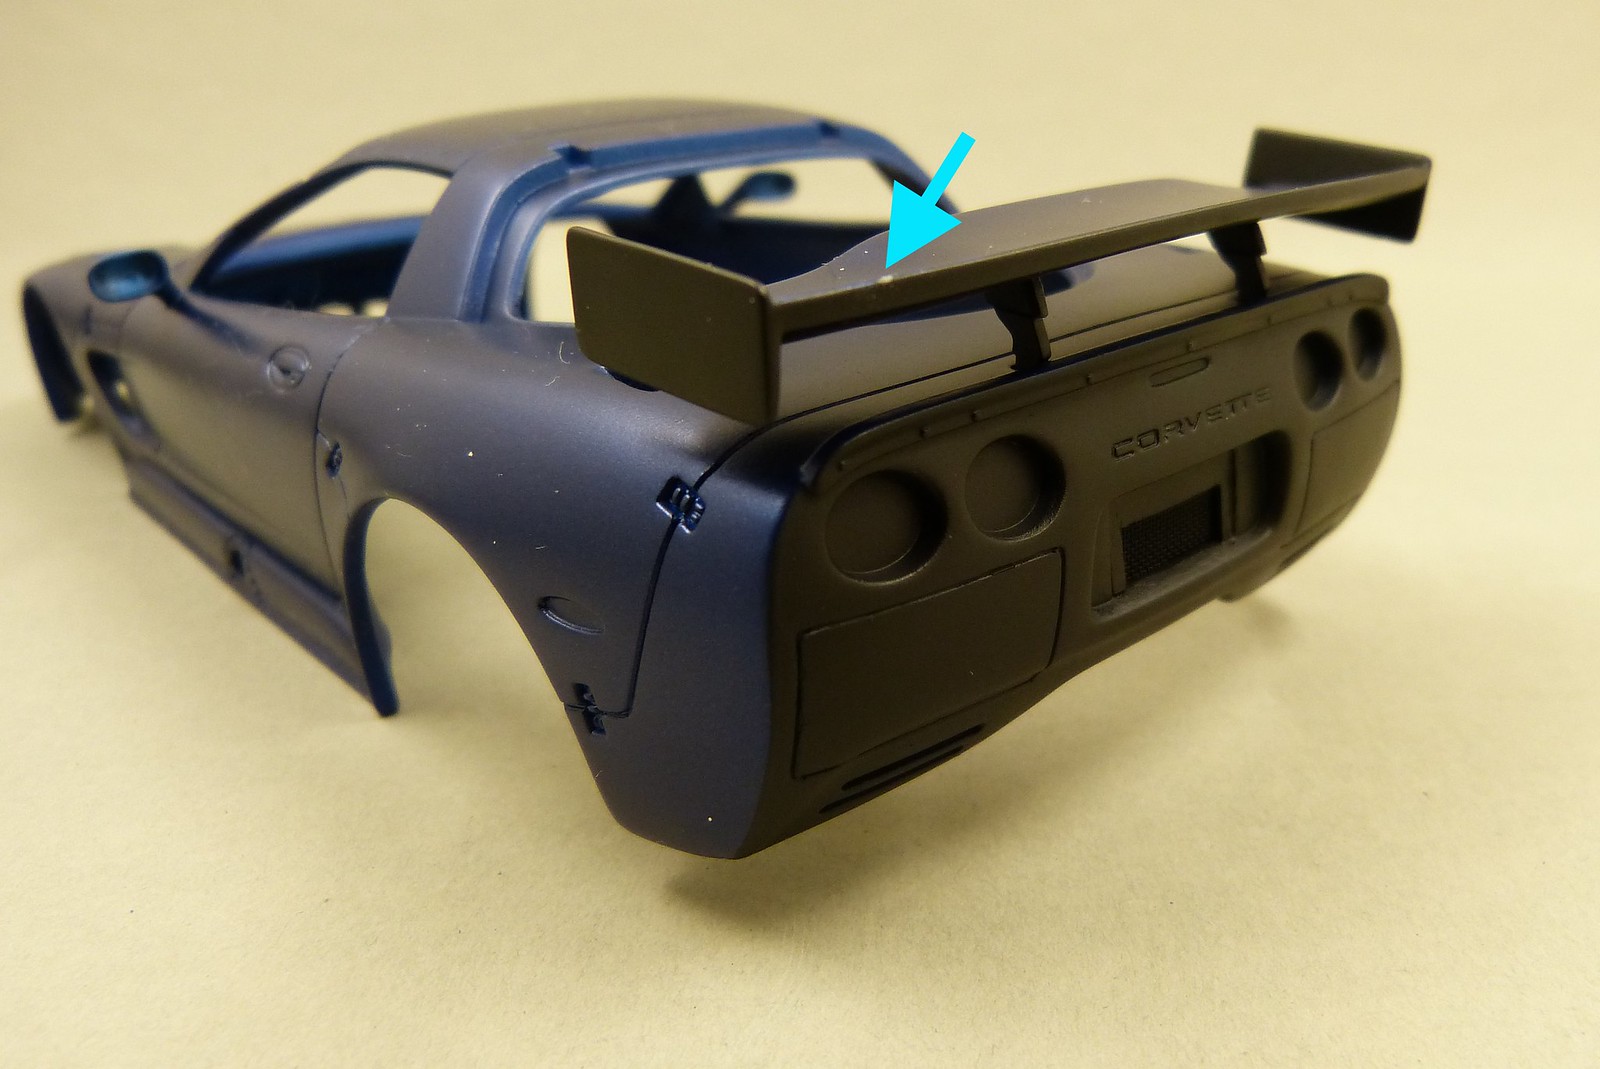
I'll try to touch up the spot. I don't really want to sand the area down and spray it again (although that would be the best solution...)
After a period of thorough drying I put on a coat of clear in preparation for the decalling job at hand. For this I used Aqua gloss from Alclad.
The first time I used this gloss coat and I'm still deciding whether I like it or not...
I used my trusty Harder & Steenbeck Evolution airbrush with 0.4 nozzle and needle.
I sprayed the clear with a pressure of about 20 psi (1.5 bar). Alclad recommends a pressure in the range of 15-40 psi.
During the spraying I soon experienced slight problems with some slight clogging at the tip. To remedy this I pulled the trigger fully open (on a piece of cardboard, that is) and that would solve the problem for a bit of time.
As a result I wasn't totally comfortable with how I had to spray. The amount of clear coming out wasn't very consistent.
In the end the layer of clear turned out okay-ish. But it isn't exactly high gloss, more like semigloss.

I'm not sure about this one yet.
Apart from that, a few specs of dust have been trapped in the layer of clear so there's some sanding to do before I can start the decalling process.
What I do like about the clearcoat is the way the paint on the car has come alive. At first I was afraid that the blue might be too dark. But even with this semigloss layer of clear the paint has really come alive and looks vibrant.
At least in real life. It's hard to capture in a picture sadly...
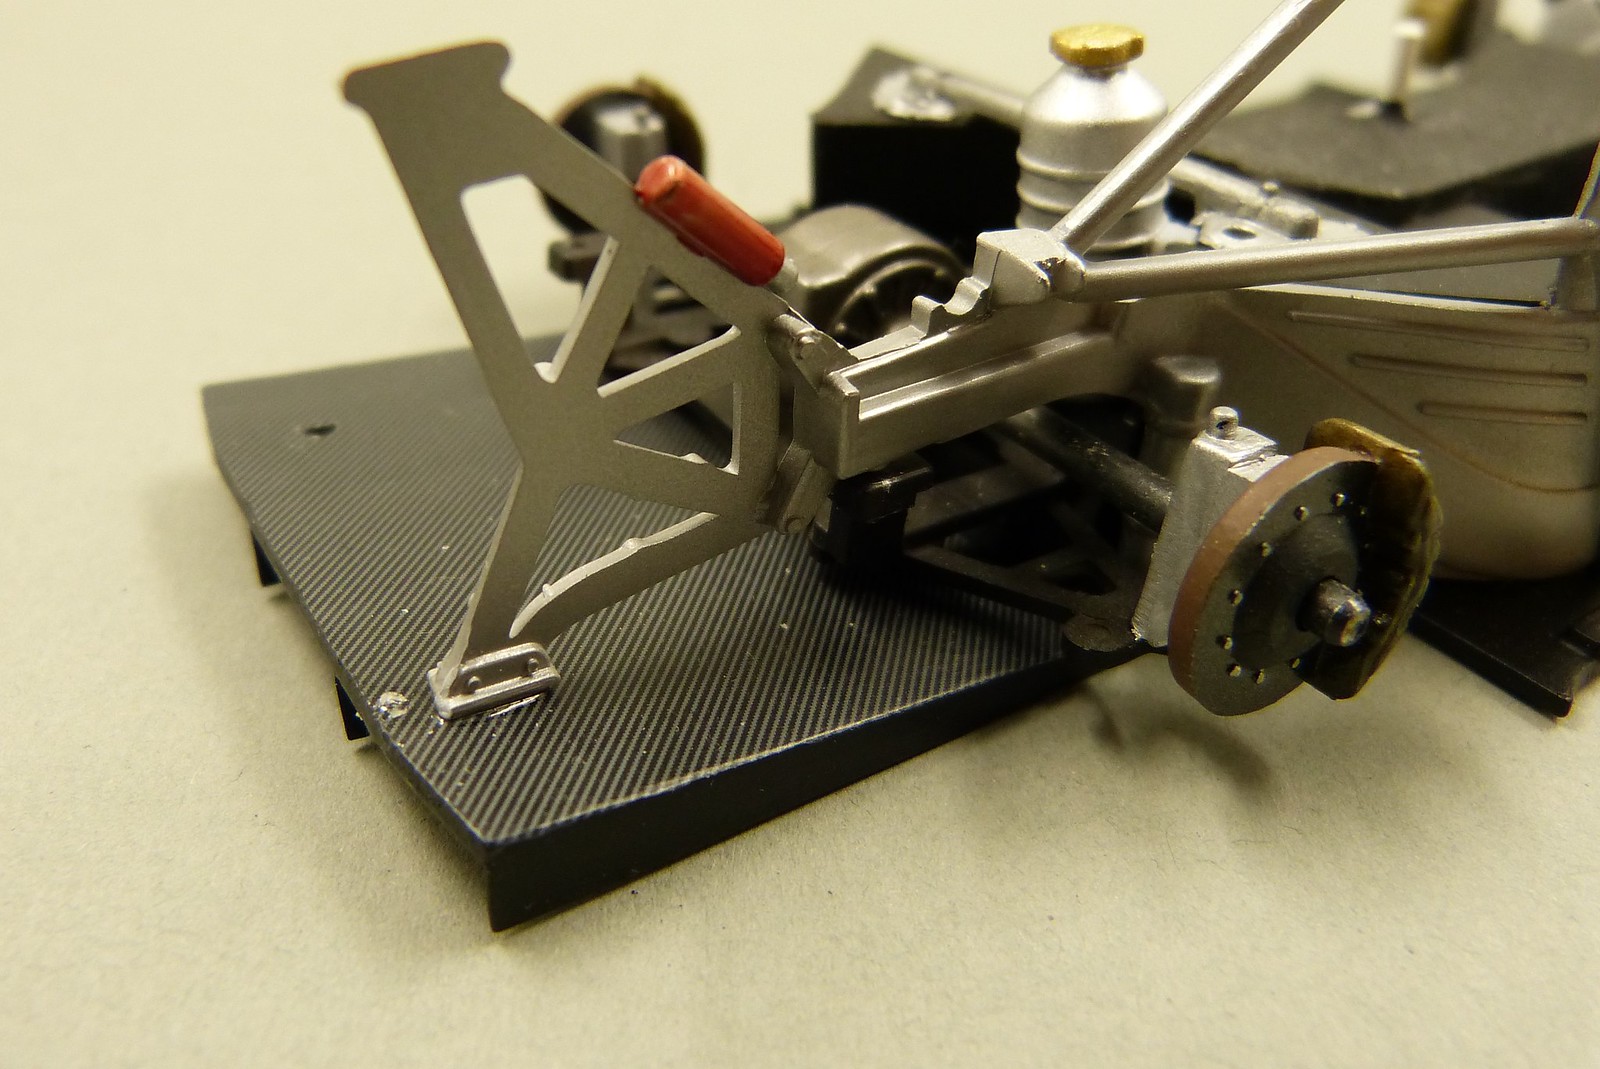
Apart from the body, work has also continued on the interior.
A few details have been finished so that I can continue with the construction of the car.
The right side of the rollcage has already been glued down. The main beam has been glued to the floor with regular Tamiya cement.
I used CA glue to glue parts of the rollcage to the suspension and the diffusor (and have been quite sloppy with the glue sadly).
In all instances I used clamps to keep the parts fixed while the glue set.

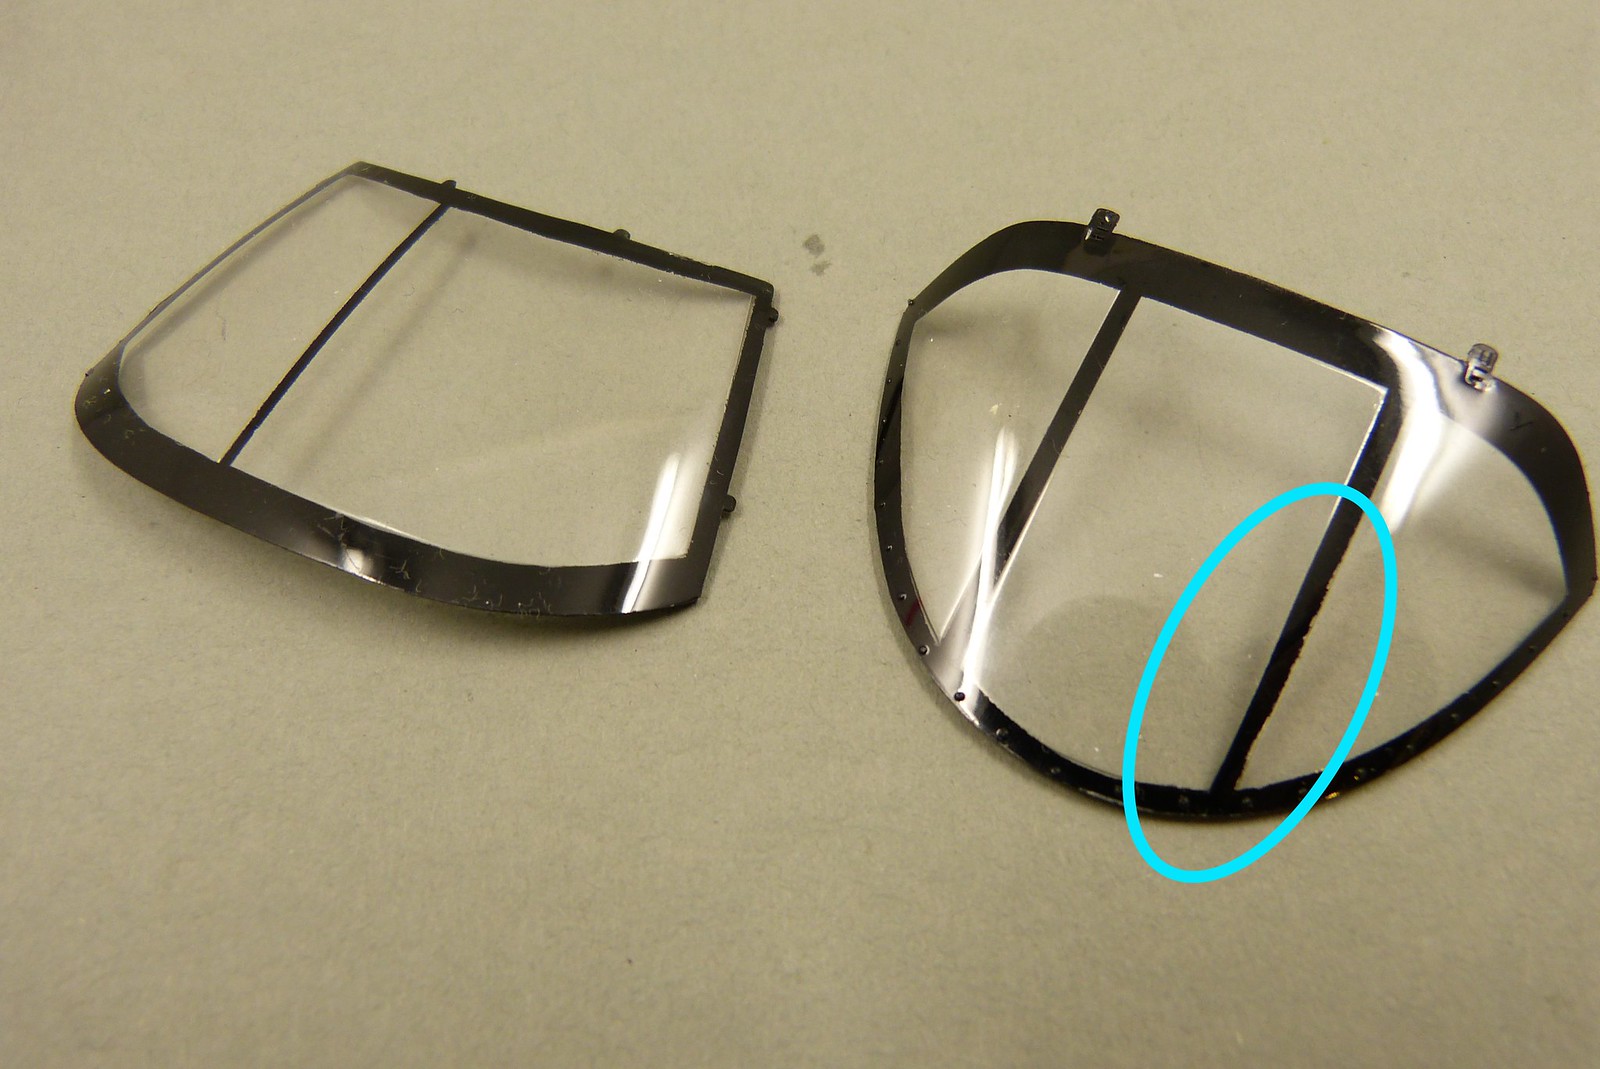
In the meantime I also sprayed the trim around the windows.
I had to make my own masks, as there are none provided by Revell (not even templates).
I stuck some Tamiya masking tape to the windows using a pencil to mark the cut lines. After that I stuck the tape to the cutting mat and cut out the required masks.
The end result turned out nice enough, but there are some spots that require a bit of attention.
That's it for now.
I'll try to keep up the momentum and hope to come back soon enough with another update.
All went very well, apart from a dust particle getting caught in the still tacky paint.
As I hadn't finished painting yet, I used a piece of sanding sponge to remove the dust particle and paint the area again.
The colour has now a nice and even shade across the body, so no further painting (of the blue that is) will be necessary.
After the paint had hardened I went about the task of painting the rear of the body and part of the rear wing black.
This was the first time I used the new Tamiya flexible masking tape (the white one) for the masking process. It worked perfectly.
I painted the required areas with a single coat of black (80% X-18, 20% XF-1). The paint went down beautifully. Everything is (almost) ready for a coat of clear so I can start the decalling process.
There's just one spot on the rear wing that needs to be tended to. For some reasong a very small spot of blue paint came loose after removing the masking tape. Rather strange I think. I did burnish the tape down to prevent paint creeping under it, but can't remember being too forceful in burnishing the tape down.
I'll try to touch up the spot. I don't really want to sand the area down and spray it again (although that would be the best solution...)
After a period of thorough drying I put on a coat of clear in preparation for the decalling job at hand. For this I used Aqua gloss from Alclad.
The first time I used this gloss coat and I'm still deciding whether I like it or not...
I used my trusty Harder & Steenbeck Evolution airbrush with 0.4 nozzle and needle.
I sprayed the clear with a pressure of about 20 psi (1.5 bar). Alclad recommends a pressure in the range of 15-40 psi.
During the spraying I soon experienced slight problems with some slight clogging at the tip. To remedy this I pulled the trigger fully open (on a piece of cardboard, that is) and that would solve the problem for a bit of time.
As a result I wasn't totally comfortable with how I had to spray. The amount of clear coming out wasn't very consistent.
In the end the layer of clear turned out okay-ish. But it isn't exactly high gloss, more like semigloss.
I'm not sure about this one yet.
Apart from that, a few specs of dust have been trapped in the layer of clear so there's some sanding to do before I can start the decalling process.
What I do like about the clearcoat is the way the paint on the car has come alive. At first I was afraid that the blue might be too dark. But even with this semigloss layer of clear the paint has really come alive and looks vibrant.
At least in real life. It's hard to capture in a picture sadly...
Apart from the body, work has also continued on the interior.
A few details have been finished so that I can continue with the construction of the car.
The right side of the rollcage has already been glued down. The main beam has been glued to the floor with regular Tamiya cement.
I used CA glue to glue parts of the rollcage to the suspension and the diffusor (and have been quite sloppy with the glue sadly).
In all instances I used clamps to keep the parts fixed while the glue set.
In the meantime I also sprayed the trim around the windows.
I had to make my own masks, as there are none provided by Revell (not even templates).
I stuck some Tamiya masking tape to the windows using a pencil to mark the cut lines. After that I stuck the tape to the cutting mat and cut out the required masks.
The end result turned out nice enough, but there are some spots that require a bit of attention.
That's it for now.
I'll try to keep up the momentum and hope to come back soon enough with another update.
Comments
Post a Comment