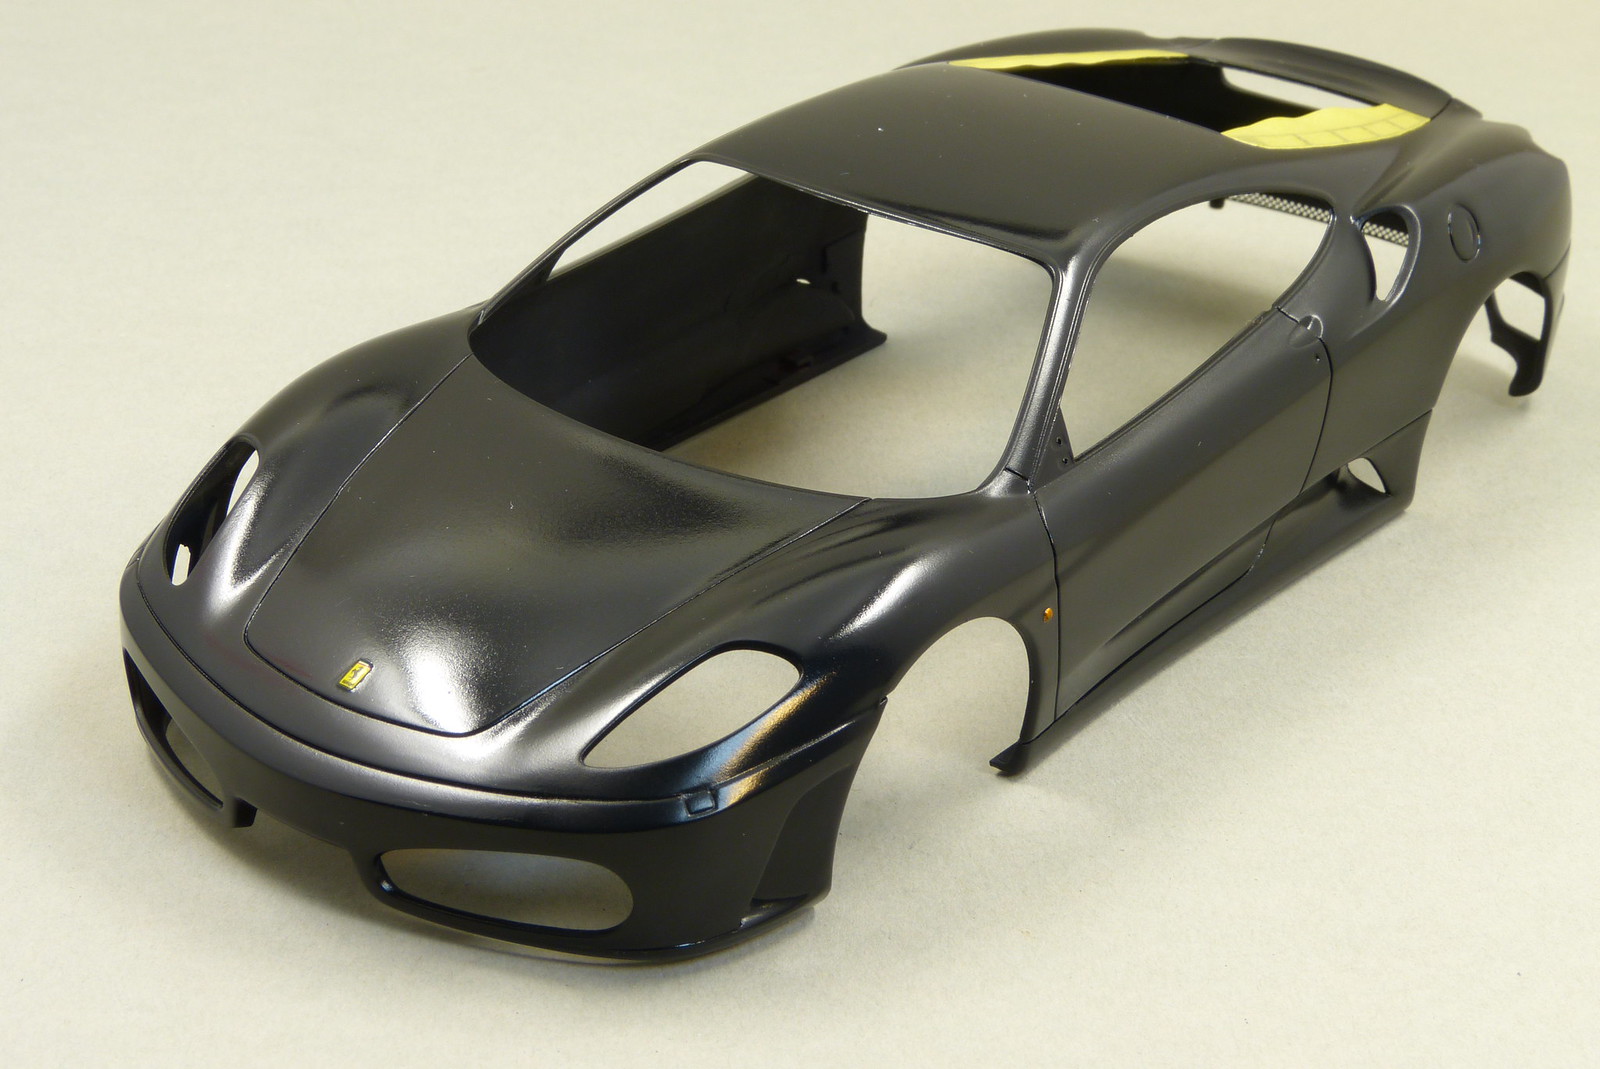
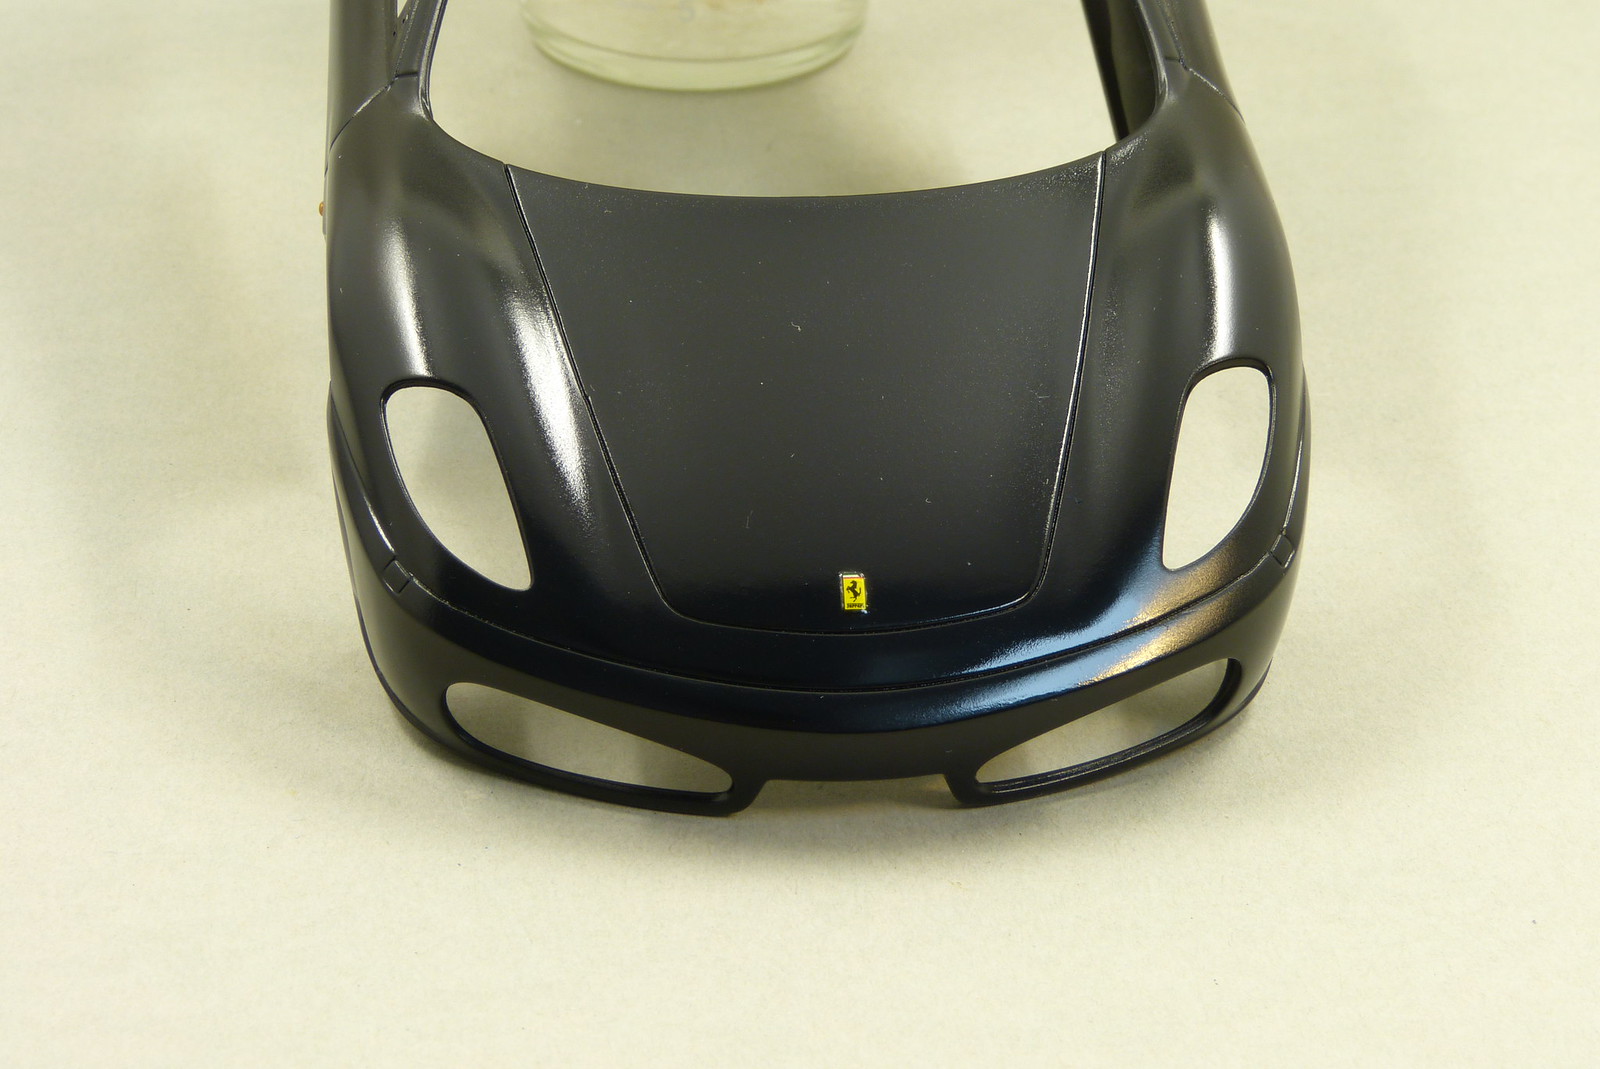
After the best part of an evening of work I finally seemed to have get rid of the various paintdots littering the body of the Ferrari.
On some places I sanded through the paint and primer layers until the bare plastic was visible again.
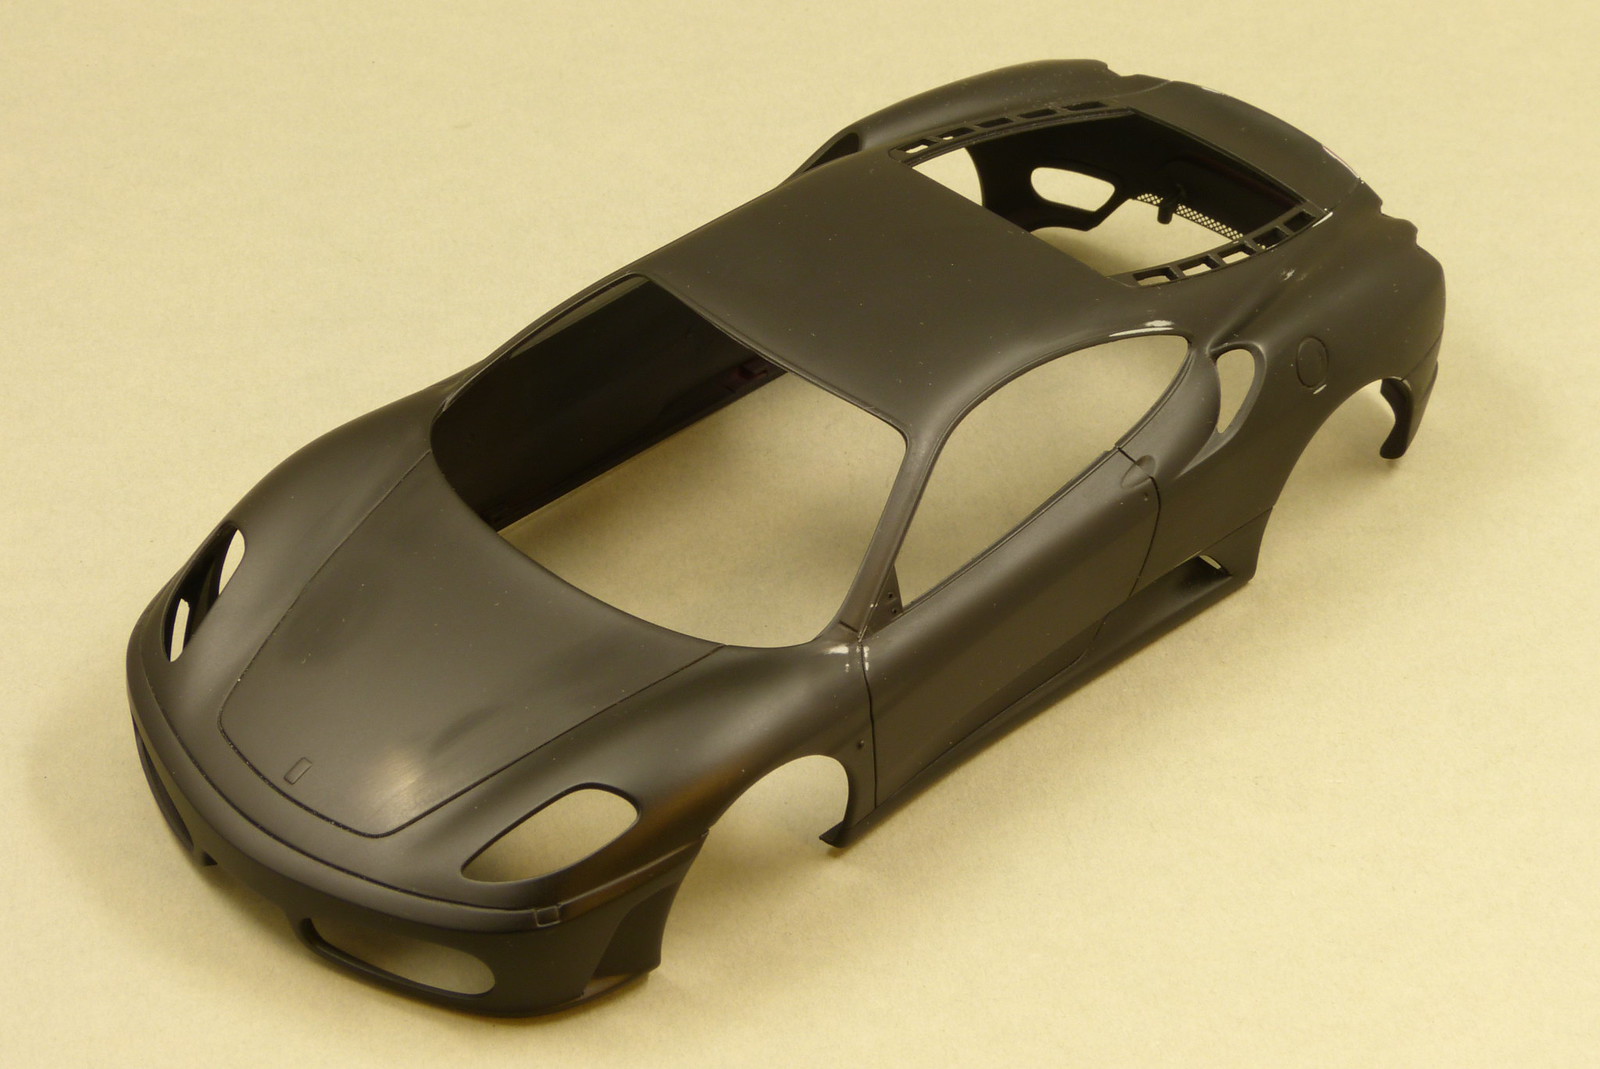
Because of the dark and slightly flat colour I'm using I didn't reprime and just sprayed the color on.
Things went very smooth.
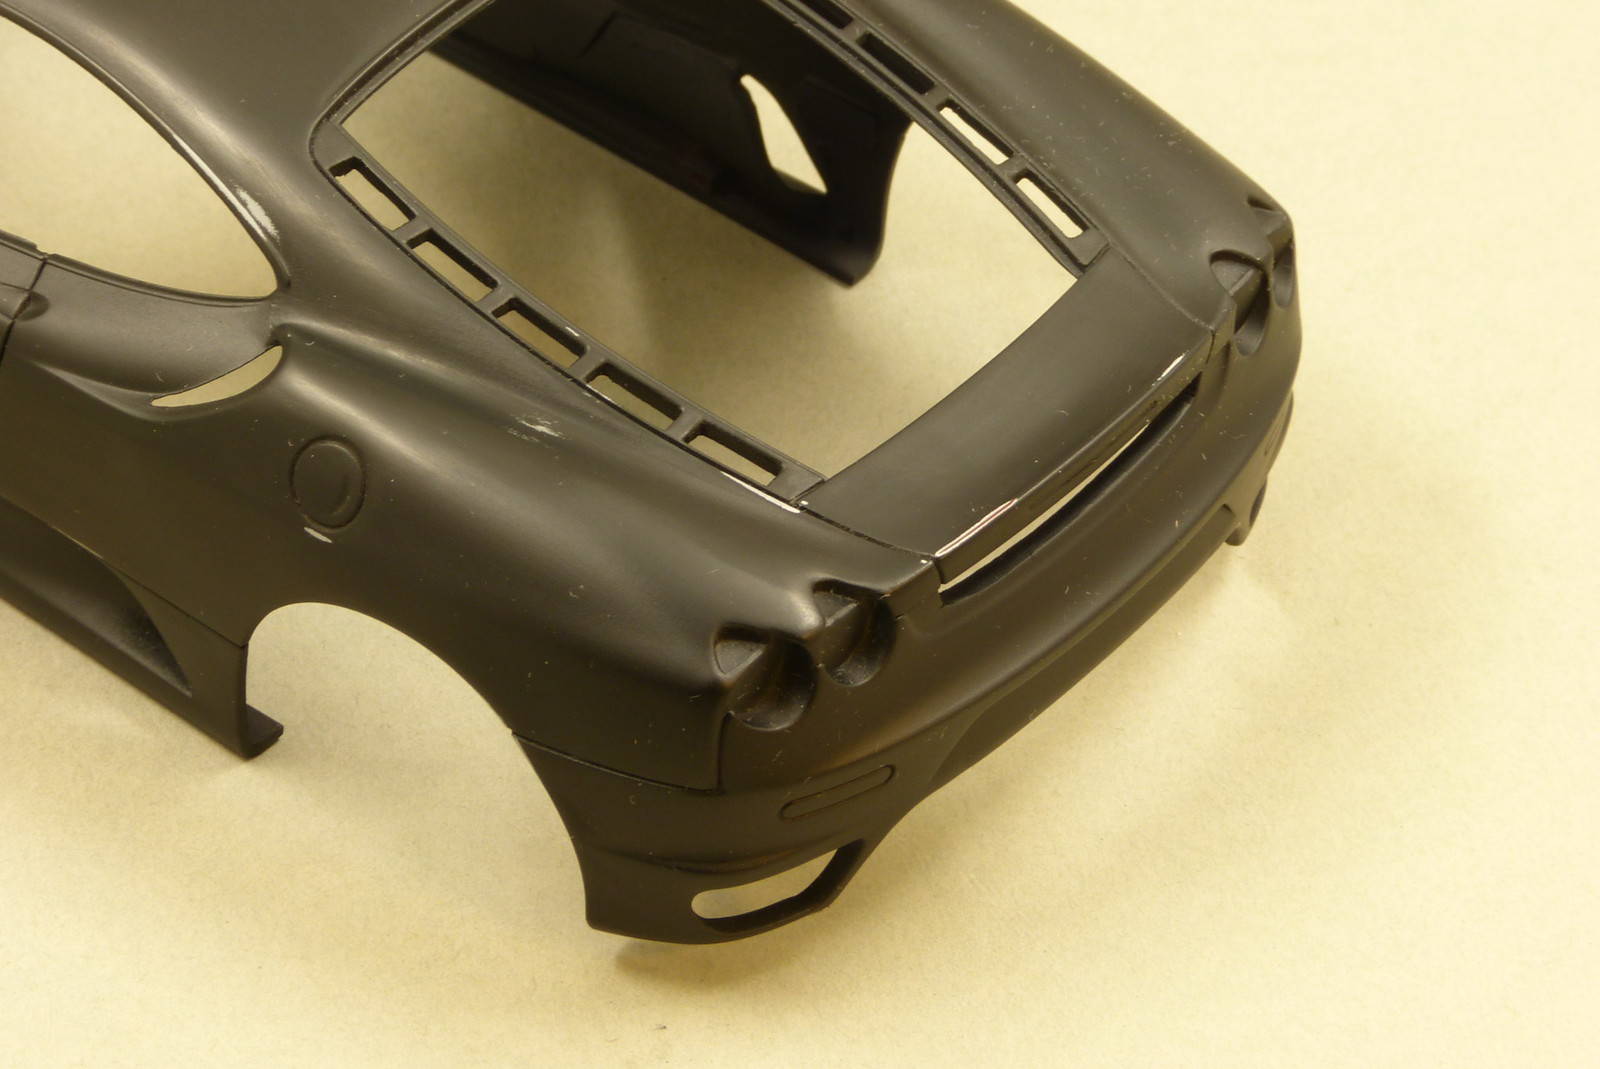
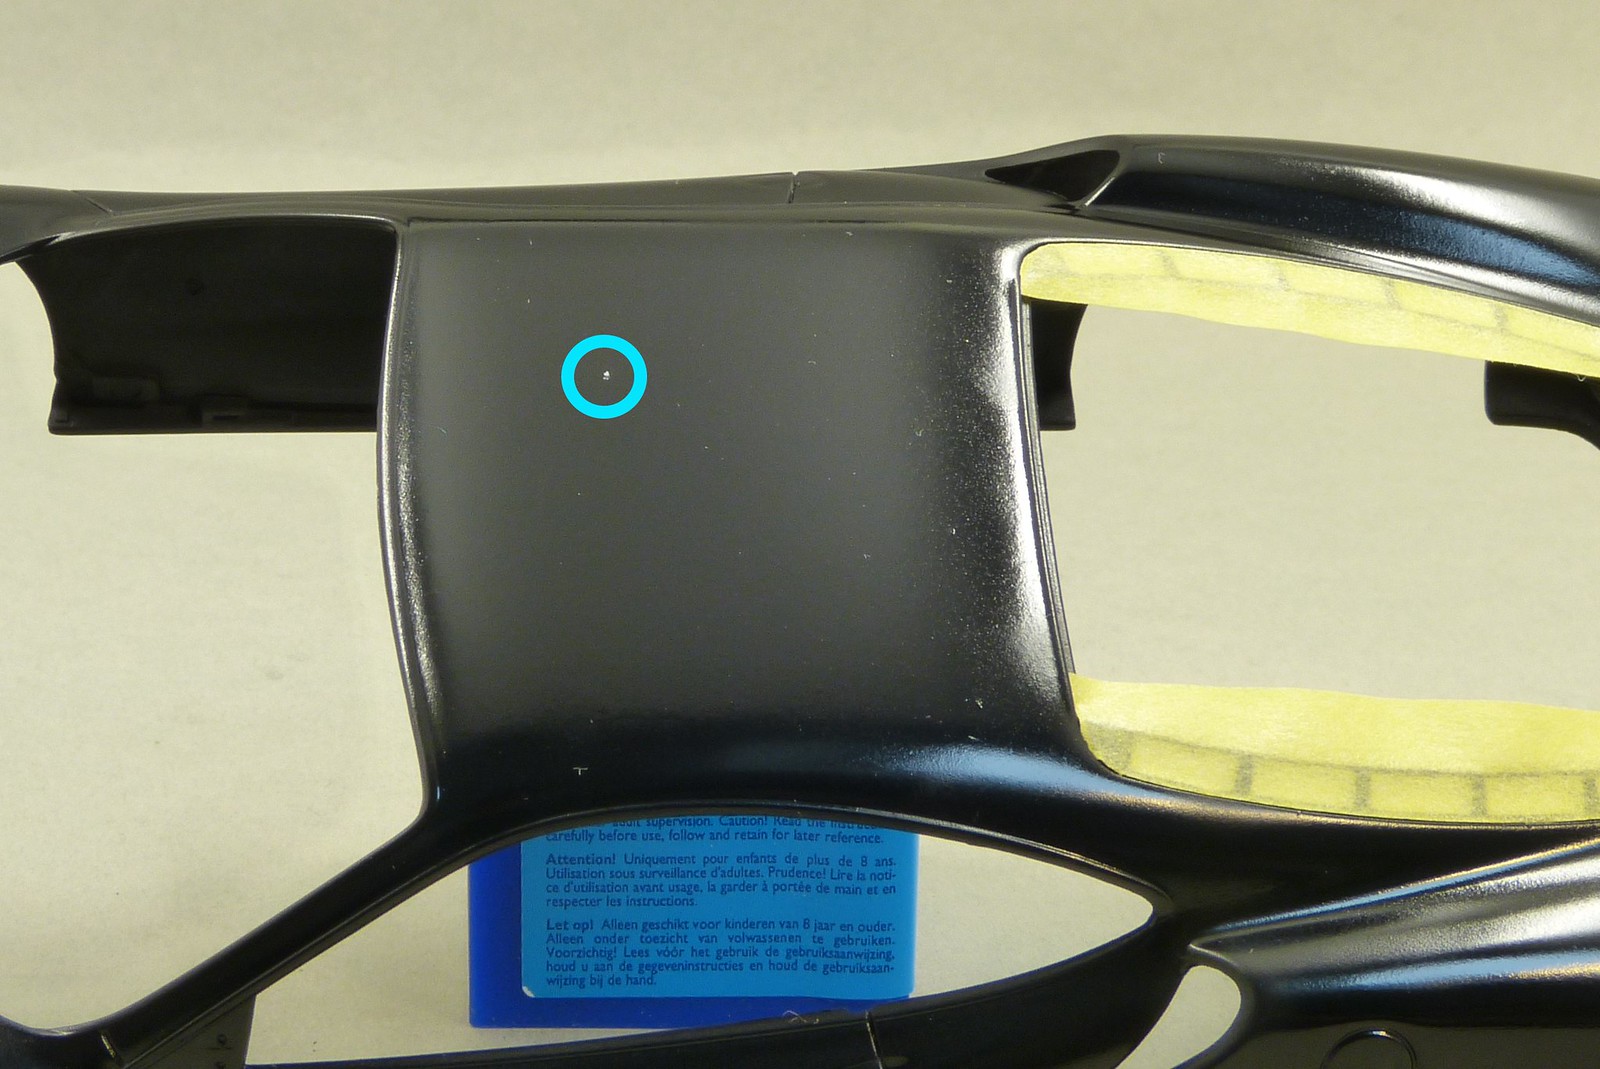
Only a few spots that needed some attention. A spec of dust got trapped in the paint on the rear of the body and I hit the bonnet a bit hard with the airbrush which means that a few runners need to be sanded back a bit.
Nothing too serious though.
After sanding the aforementioned spots and giving the body another coat of black I declare the body for ready. At least regarding the painting stage.

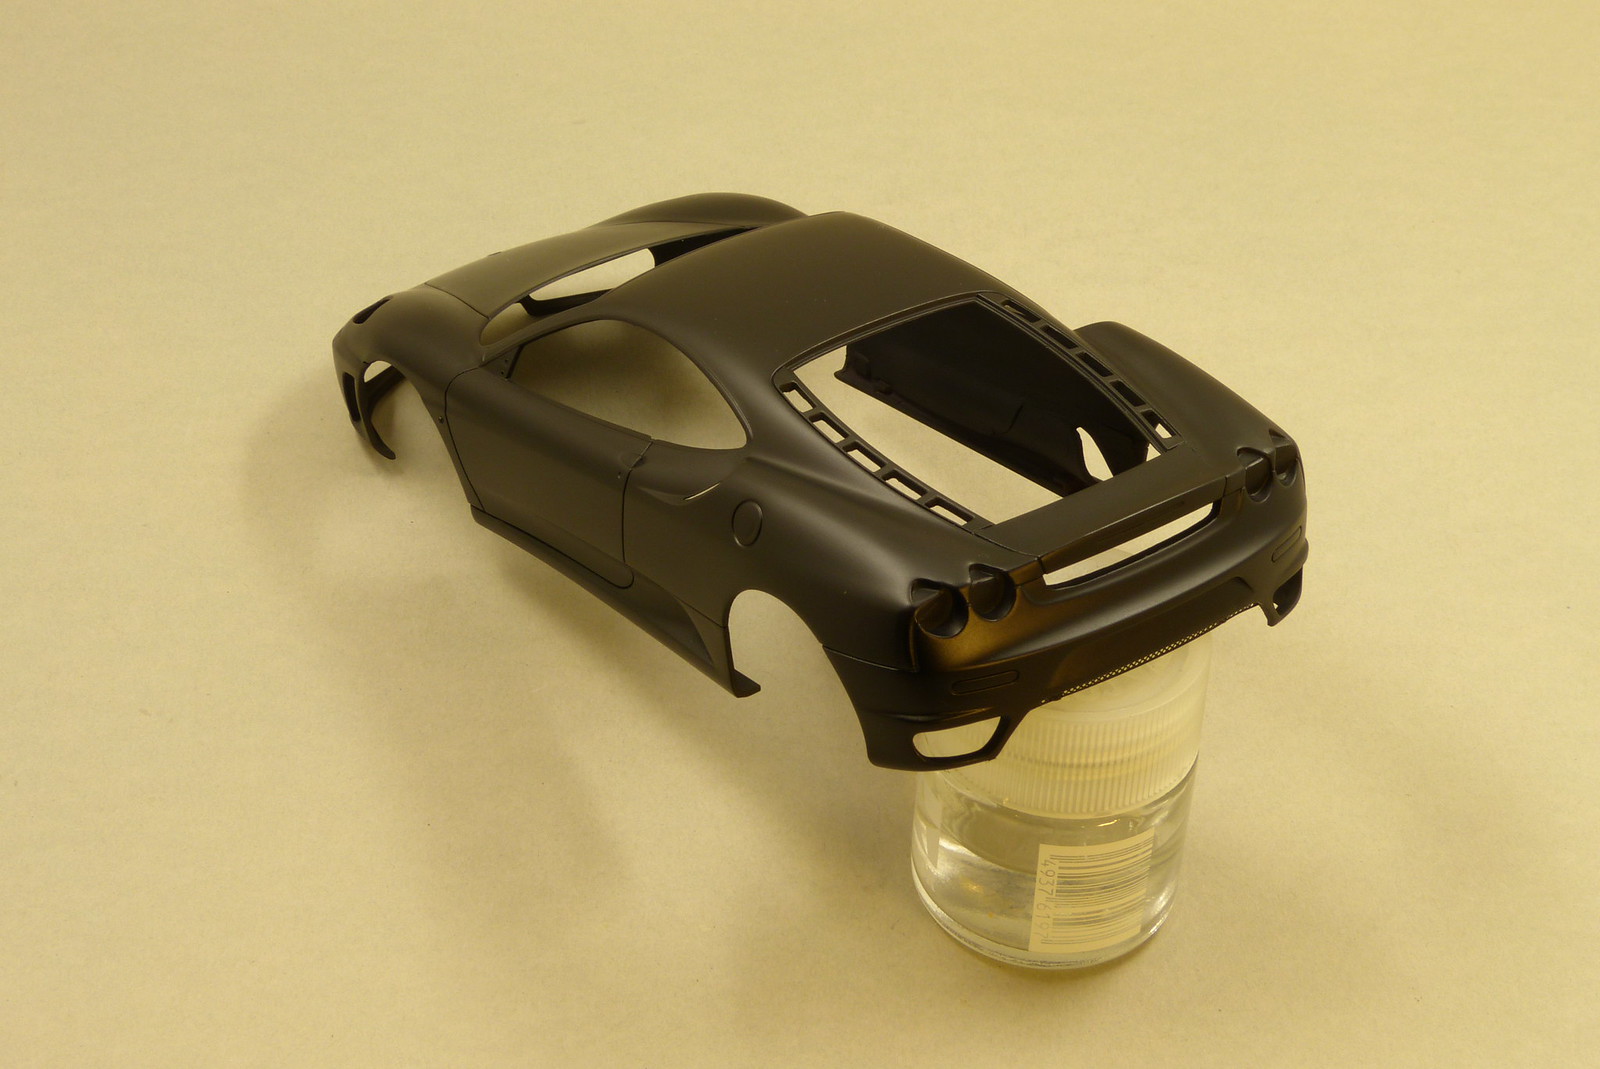
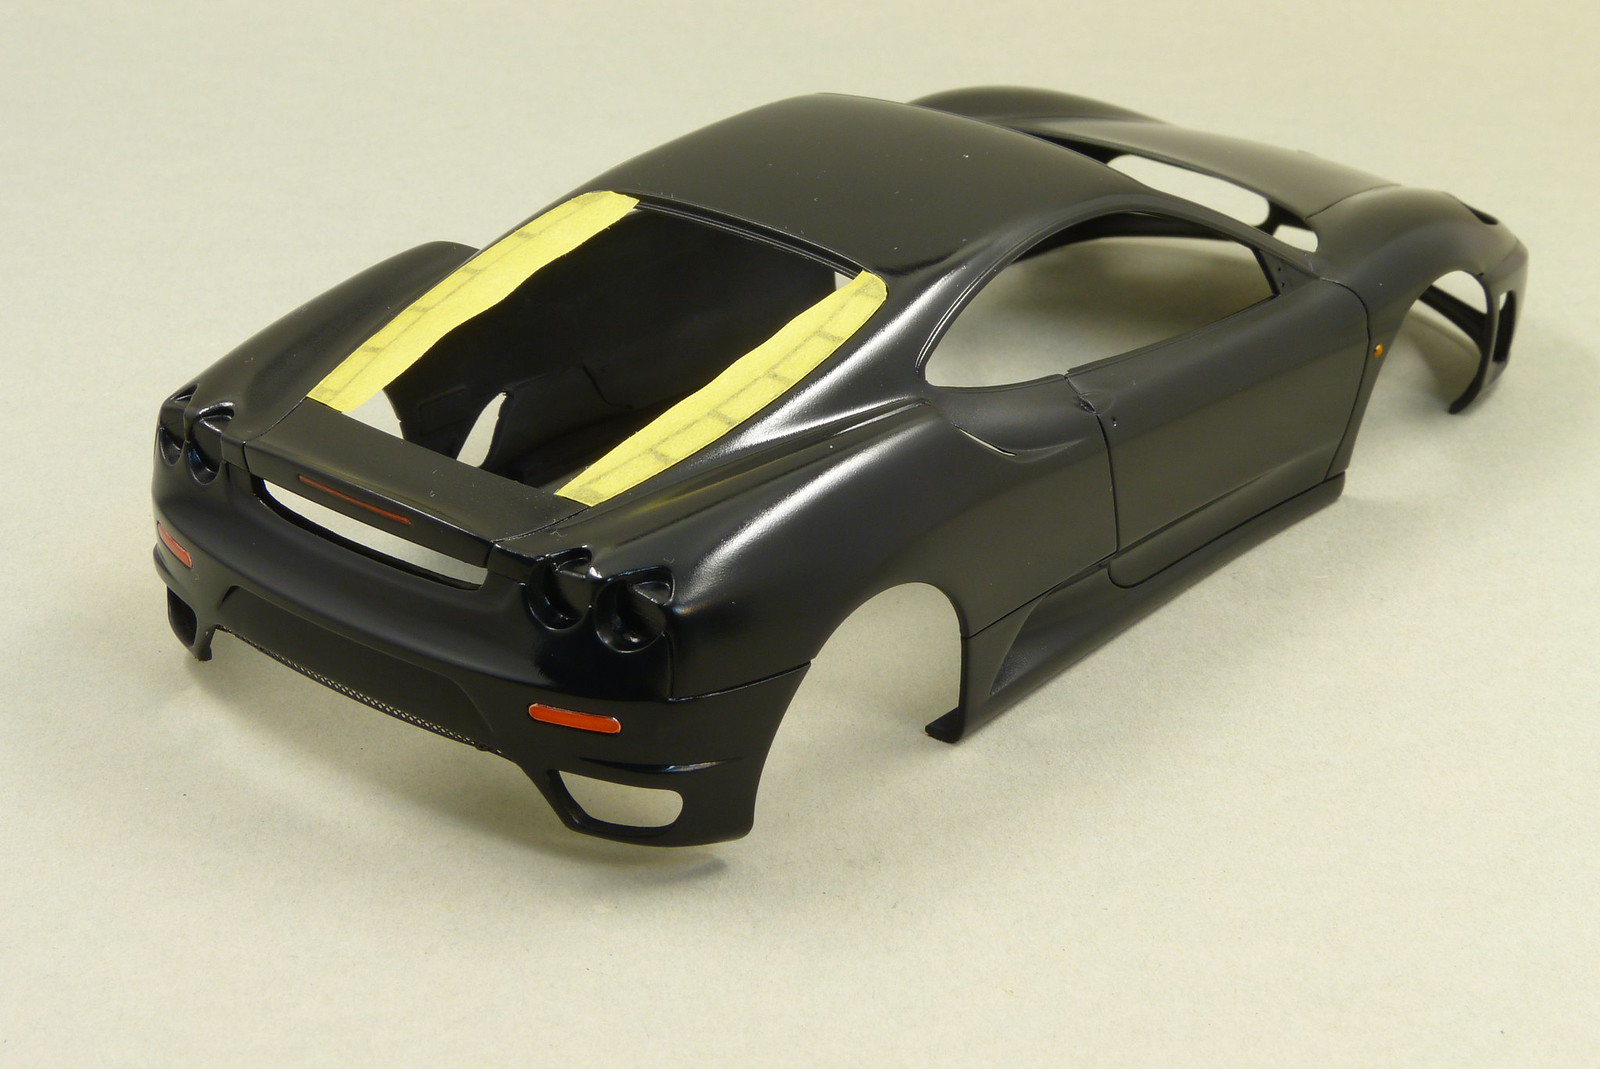
Now only a few details remained on the body. Apart from applying the few decals I also needed to paint the third brake light and the reflectors present at the rear of the car.
For the third brake light and the reflectors I decided to use Bare Metal Foil (chrome).
It's the first time for me using BMF, but I must say it went perfectly. The foil conformed itself easily to the required shape and I had no trouble cutting the foil to size with a (nearly) new #11 blade.
The paint went on without too much hassle (although I can't seem to get to grips with this clear paint) and looks convincing enough.
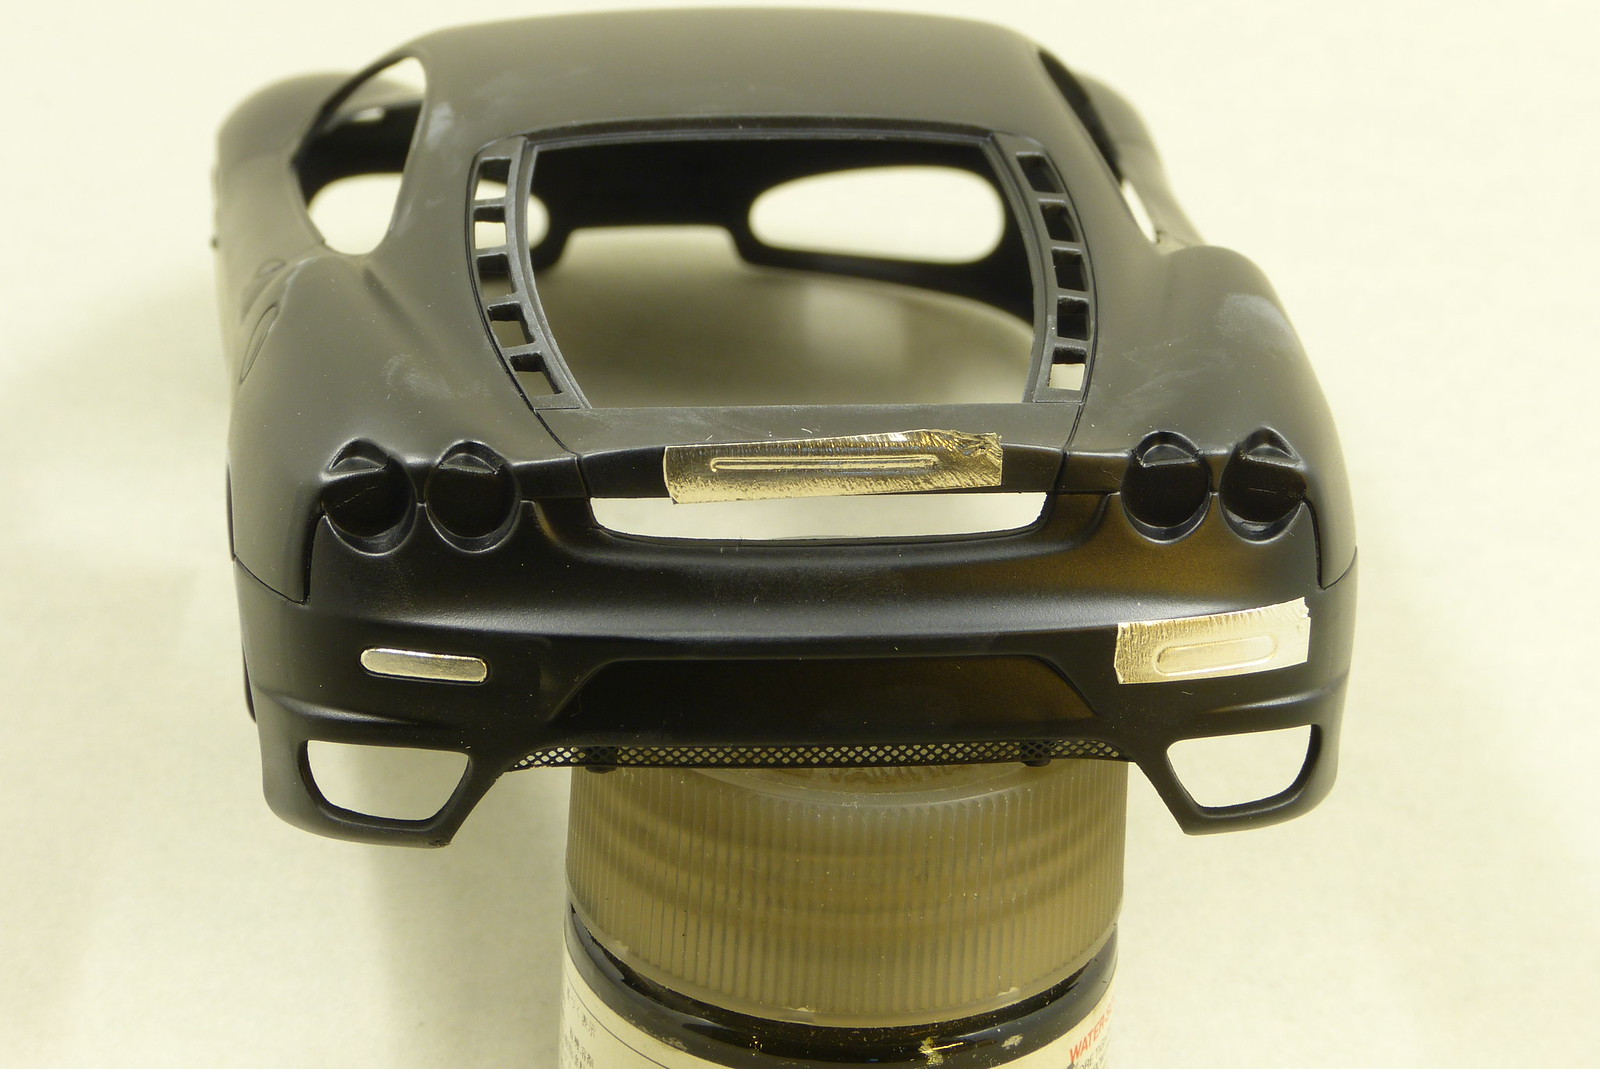
The only thing left now was applying the clear coat.
But before doing this I needed to mask the vents next to the rear window as they need to stay sg black. For this I used regular Tamiya masking tape cut to size using a scalpel blade.
Once again I used Alclad Aqua Gloss for the clear coat.
Trying to keep to the instructions I tried to lay down two medium coats on the body.
I'm afraid the second coat was a bit heavy and some pooling is evident, particularly on the driver's door.
The coat seems to have gone down all right, although the shine isn't quite what I expected. Although, after using the same clear on the Corvette, I knew what I was in for.
At least the coat went down better than the one I gave the Corvette.
Sadly a few specs of dust were trapped in the second coat. I hope I'll be able to get these out with a bit of compound.
On some places I sanded through the paint and primer layers until the bare plastic was visible again.
Because of the dark and slightly flat colour I'm using I didn't reprime and just sprayed the color on.
Things went very smooth.
Only a few spots that needed some attention. A spec of dust got trapped in the paint on the rear of the body and I hit the bonnet a bit hard with the airbrush which means that a few runners need to be sanded back a bit.
Nothing too serious though.
After sanding the aforementioned spots and giving the body another coat of black I declare the body for ready. At least regarding the painting stage.
Now only a few details remained on the body. Apart from applying the few decals I also needed to paint the third brake light and the reflectors present at the rear of the car.
For the third brake light and the reflectors I decided to use Bare Metal Foil (chrome).
It's the first time for me using BMF, but I must say it went perfectly. The foil conformed itself easily to the required shape and I had no trouble cutting the foil to size with a (nearly) new #11 blade.
The paint went on without too much hassle (although I can't seem to get to grips with this clear paint) and looks convincing enough.
The only thing left now was applying the clear coat.
But before doing this I needed to mask the vents next to the rear window as they need to stay sg black. For this I used regular Tamiya masking tape cut to size using a scalpel blade.
Once again I used Alclad Aqua Gloss for the clear coat.
Trying to keep to the instructions I tried to lay down two medium coats on the body.
I'm afraid the second coat was a bit heavy and some pooling is evident, particularly on the driver's door.
The coat seems to have gone down all right, although the shine isn't quite what I expected. Although, after using the same clear on the Corvette, I knew what I was in for.
At least the coat went down better than the one I gave the Corvette.
Sadly a few specs of dust were trapped in the second coat. I hope I'll be able to get these out with a bit of compound.
Comments
Post a Comment