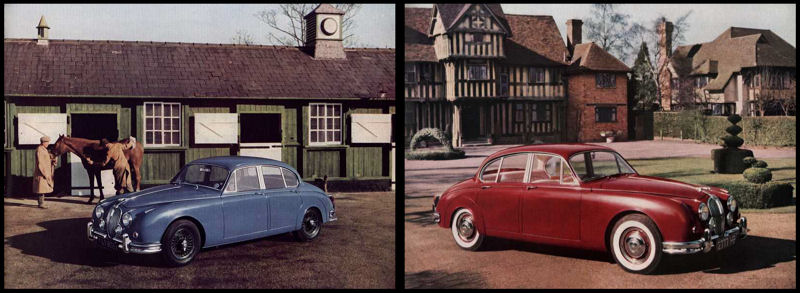
Mirror mirror on the car...
The mirrors that are provided in this kit don't really resemble the mirrors on the Inspector's car.
Actually, I wonder how Tamiya decided which type of mirror to include in this kit. Because looking through the original car's brochure I can't help but notice the absence of any kind of mirror in all of the pictures and drawings. I find it hard to believe that the car would leave the factory without any rear-view mirrors. But apparently it did...
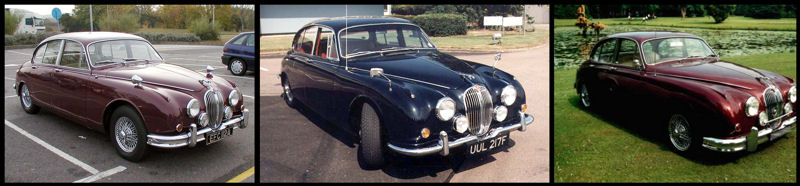
 And when mirrors were finally mounted on the cars (by the owner or by
Jaguar, I don't know), they were mounted all over the front of the car.
Some were mounted close to the driver. Others were mounted almost at the
front of the hood.
And when mirrors were finally mounted on the cars (by the owner or by
Jaguar, I don't know), they were mounted all over the front of the car.
Some were mounted close to the driver. Others were mounted almost at the
front of the hood.
Pick one :
 Luckily I had a few nice pictures (images from an episode) depicting the
shape and position of the mirrors on Inspector Morse's car.
Luckily I had a few nice pictures (images from an episode) depicting the
shape and position of the mirrors on Inspector Morse's car.
 Sadly I thought I'd have to scratch-build the mirrors... Not my strongest point I'm afraid.
But luckily (again) I could use parts of the kit-provided mirrors. With a few minor modifications I managed to get them to look quite convincing.

 Only thing I'm contemplating is whether I should strip the chrome layer
and putty the rear of the mirrors to give it a more finished look. I
have some Alclad chrome, so stripping the chrome won't be a problem.
I'll probably make the adjustments. But not until the next update !
Only thing I'm contemplating is whether I should strip the chrome layer
and putty the rear of the mirrors to give it a more finished look. I
have some Alclad chrome, so stripping the chrome won't be a problem.
I'll probably make the adjustments. But not until the next update !
The mirrors that are provided in this kit don't really resemble the mirrors on the Inspector's car.
Actually, I wonder how Tamiya decided which type of mirror to include in this kit. Because looking through the original car's brochure I can't help but notice the absence of any kind of mirror in all of the pictures and drawings. I find it hard to believe that the car would leave the factory without any rear-view mirrors. But apparently it did...
Pick one :
But luckily (again) I could use parts of the kit-provided mirrors. With a few minor modifications I managed to get them to look quite convincing.
Comments
Post a Comment