As explained in my previous post, modelling has been very slow the past months.
A certain individual by the name of "Geralt of Rivia" has kept me occupied and diverted all my free time away from modelling.
So much so that there's hasn't been much free time left for some modelling.
Before I started with that game, I managed to squeeze in a few small additions for the Corvette.
I still haven't painted the second layer of color onto the body, but have been doing some minor detailing in the interior.
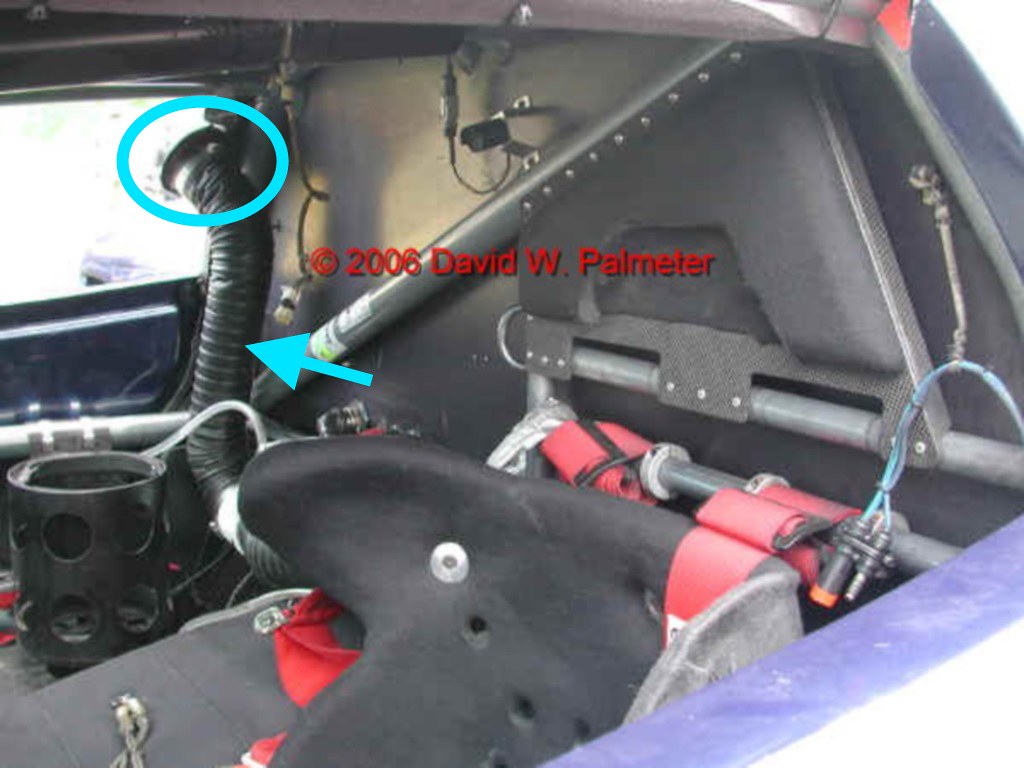
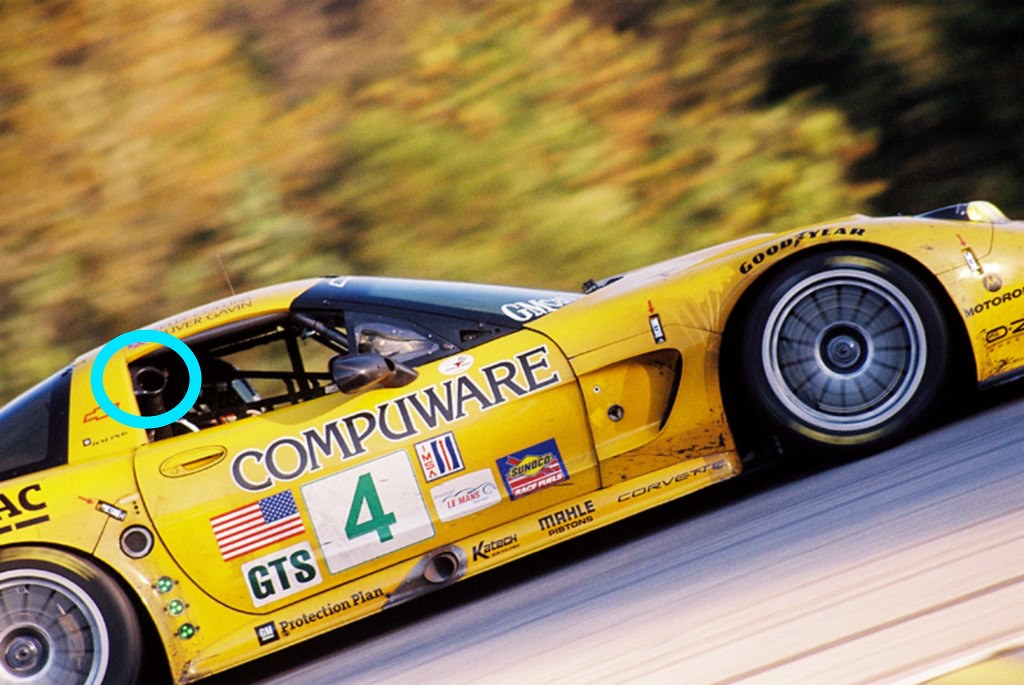
At first I thought to limit the extra work to the small boxes at the co-driver side, the communications wire on the steering wheel and of course the big hose/pipe at the co-driver's side, as it is quite a prominent feature.
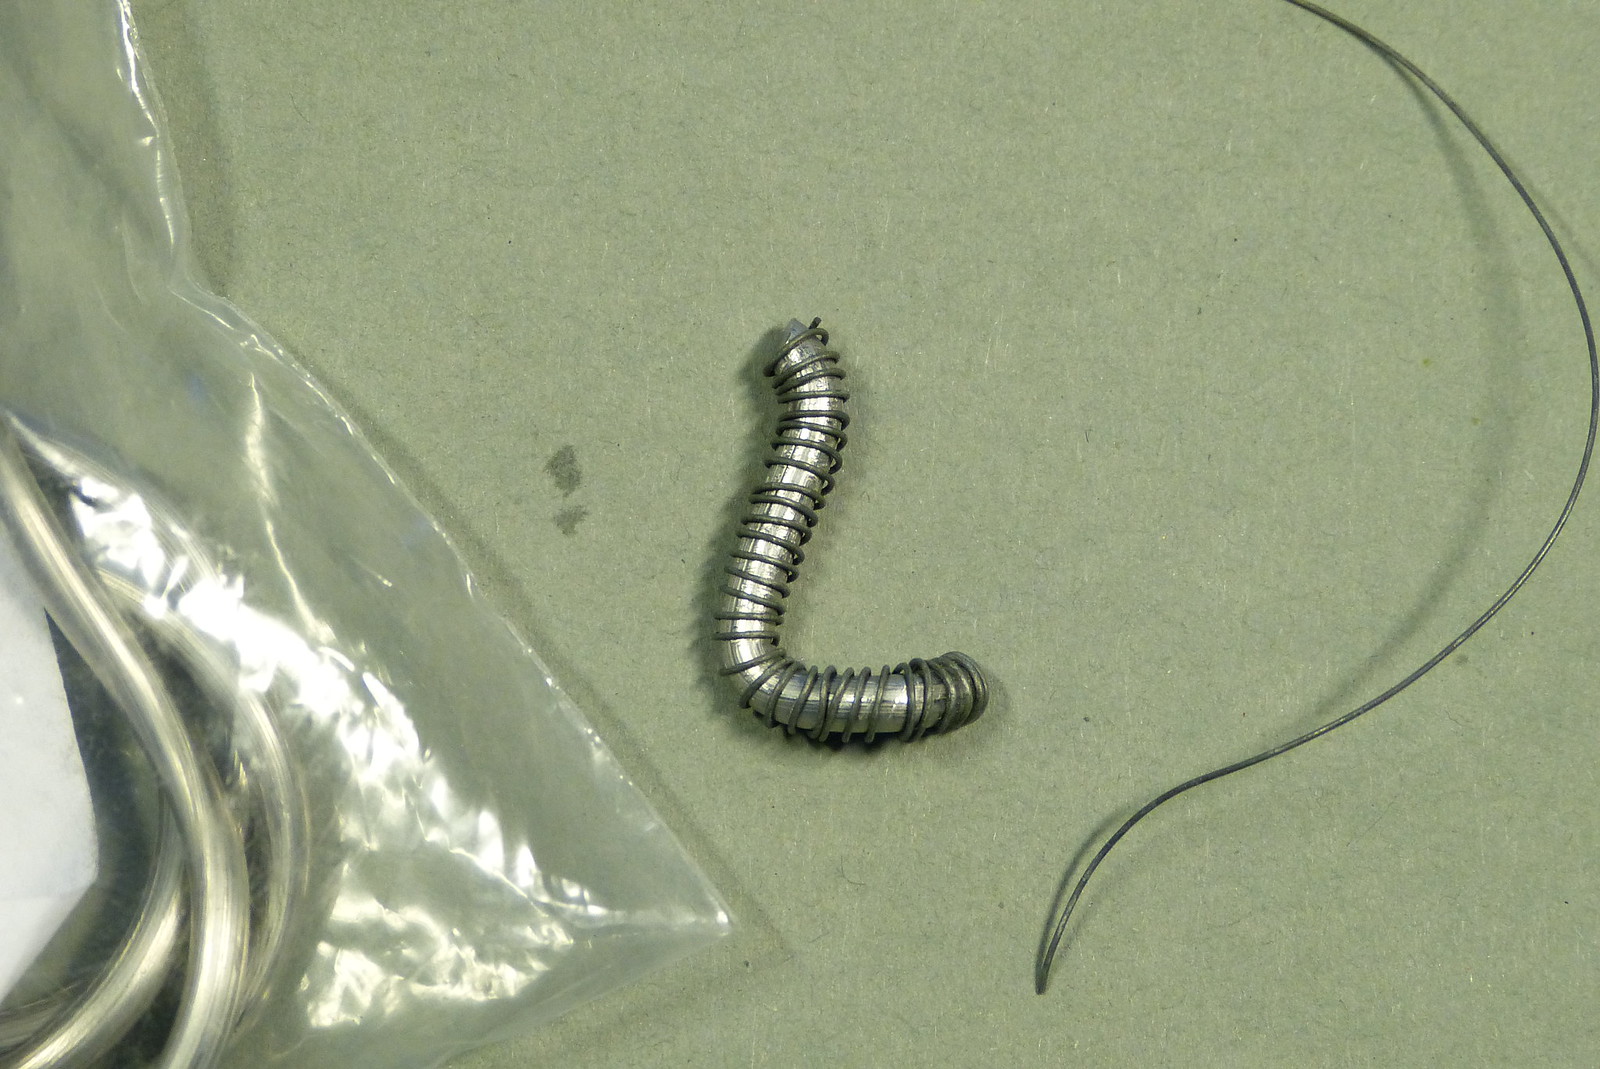
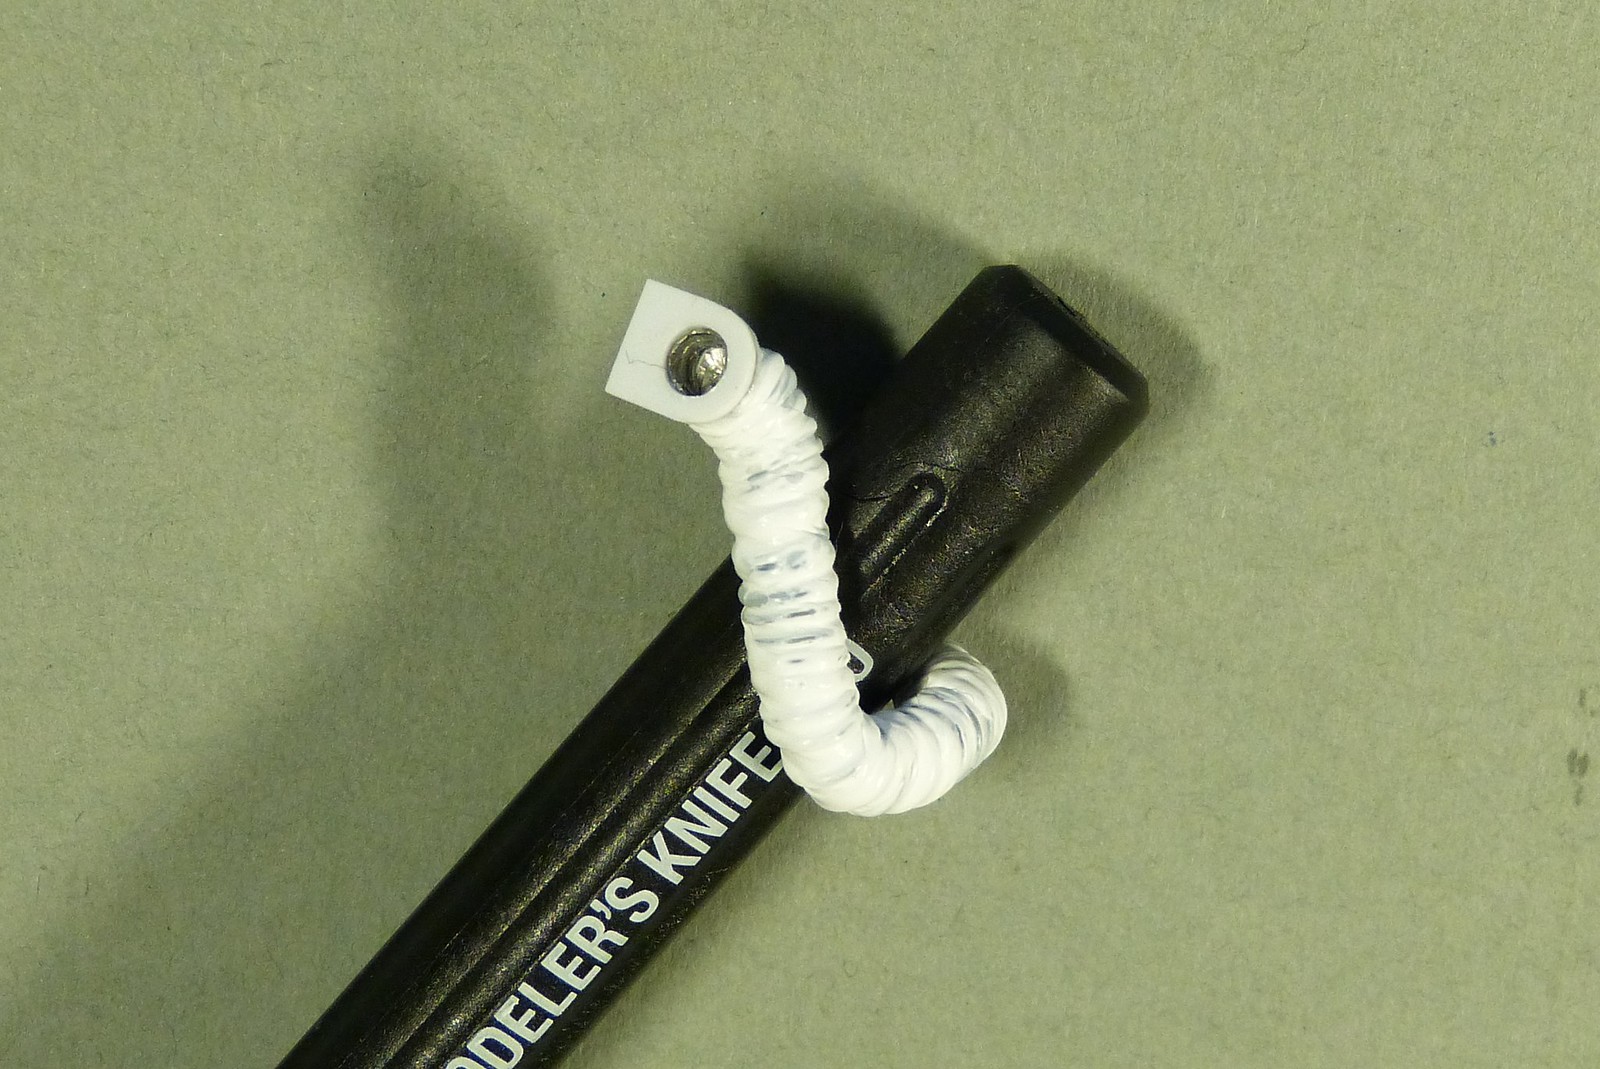
The hose if which the exact purpose is not quite clear to me (I suspect it is the refuelling hose, as there are no other visible tank openings and the fuel tanks are located just behind the firewall behind the driver), is made of 2 mm lead wire bent to shape.
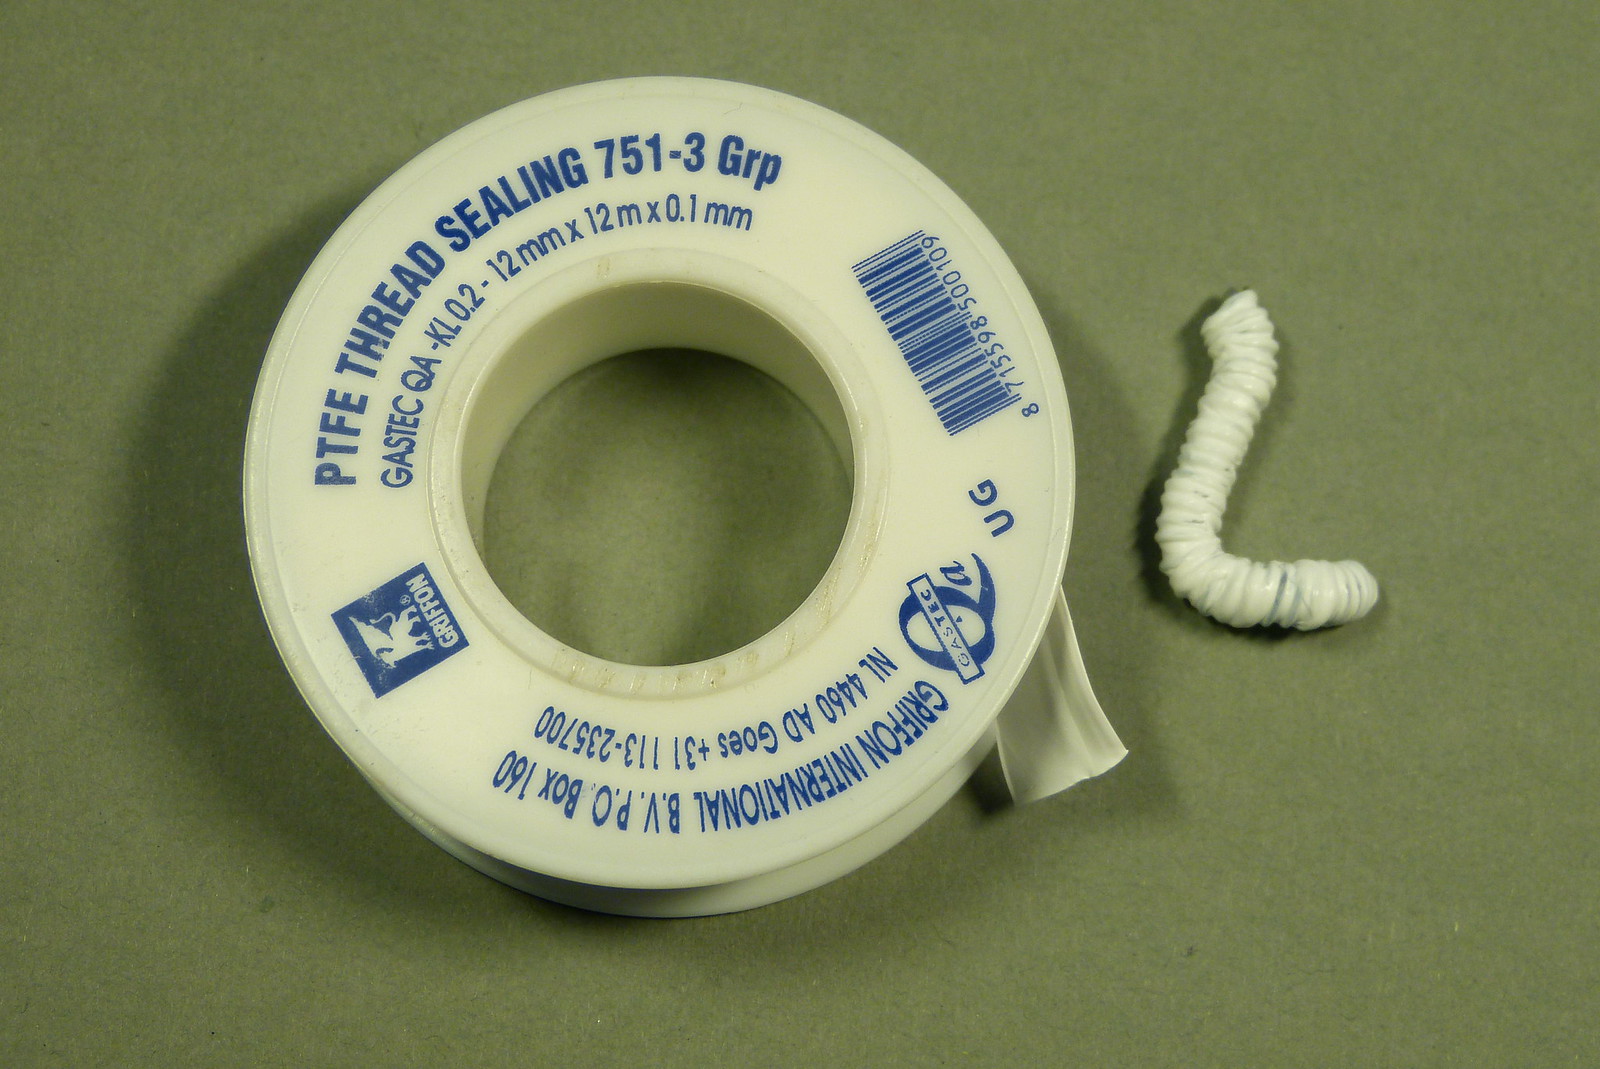
After that I wrapped some thin wire around the lead wire and finished it off with some PTFE tape.
Next I had to make some sort of mounting plate to attach the tube to the roll cage.
It was quite hard to find some good images of this plate, so I used a bit of artistic freedom. But I think I came quite close to the original.
To give some depth to the tube I drilled out the opening as far as I dared to go.
After I'd added the cable to the steering wheel I thought, if I add this than I should also add some other, more evident, details too.
So I've decided to add the comm. wires to the helmet, some wire and connectors to the back wall, the camera on the back wall and a small electronics box on the co-driver side to spice things up a bit.
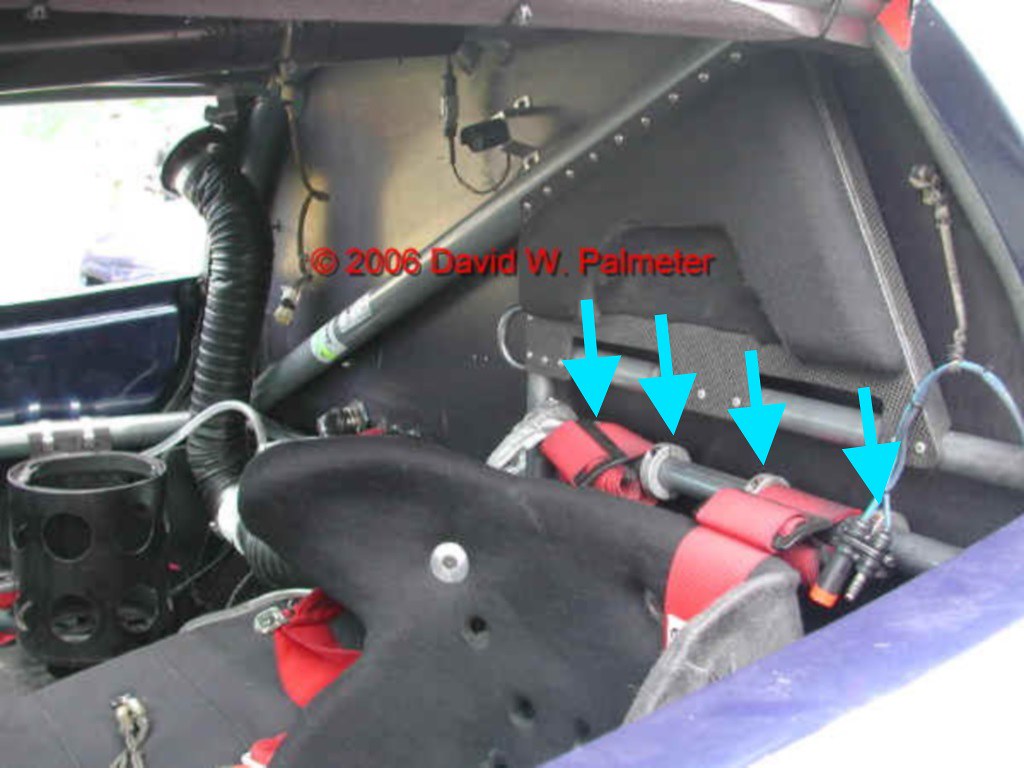
To lend a bit of colour to the interior I also decided to place some stuff between the rollcage and the body (shown in the image below).


The seatbelts are mounted to the roll cage behind the drivers seat.
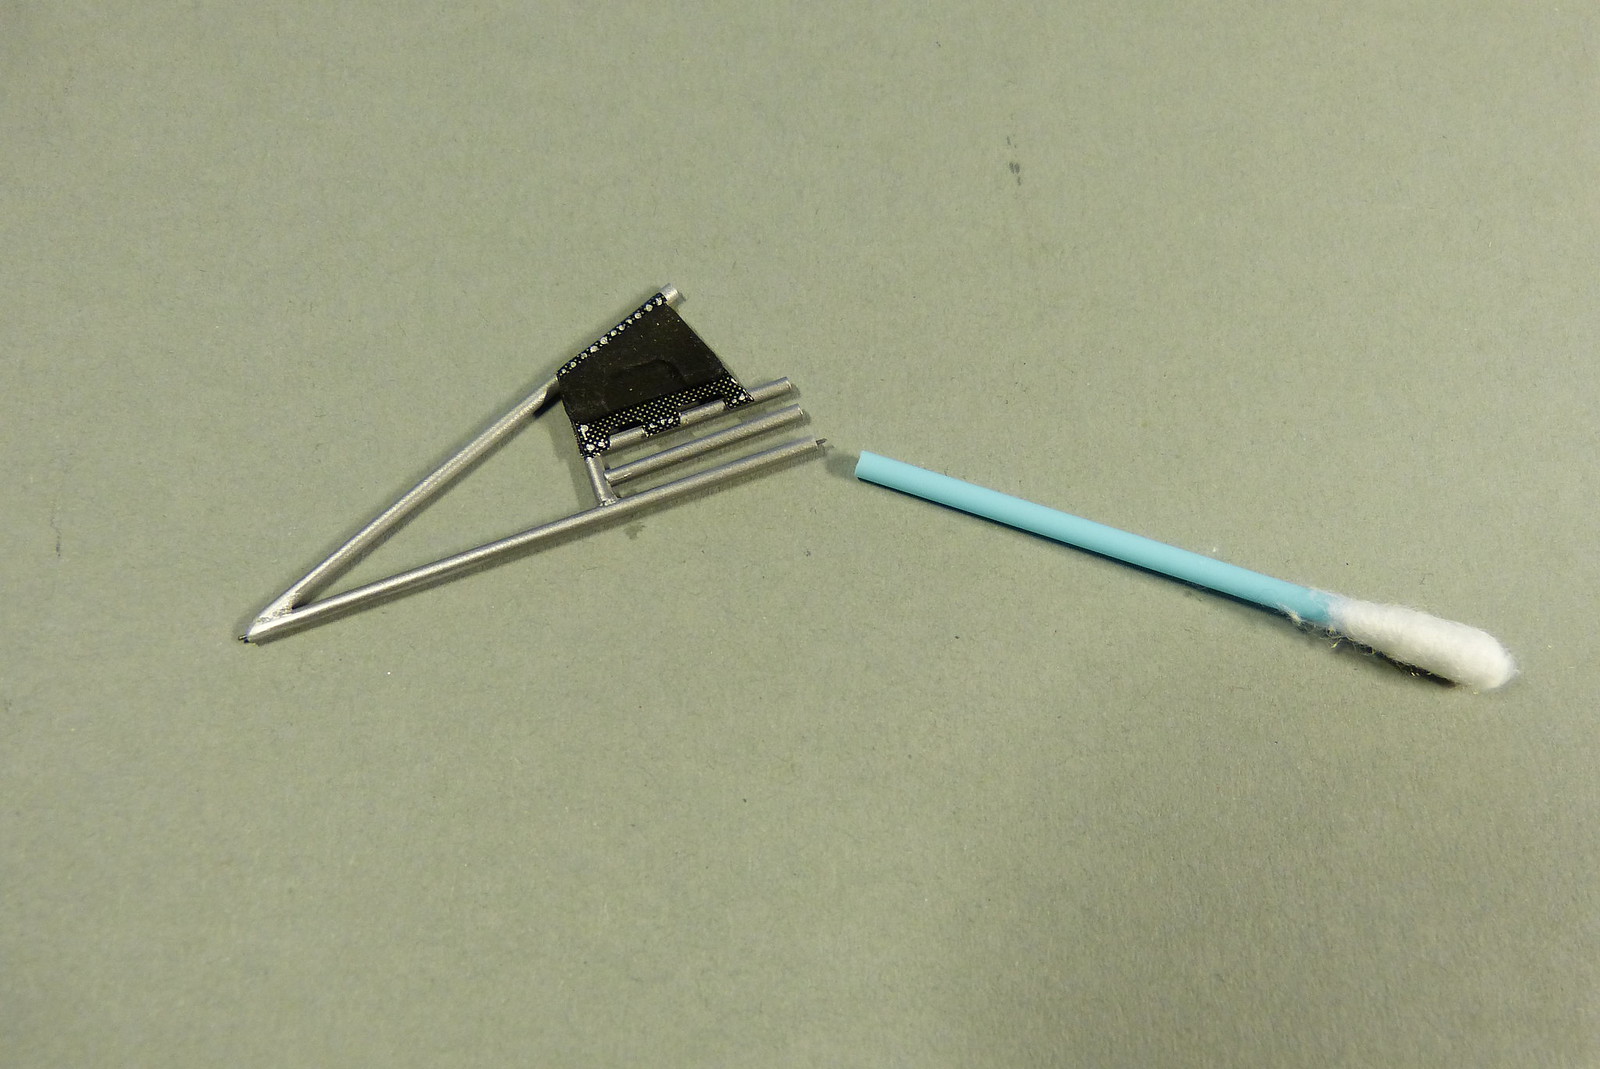
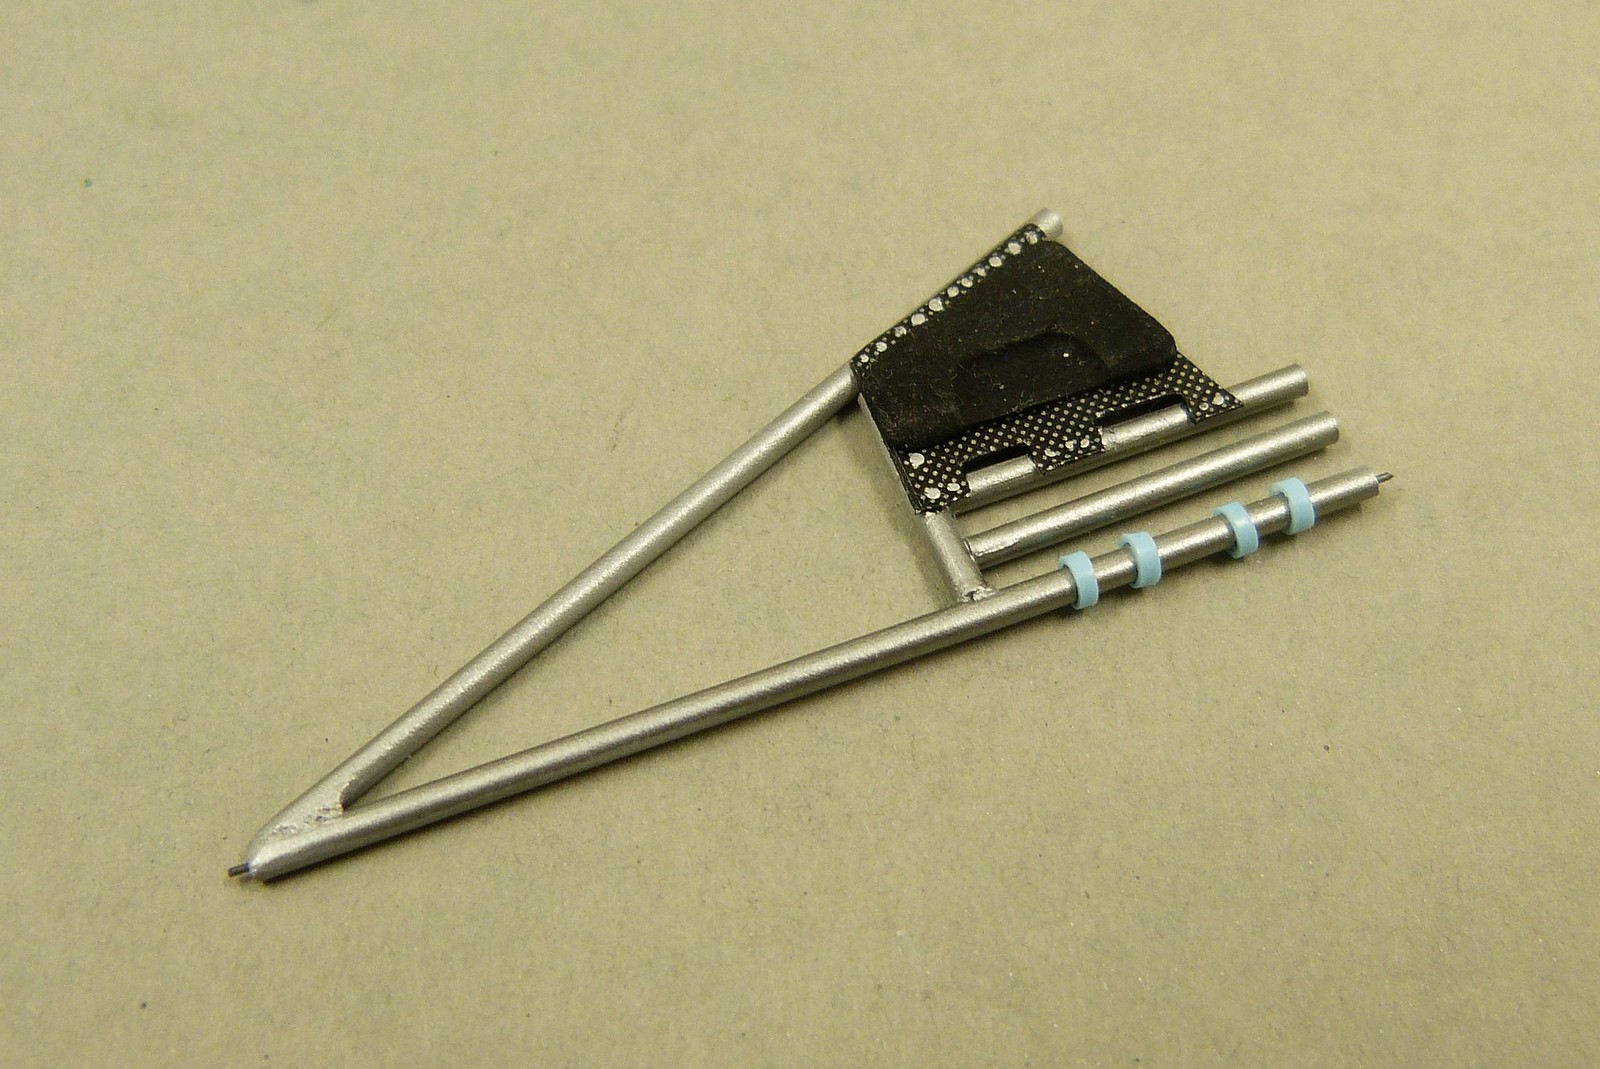
For some time I've been wondering how to build the clamping rings on the roll cage keeping the seat belts in place.
After several failed attempts I finally managed to solve the problem with the aid of a simple Q-tip which I always have at hand.
The shaft of the Q-tip is hollow and a perfect fit for the rollcage. I sliced four rings from the Q-tip shaft and glued them to the rollcage. Now I only have to paint them.
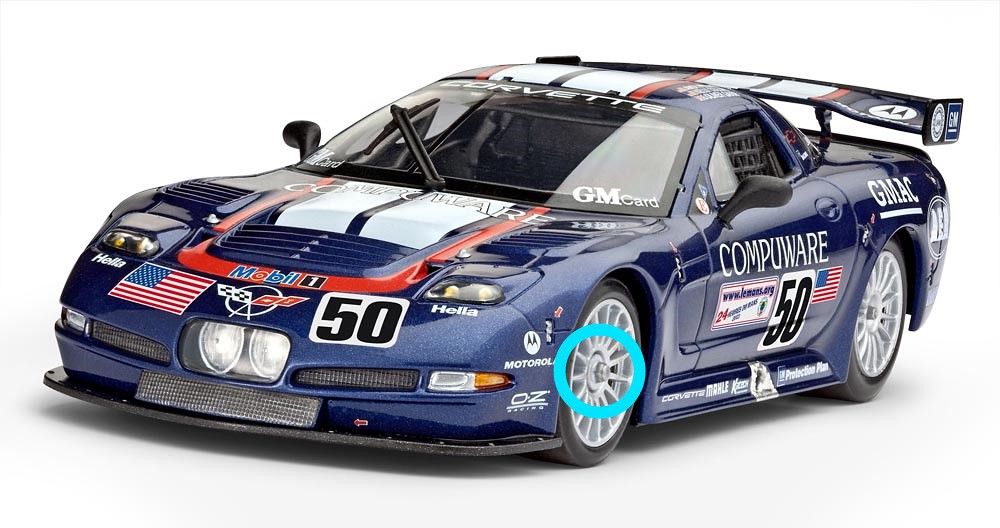
One other thing I tackled is the wheelnut of the front wheels.
On the rear wheels, the wheel nut is moulded with the wheel and the wheel is than fixed on the axle passing through the rear differential.
On the front wheels, the wheel nut is a separate part used to fix the wheel to the suspension/brake assembly. Sadly the part is quite rough and big and doesn't look very realistic.
Without wanting to change too much, I decided to snip off the flange of the wheel nut.
I was planning to glue the wheels to the brakes anyway, so there's no fear that the wheels will come off because of the removed flange.
There's still some cleaning up to do and the parts will need a fresh lick of paint, but other than that will leave them as they are now. Even in it's current state, the parts look already quite a bit better than the original version.

And now for something completely different...
As I'm locally known for some bad housekeeping I have left the (finished) parts of the Corvette lying on my desk for the past months.
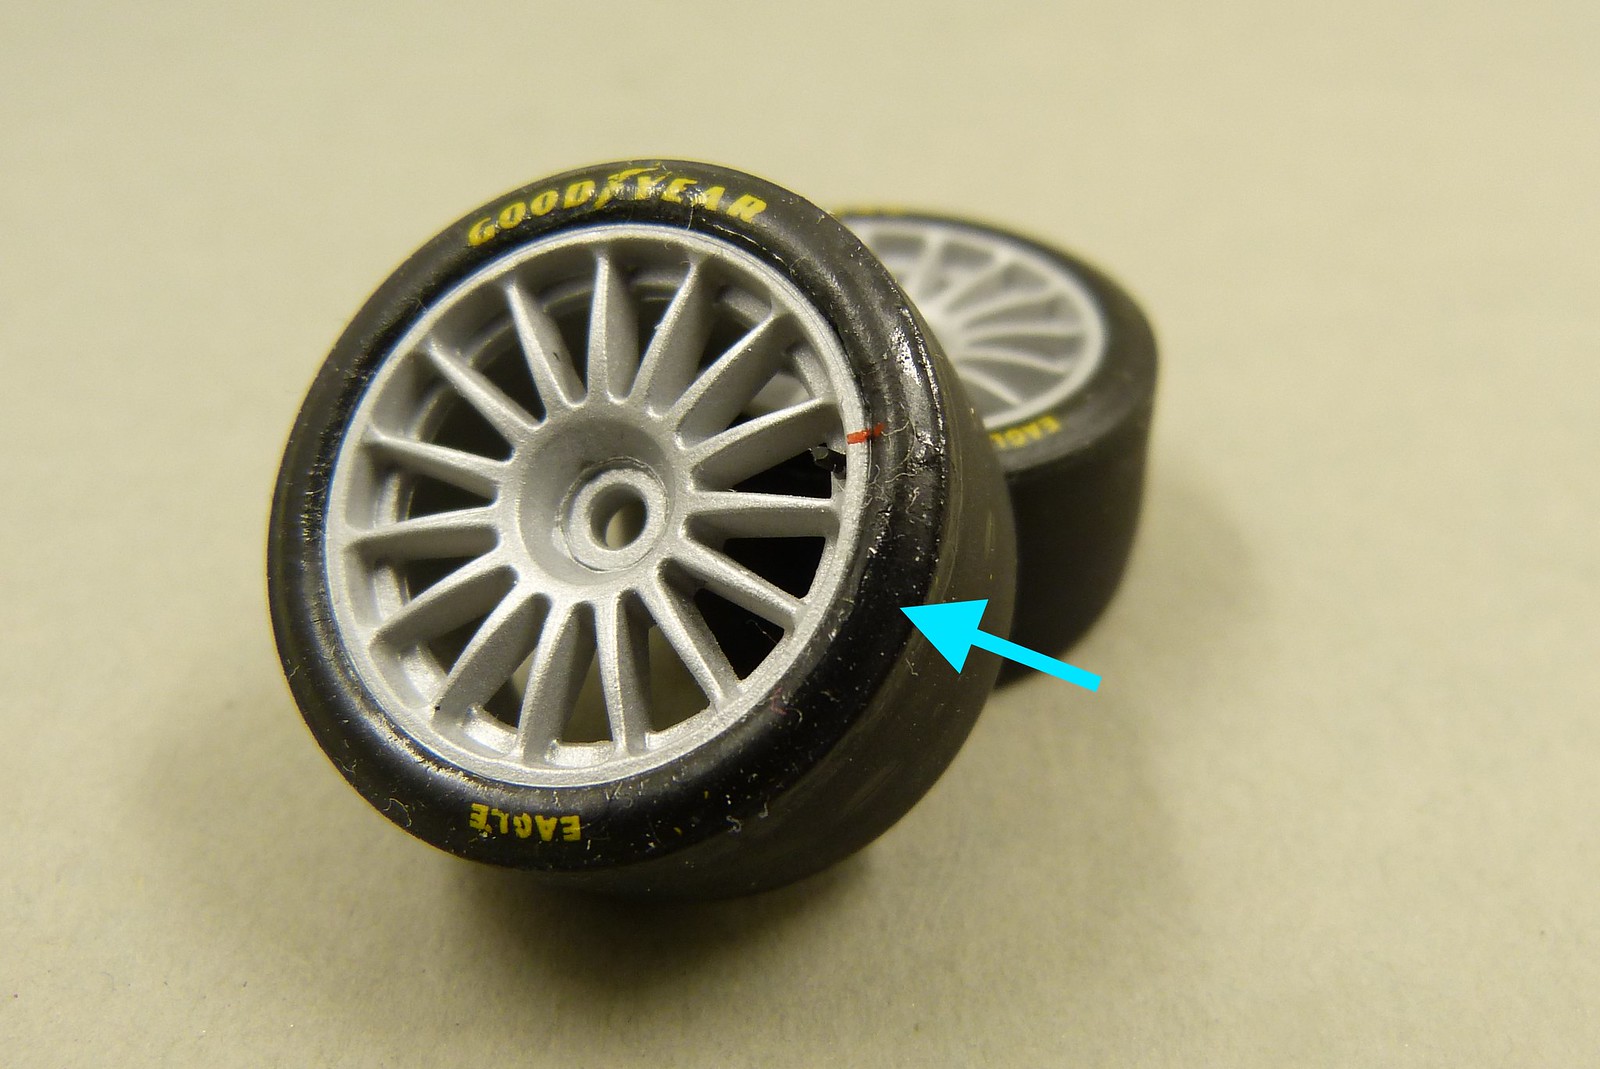
As it happens I managed to put a plastic bag with some decals on top of the tires of the Corvette. Thanks to the hot weather this action has damaged the clearcoat of one of the front tires, which I now may repaint with another layer of clearcoat.
That'll teach me not to put the parts safely away.
Next update won't take so long. Promised.
A certain individual by the name of "Geralt of Rivia" has kept me occupied and diverted all my free time away from modelling.
So much so that there's hasn't been much free time left for some modelling.
Before I started with that game, I managed to squeeze in a few small additions for the Corvette.
I still haven't painted the second layer of color onto the body, but have been doing some minor detailing in the interior.
At first I thought to limit the extra work to the small boxes at the co-driver side, the communications wire on the steering wheel and of course the big hose/pipe at the co-driver's side, as it is quite a prominent feature.
The hose if which the exact purpose is not quite clear to me (I suspect it is the refuelling hose, as there are no other visible tank openings and the fuel tanks are located just behind the firewall behind the driver), is made of 2 mm lead wire bent to shape.
After that I wrapped some thin wire around the lead wire and finished it off with some PTFE tape.
Next I had to make some sort of mounting plate to attach the tube to the roll cage.
It was quite hard to find some good images of this plate, so I used a bit of artistic freedom. But I think I came quite close to the original.
To give some depth to the tube I drilled out the opening as far as I dared to go.
After I'd added the cable to the steering wheel I thought, if I add this than I should also add some other, more evident, details too.
So I've decided to add the comm. wires to the helmet, some wire and connectors to the back wall, the camera on the back wall and a small electronics box on the co-driver side to spice things up a bit.
To lend a bit of colour to the interior I also decided to place some stuff between the rollcage and the body (shown in the image below).
The seatbelts are mounted to the roll cage behind the drivers seat.
For some time I've been wondering how to build the clamping rings on the roll cage keeping the seat belts in place.
After several failed attempts I finally managed to solve the problem with the aid of a simple Q-tip which I always have at hand.
The shaft of the Q-tip is hollow and a perfect fit for the rollcage. I sliced four rings from the Q-tip shaft and glued them to the rollcage. Now I only have to paint them.
One other thing I tackled is the wheelnut of the front wheels.
On the rear wheels, the wheel nut is moulded with the wheel and the wheel is than fixed on the axle passing through the rear differential.
On the front wheels, the wheel nut is a separate part used to fix the wheel to the suspension/brake assembly. Sadly the part is quite rough and big and doesn't look very realistic.
Without wanting to change too much, I decided to snip off the flange of the wheel nut.
I was planning to glue the wheels to the brakes anyway, so there's no fear that the wheels will come off because of the removed flange.
There's still some cleaning up to do and the parts will need a fresh lick of paint, but other than that will leave them as they are now. Even in it's current state, the parts look already quite a bit better than the original version.
And now for something completely different...
As I'm locally known for some bad housekeeping I have left the (finished) parts of the Corvette lying on my desk for the past months.
As it happens I managed to put a plastic bag with some decals on top of the tires of the Corvette. Thanks to the hot weather this action has damaged the clearcoat of one of the front tires, which I now may repaint with another layer of clearcoat.
That'll teach me not to put the parts safely away.
Next update won't take so long. Promised.
Comments
Post a Comment