Working as a mechanical engineer has its advantages.
For one there is the acquired knowledge of 3D modelling, which I'm intending to put to use for my scale modelling activities.
Actually, I already did use SolidWorks for some modelling activities in the past (creating a (sheet metal) flat pattern for folding the brake air ducts for Gigi Galli's Peugeot 307 WRC). But with 3D printing coming of age with companies like shapeways et all, my modelling activities are expanding into that direction too (as if I hadn't more than enough on my hands with just building kits...).
How good were the times in the mid-eighties and at the start of the nineties when the only way of getting reference images was through buying books and/or magazines...
As my budget was quite tight in those days, choices had to be made between a new kit, or a new book/magazine.
The kits won most of the times. And thus I just build my models following the instructions to the letter to churn out the odd model every month or two.
Times have changed...
With the growing availability of reference images, mainly on the internet, I'm hard pressed to build anything out of the box these days. There's always something that can be improved upon...
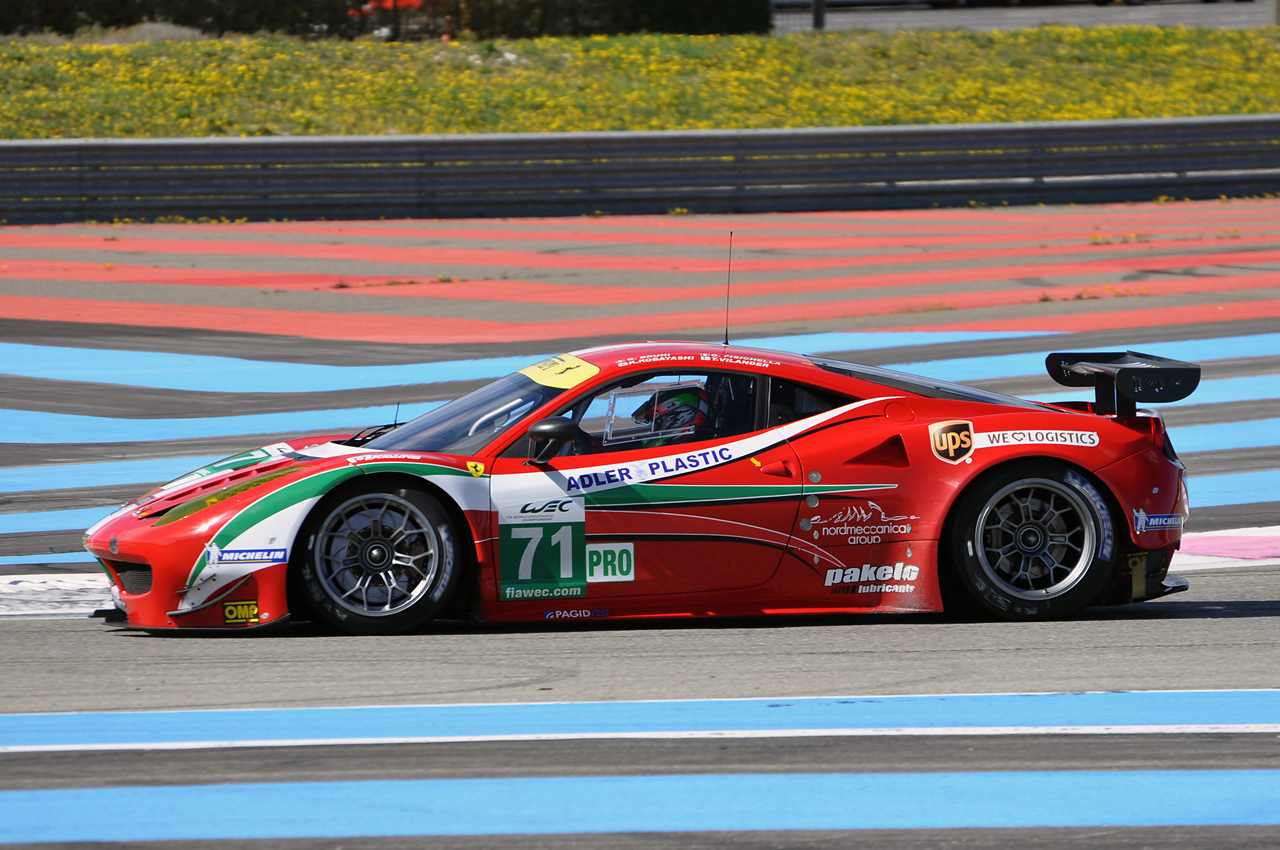
For instance, some time back, before Studio27 offered this model, I bought a resin Ferrari F458GT2 in 1/24 from Auto Place Model 24 to build into the Le Mans racer in which Kamui Kobayashi raced in 2013.
The model was bought without decals, counting on the fact that Studio27 or another aftermarket company would release them sooner or later.
I wasn't disappointed as some time later Studio27 released their own transkit for this model (of course riding on the popularity of Kamui) and, luckily for me, a separate (spare) decal sheet, which I promptly bought.
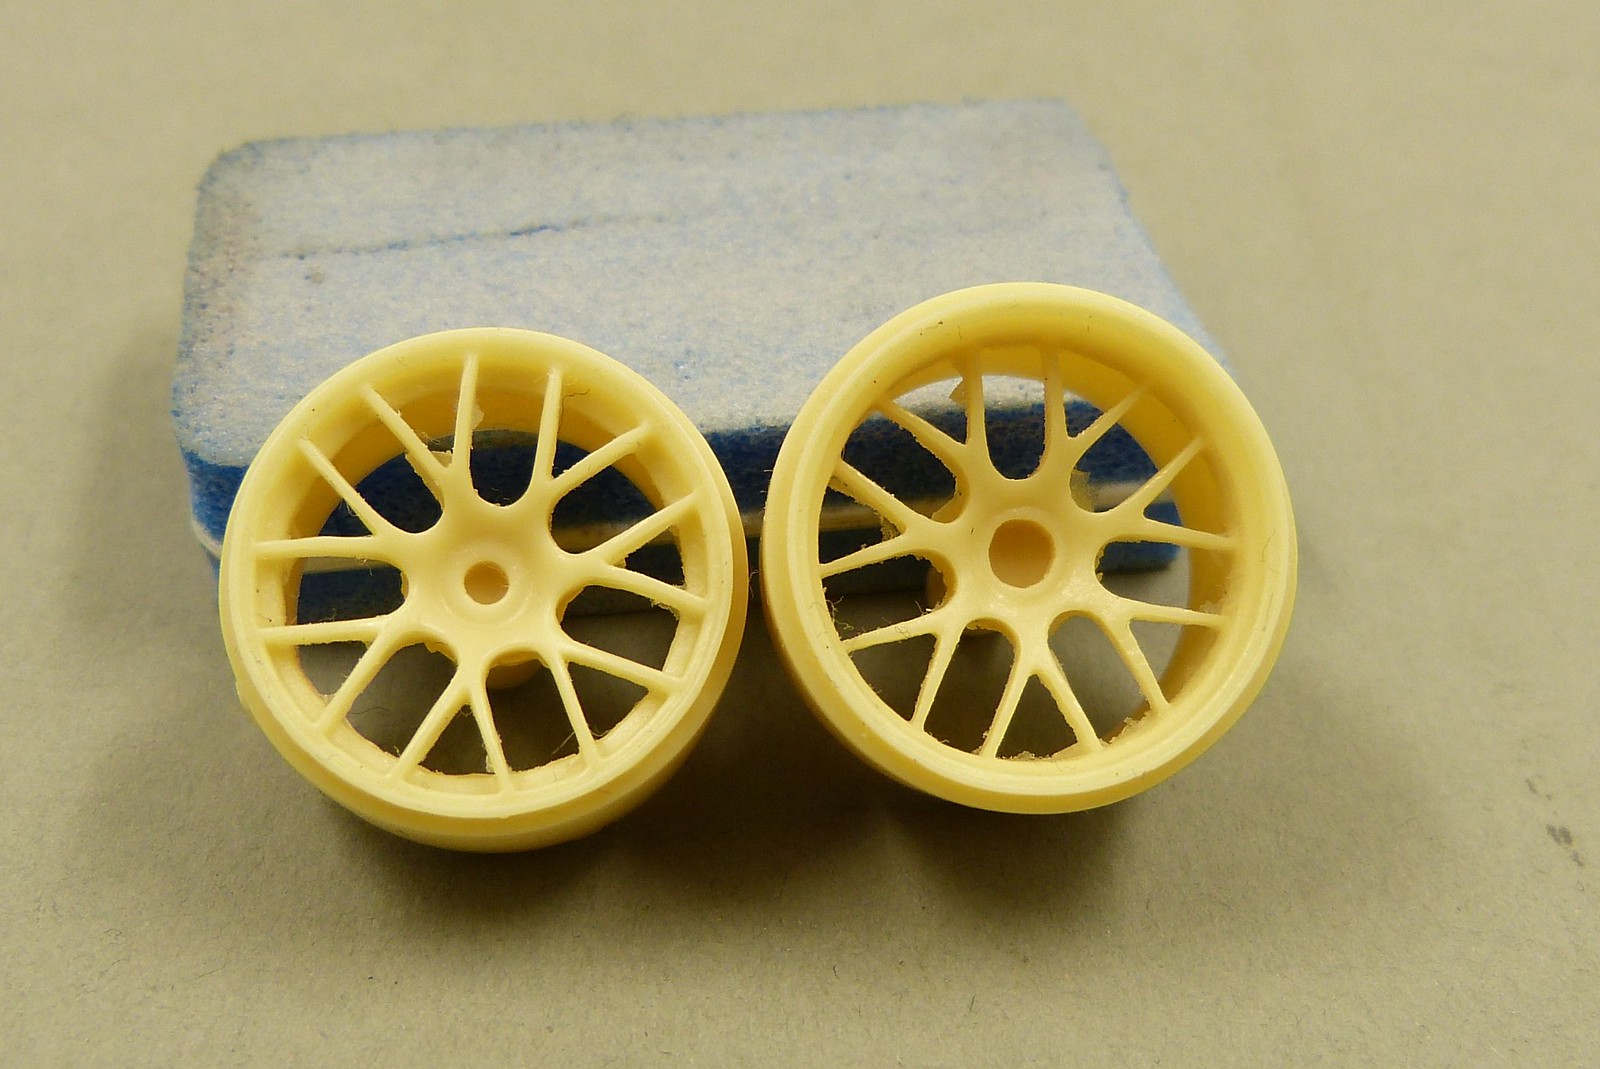
Looking through the available reference images I soon found out that the wheels for this particular car were completely wrong.
Included in the kit are BBS wheels, but the AF Corse team used Motegi wheels during the 2013 WEC season.
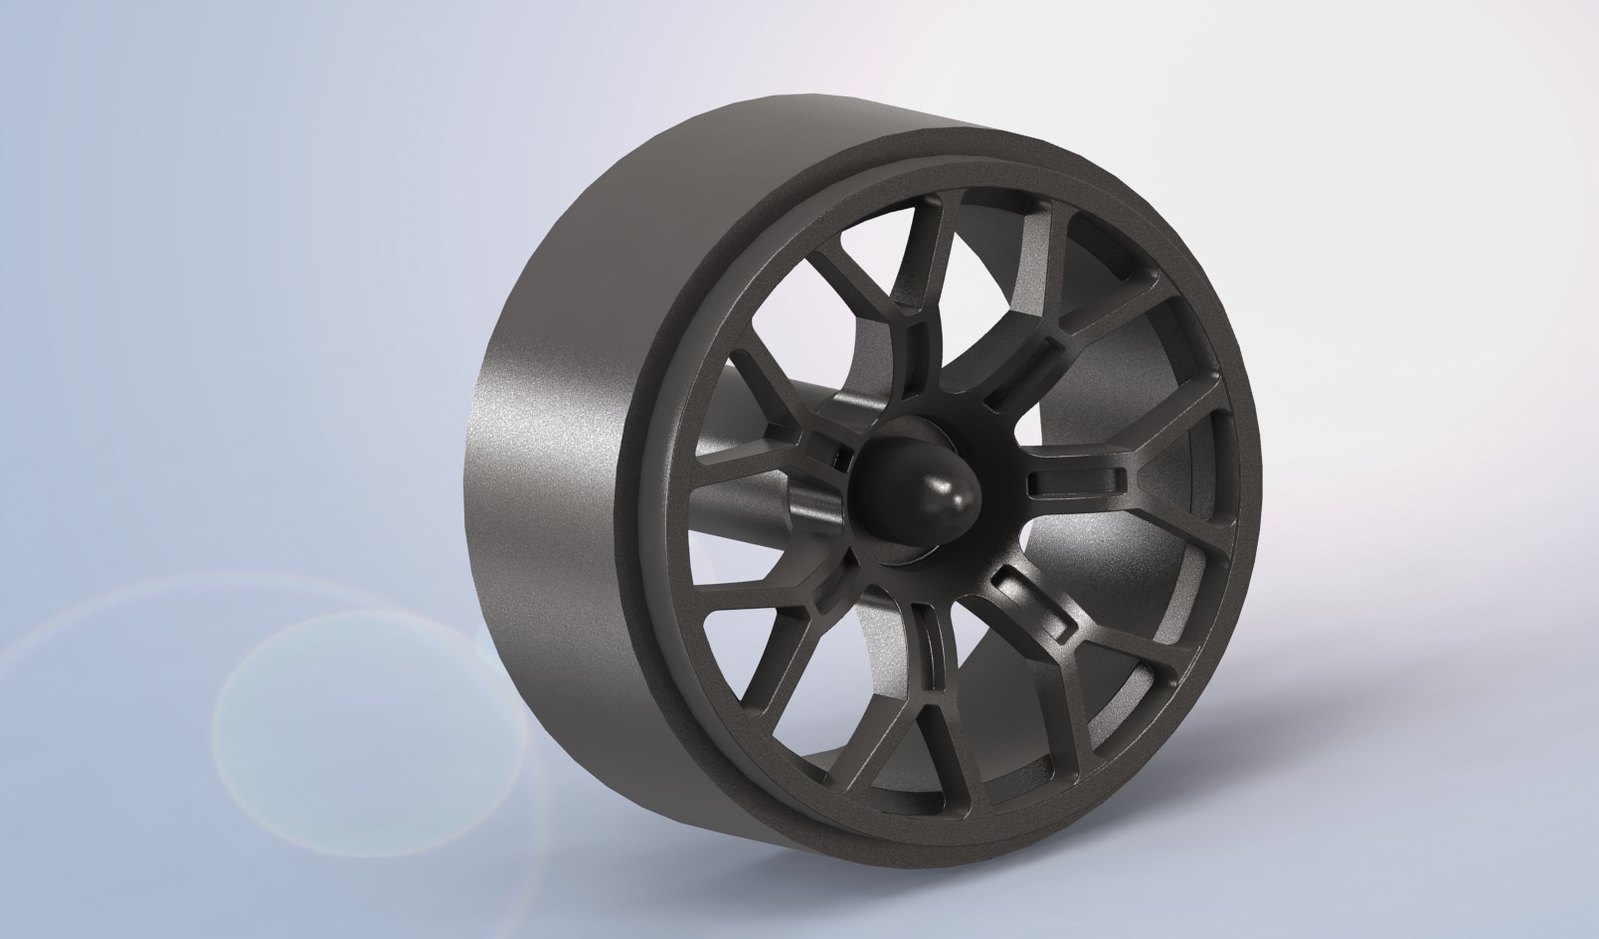
No aftermarket company has these in their catalog. So I finally decided to draw them myself and I'm going to have them 3D printed.
Below an image of the original wheels, a screenshot from the front wheel I made in SolidWorks and reference images of the car and wheels during the 2013 WEC season.

For one there is the acquired knowledge of 3D modelling, which I'm intending to put to use for my scale modelling activities.
Actually, I already did use SolidWorks for some modelling activities in the past (creating a (sheet metal) flat pattern for folding the brake air ducts for Gigi Galli's Peugeot 307 WRC). But with 3D printing coming of age with companies like shapeways et all, my modelling activities are expanding into that direction too (as if I hadn't more than enough on my hands with just building kits...).
How good were the times in the mid-eighties and at the start of the nineties when the only way of getting reference images was through buying books and/or magazines...
As my budget was quite tight in those days, choices had to be made between a new kit, or a new book/magazine.
The kits won most of the times. And thus I just build my models following the instructions to the letter to churn out the odd model every month or two.
Times have changed...
With the growing availability of reference images, mainly on the internet, I'm hard pressed to build anything out of the box these days. There's always something that can be improved upon...
For instance, some time back, before Studio27 offered this model, I bought a resin Ferrari F458GT2 in 1/24 from Auto Place Model 24 to build into the Le Mans racer in which Kamui Kobayashi raced in 2013.
The model was bought without decals, counting on the fact that Studio27 or another aftermarket company would release them sooner or later.
I wasn't disappointed as some time later Studio27 released their own transkit for this model (of course riding on the popularity of Kamui) and, luckily for me, a separate (spare) decal sheet, which I promptly bought.
Looking through the available reference images I soon found out that the wheels for this particular car were completely wrong.
Included in the kit are BBS wheels, but the AF Corse team used Motegi wheels during the 2013 WEC season.
No aftermarket company has these in their catalog. So I finally decided to draw them myself and I'm going to have them 3D printed.
Below an image of the original wheels, a screenshot from the front wheel I made in SolidWorks and reference images of the car and wheels during the 2013 WEC season.
Comments
Post a Comment