As mentioned in the previous post for this project I will start with the Heavy Type A field generator kit from Plus Model.
This kit marks several "firsts" for me:
The various parts are well packaged in the small cardboard box.
There are 4 bags with grey resin parts and there is one bag with a decal sheet and a small fret of PE parts.
The manual has a parts list to start with and continues with the building instructions spread over 20 steps.


What is immediately apparent is that although this is a small kit, it is very complete and has quite a high parts count with 53 resin parts and some 38 PE parts.
Upon first inspection the parts look well cast with little to no obvious defects.
There is some slight flash along some of the parts, but nothing too serious.

The kit can be made with one side panel open (or closed) and the back panel open or closed.
Looking at my reference picture, the side panels are closed. The back panel cannot be seen, but I will fix that in the open position for a bit of visual interest.
Although it is quite difficult to make out (at least for me), I'm not totally convinced that it is a Heavy Type A field generator in the picture (in the first post for this project). Looking for other images of generators on the internet it is quite clear that there was some variation in the design of the field generators.
But even considering these variations, in this case it might very well be that it is not a field generator in the picture but a battery charger Type D.
For this project I will stick with the generator though, as there is no kit of a battery charger type D to my knowledge and because (although it might not be exactly like in the image) it is still a plausible setup as can be seen in these other images.
My intention is to build the model as far as it goes before committing to paint. I'll probably leave the wheels off to facilitate the painting and weathering of the wheelarches.
At the first building step I already encountered a minor problem. Part no. 2, the frame of the trailer was slightly bent. Nothing a bit of hot water and some friendly persuasion can fix though.

I was hoping I might even get away with it without fixing the straightness of the part. But looking at the instructions and testfitting part no. 1 against the frame it was soon obvious that I needed to fix the bent frame.
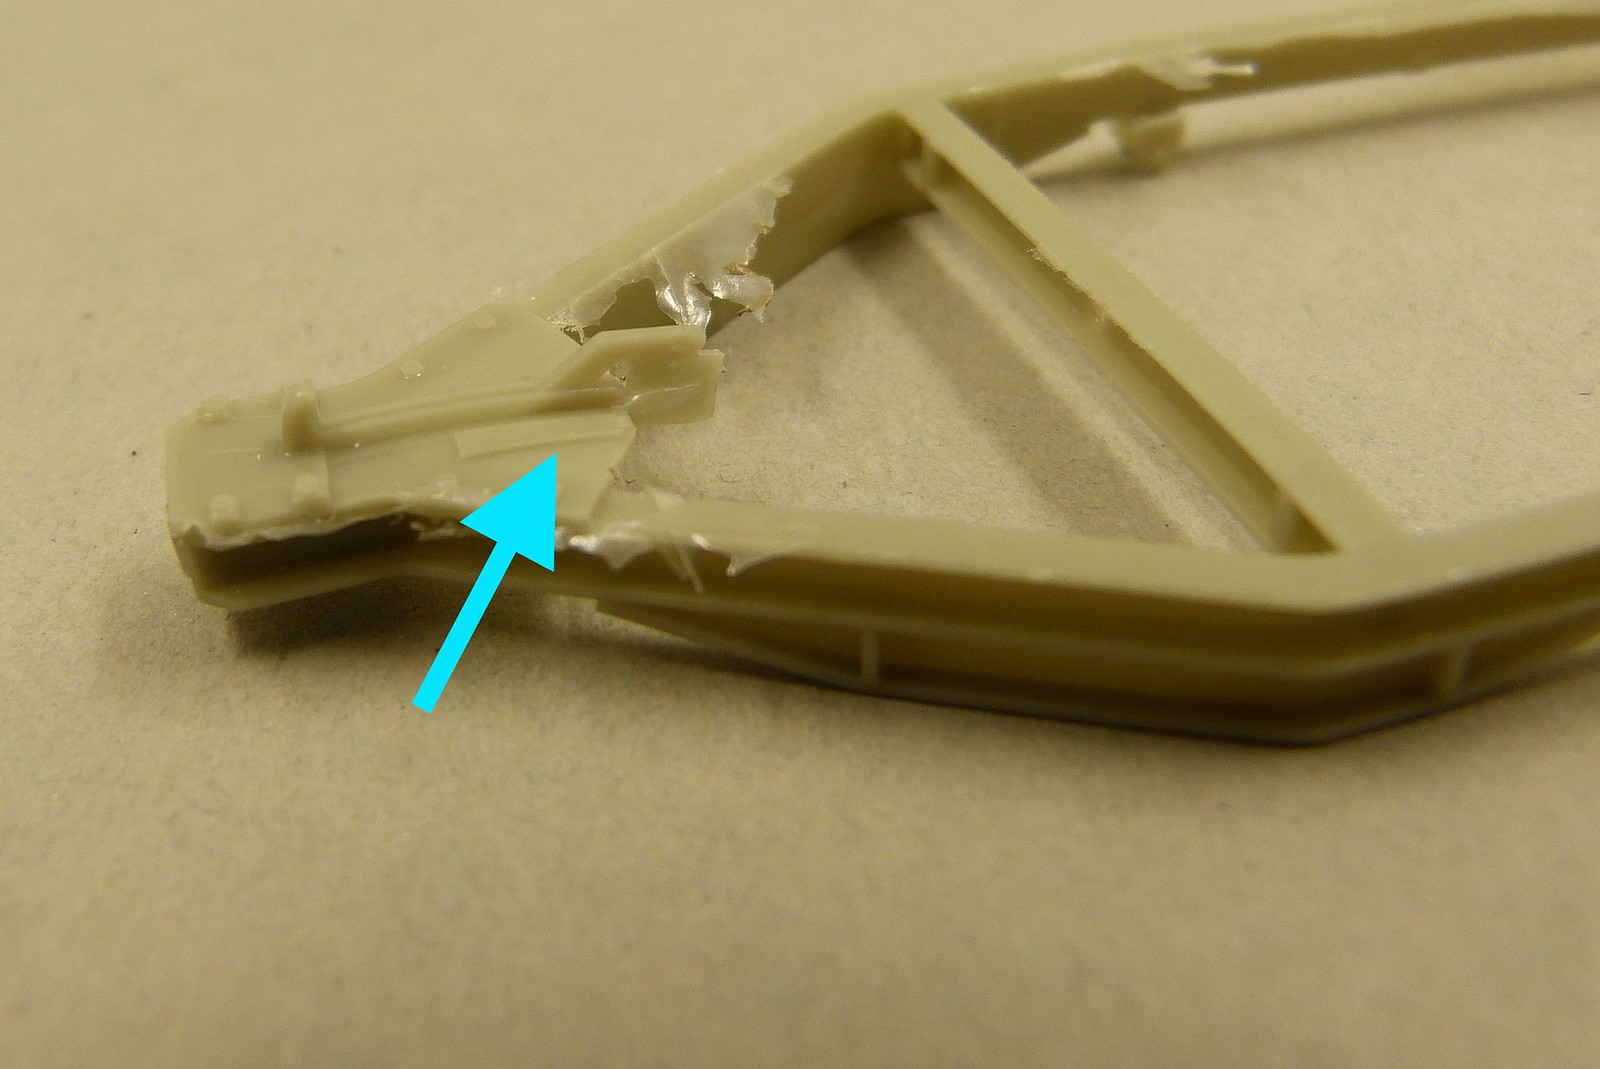
This same part no. 1 also marked a classic case of learning by doing for me.
Trying to separate the part from the casting block just proved that a PE-sawblade was indispensable.
Stubborn as I am I tried to separate the part with some friendly persuasion and side cutters from the casting block. Bad move as the part got slightly damaged.
Luckily this won't be visible when the model is finished, but it annoys me nevertheless. I'll probably try to fill the gaps before painting.
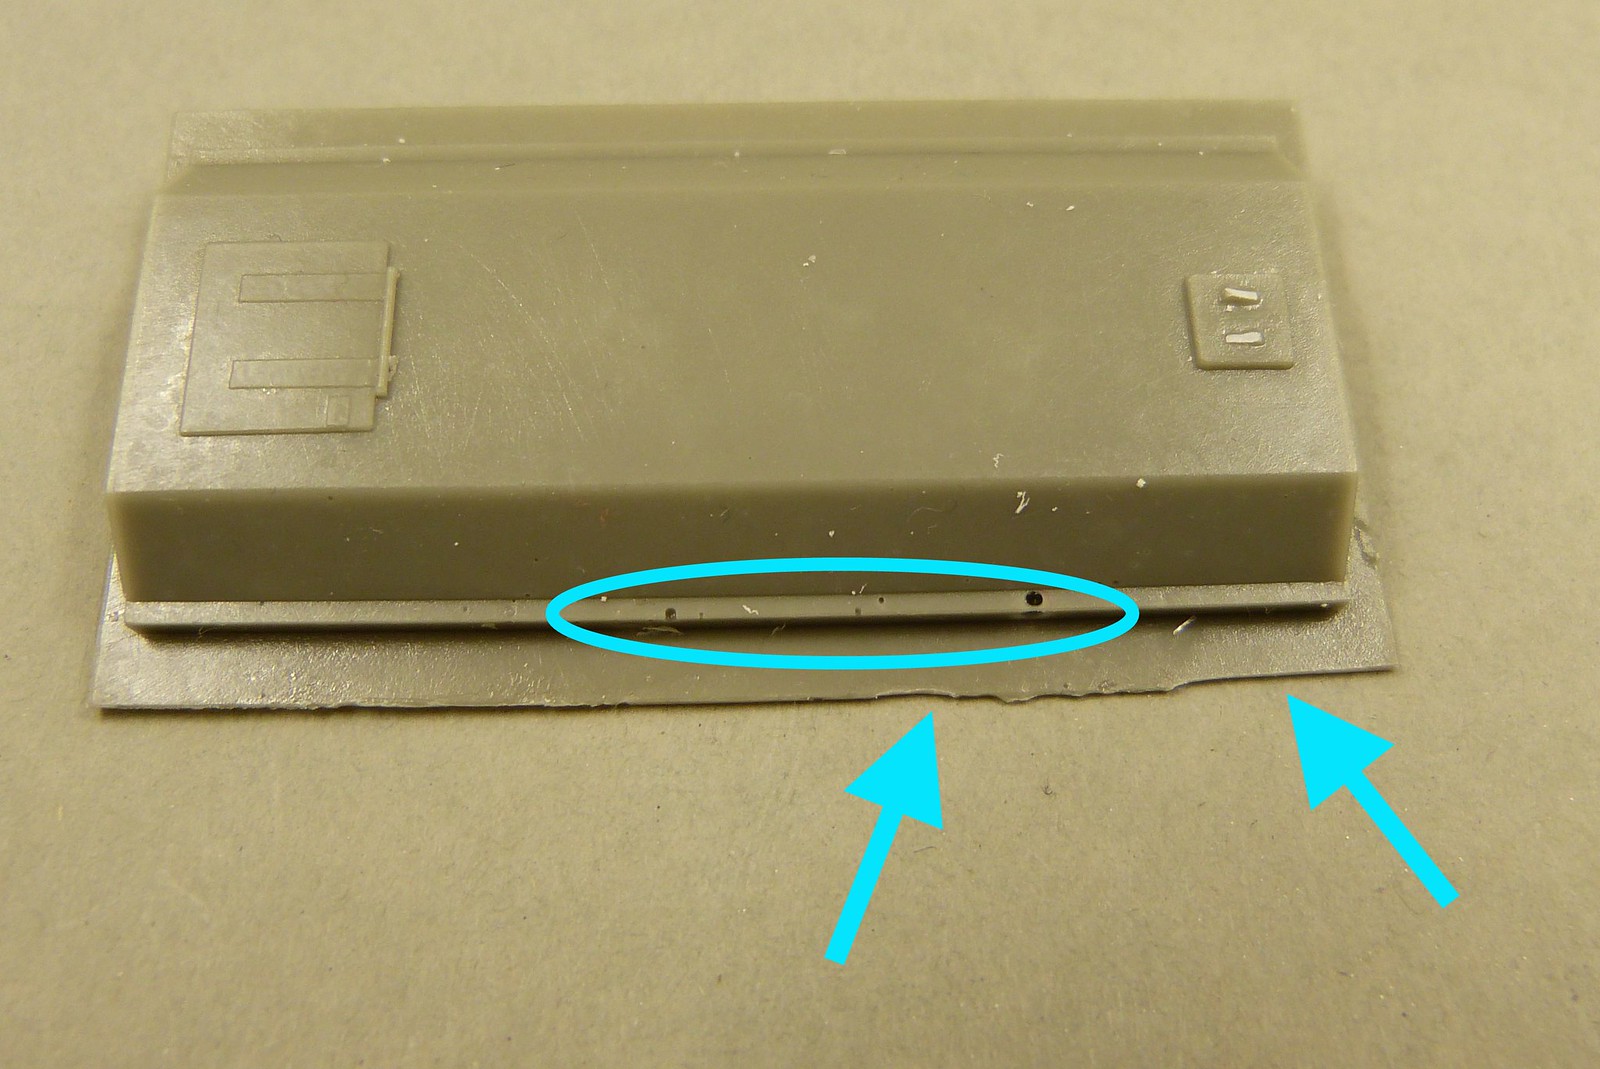
Apart from that I noticed a few holes / air bubbles on the underside of the part, so that filler will come in handy anyway.
At the moment I have all parts belonging to building step 7 separated from their casting blocks.
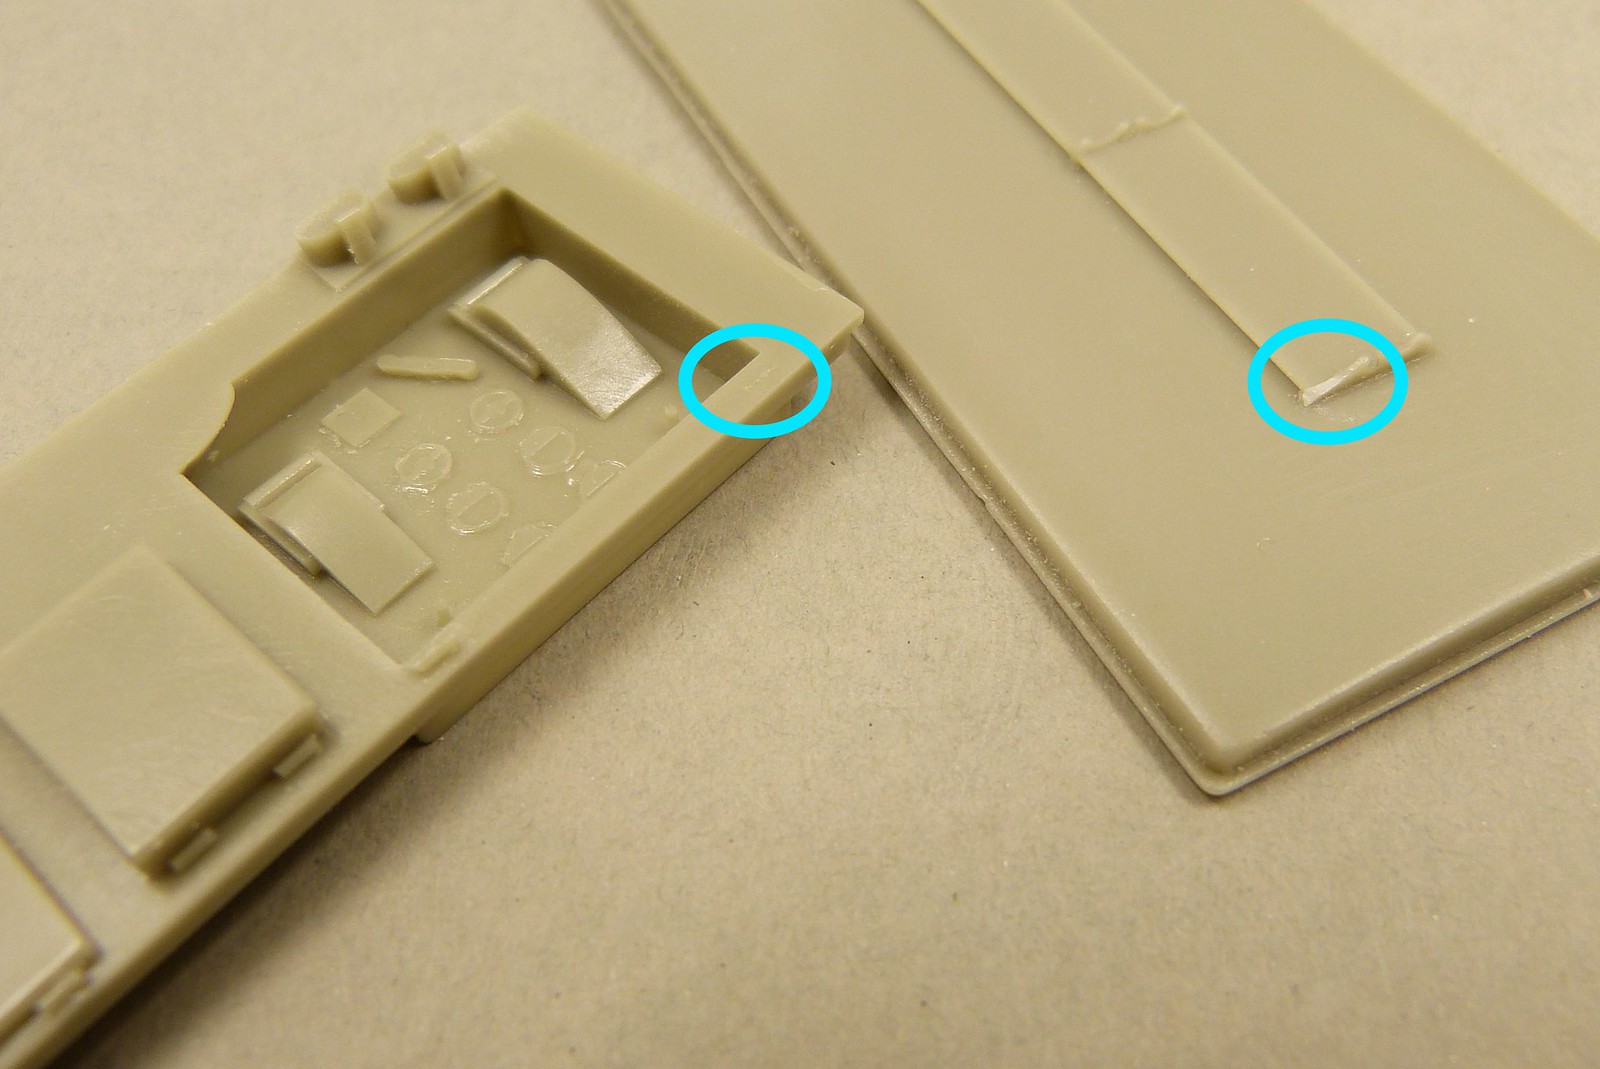
Some small defects here and there I've noticed (like a hinge that's missing), but nothing too serious.
A dryfit shows that the fit of the parts is actually quite good.

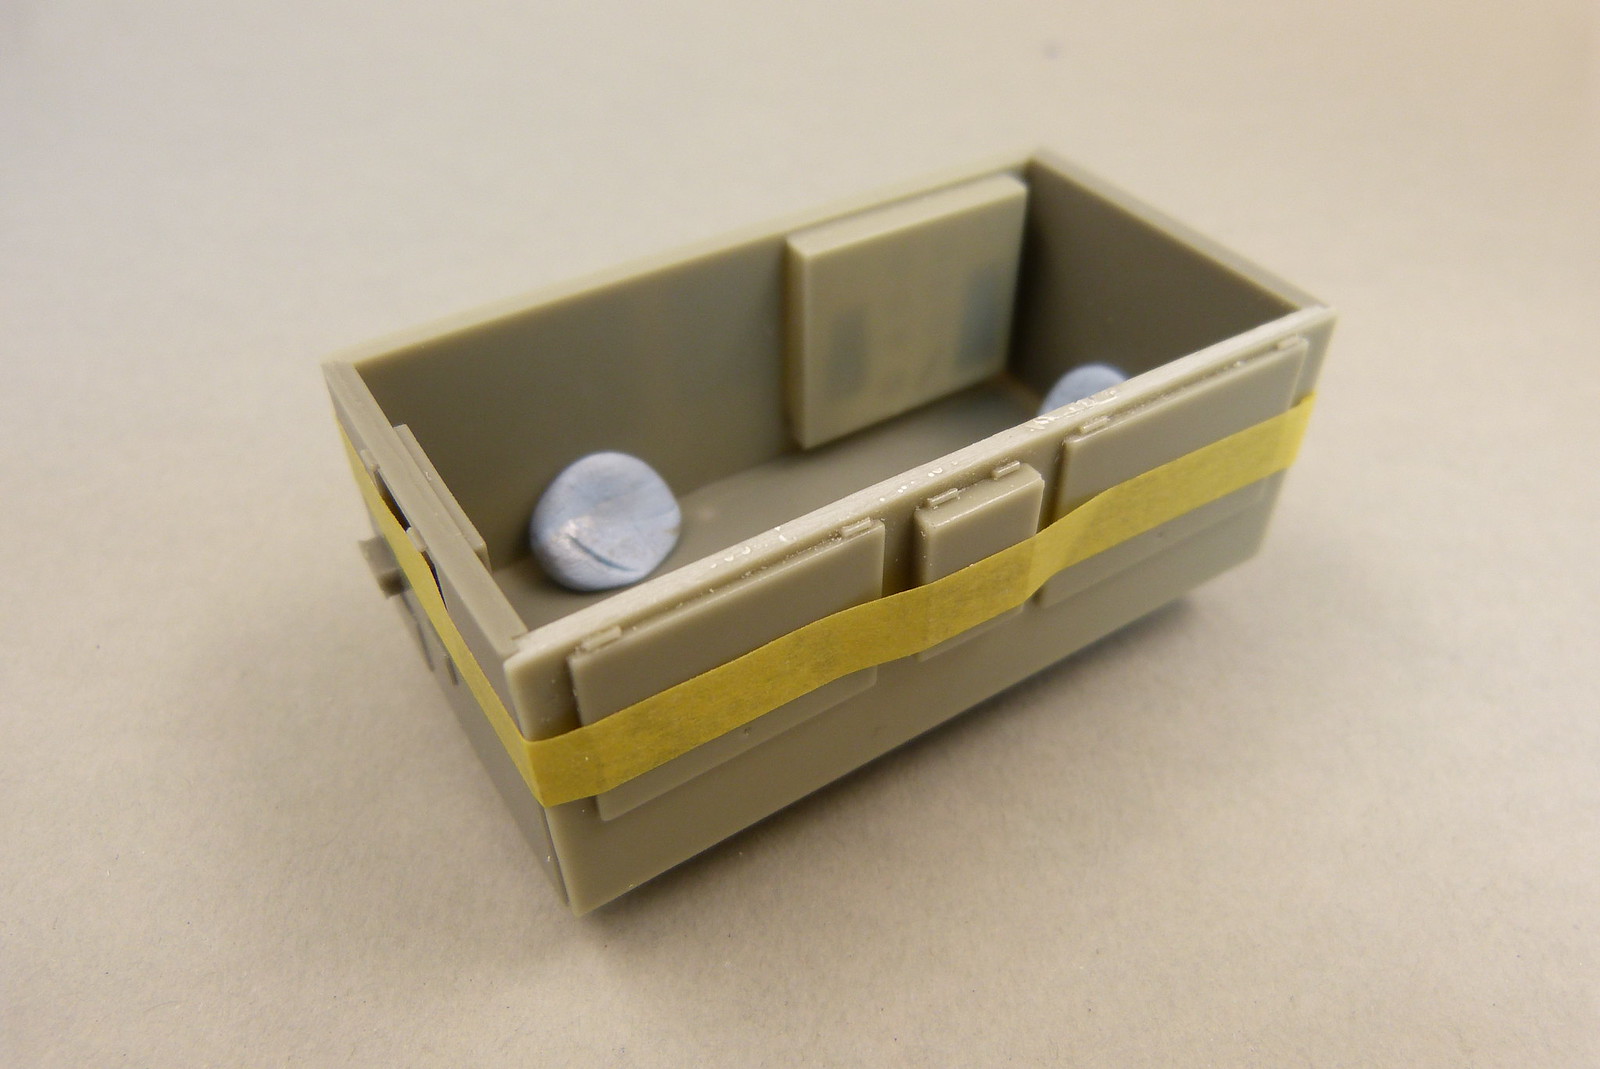

Next step will be to glue the parts together.
Problem is that it would seem that the two types of CA glue I have (Zap thin and medium) aren't strong enough to bond the parts, so I'll be going for the 2-part epoxy to see if that will get the job done.
That will be for the next update though.
This kit marks several "firsts" for me:
- Building in 1/35
- Full resin kit.
- Flat paint schemes
The various parts are well packaged in the small cardboard box.
There are 4 bags with grey resin parts and there is one bag with a decal sheet and a small fret of PE parts.
The manual has a parts list to start with and continues with the building instructions spread over 20 steps.
What is immediately apparent is that although this is a small kit, it is very complete and has quite a high parts count with 53 resin parts and some 38 PE parts.
Upon first inspection the parts look well cast with little to no obvious defects.
There is some slight flash along some of the parts, but nothing too serious.
The kit can be made with one side panel open (or closed) and the back panel open or closed.
Looking at my reference picture, the side panels are closed. The back panel cannot be seen, but I will fix that in the open position for a bit of visual interest.
Although it is quite difficult to make out (at least for me), I'm not totally convinced that it is a Heavy Type A field generator in the picture (in the first post for this project). Looking for other images of generators on the internet it is quite clear that there was some variation in the design of the field generators.
But even considering these variations, in this case it might very well be that it is not a field generator in the picture but a battery charger Type D.
For this project I will stick with the generator though, as there is no kit of a battery charger type D to my knowledge and because (although it might not be exactly like in the image) it is still a plausible setup as can be seen in these other images.
My intention is to build the model as far as it goes before committing to paint. I'll probably leave the wheels off to facilitate the painting and weathering of the wheelarches.
At the first building step I already encountered a minor problem. Part no. 2, the frame of the trailer was slightly bent. Nothing a bit of hot water and some friendly persuasion can fix though.
I was hoping I might even get away with it without fixing the straightness of the part. But looking at the instructions and testfitting part no. 1 against the frame it was soon obvious that I needed to fix the bent frame.
This same part no. 1 also marked a classic case of learning by doing for me.
Trying to separate the part from the casting block just proved that a PE-sawblade was indispensable.
Stubborn as I am I tried to separate the part with some friendly persuasion and side cutters from the casting block. Bad move as the part got slightly damaged.
Luckily this won't be visible when the model is finished, but it annoys me nevertheless. I'll probably try to fill the gaps before painting.
Apart from that I noticed a few holes / air bubbles on the underside of the part, so that filler will come in handy anyway.
At the moment I have all parts belonging to building step 7 separated from their casting blocks.
Some small defects here and there I've noticed (like a hinge that's missing), but nothing too serious.
A dryfit shows that the fit of the parts is actually quite good.
Next step will be to glue the parts together.
Problem is that it would seem that the two types of CA glue I have (Zap thin and medium) aren't strong enough to bond the parts, so I'll be going for the 2-part epoxy to see if that will get the job done.
That will be for the next update though.
Comments
Post a Comment