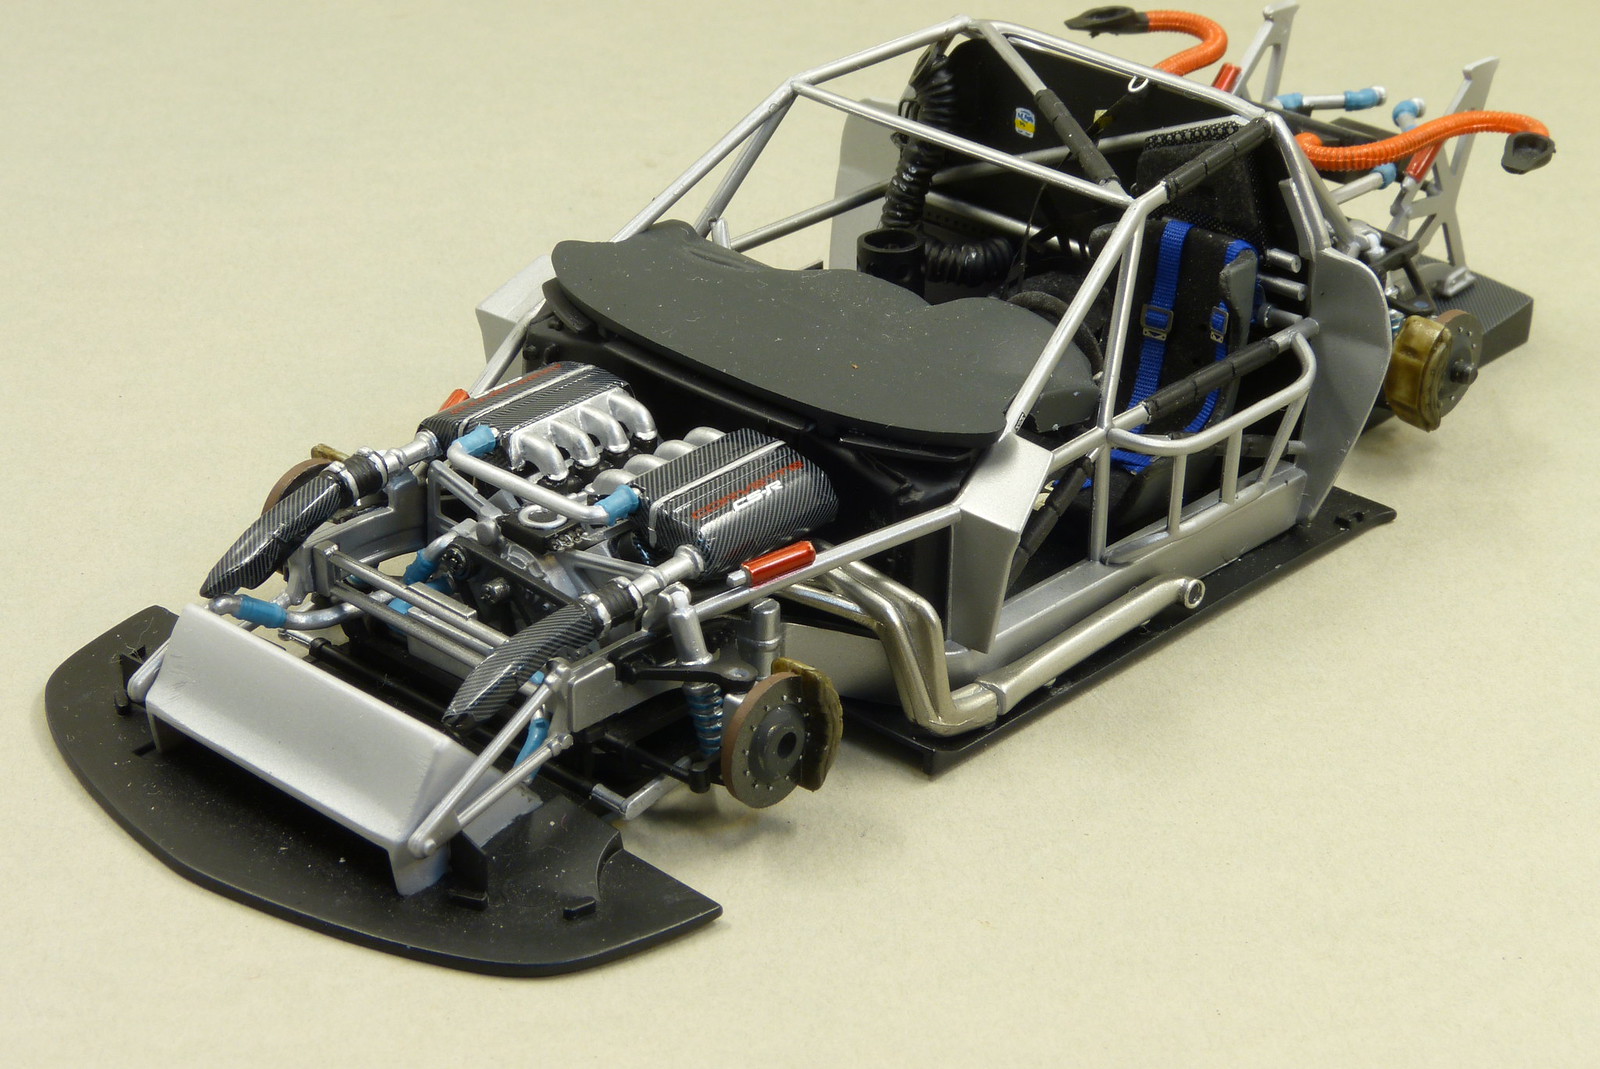
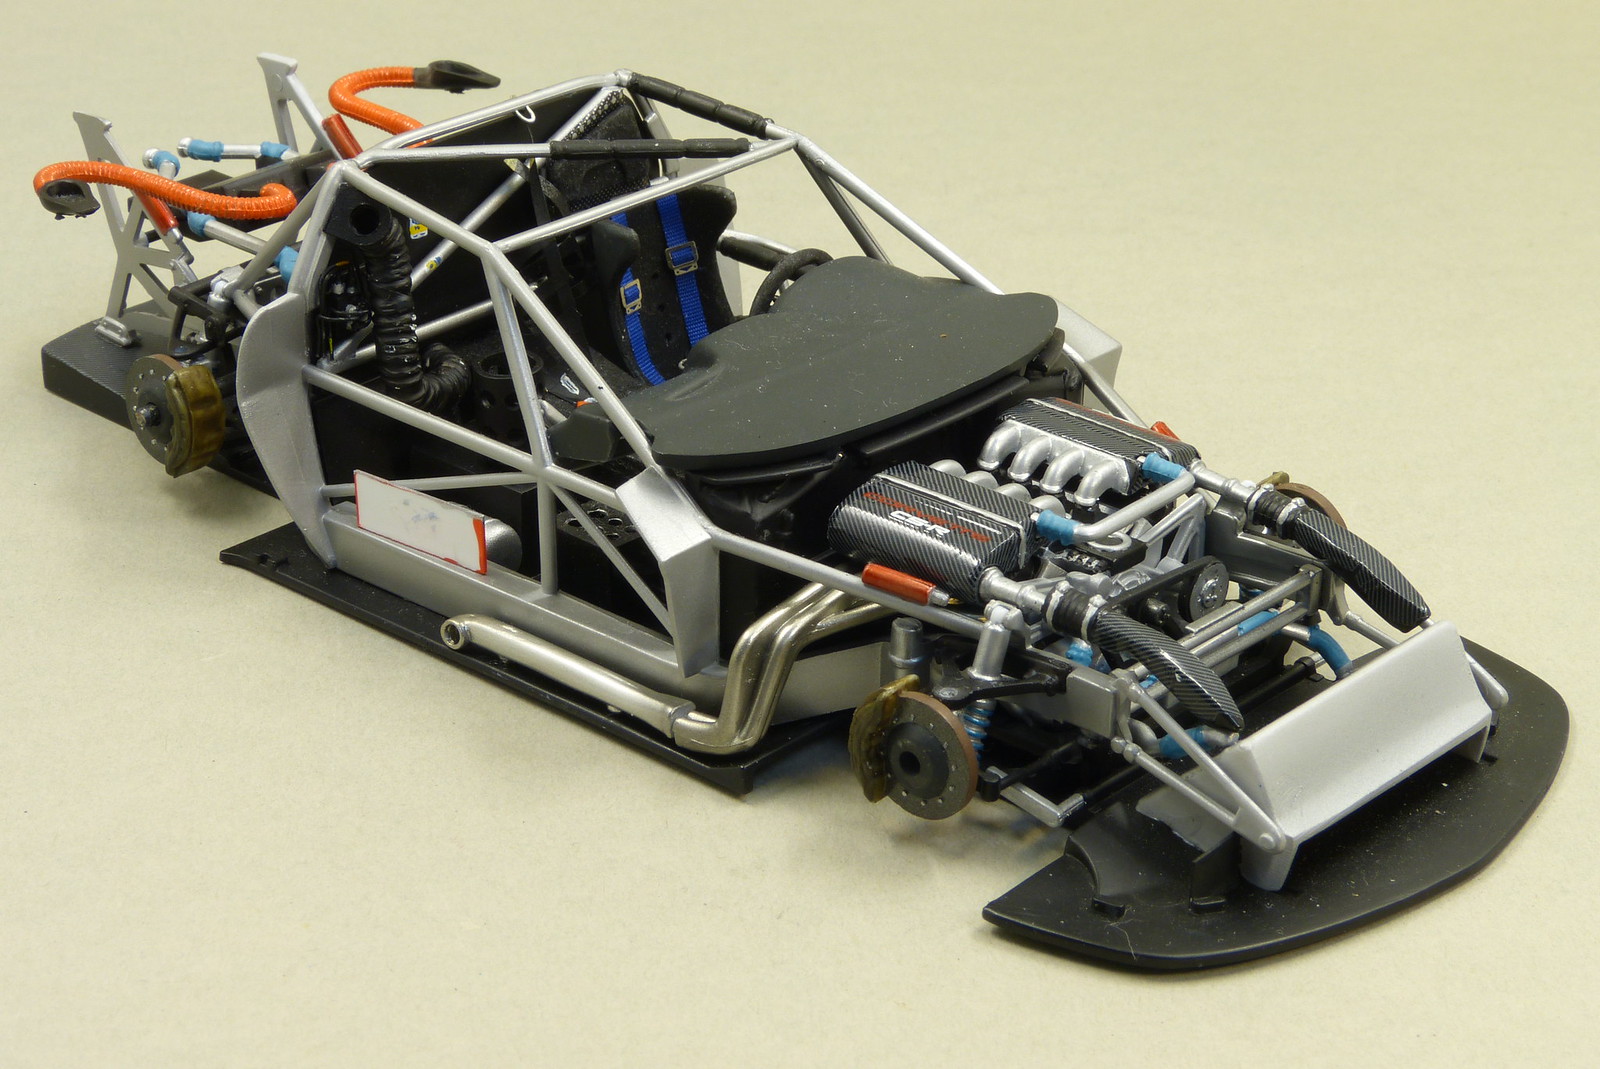
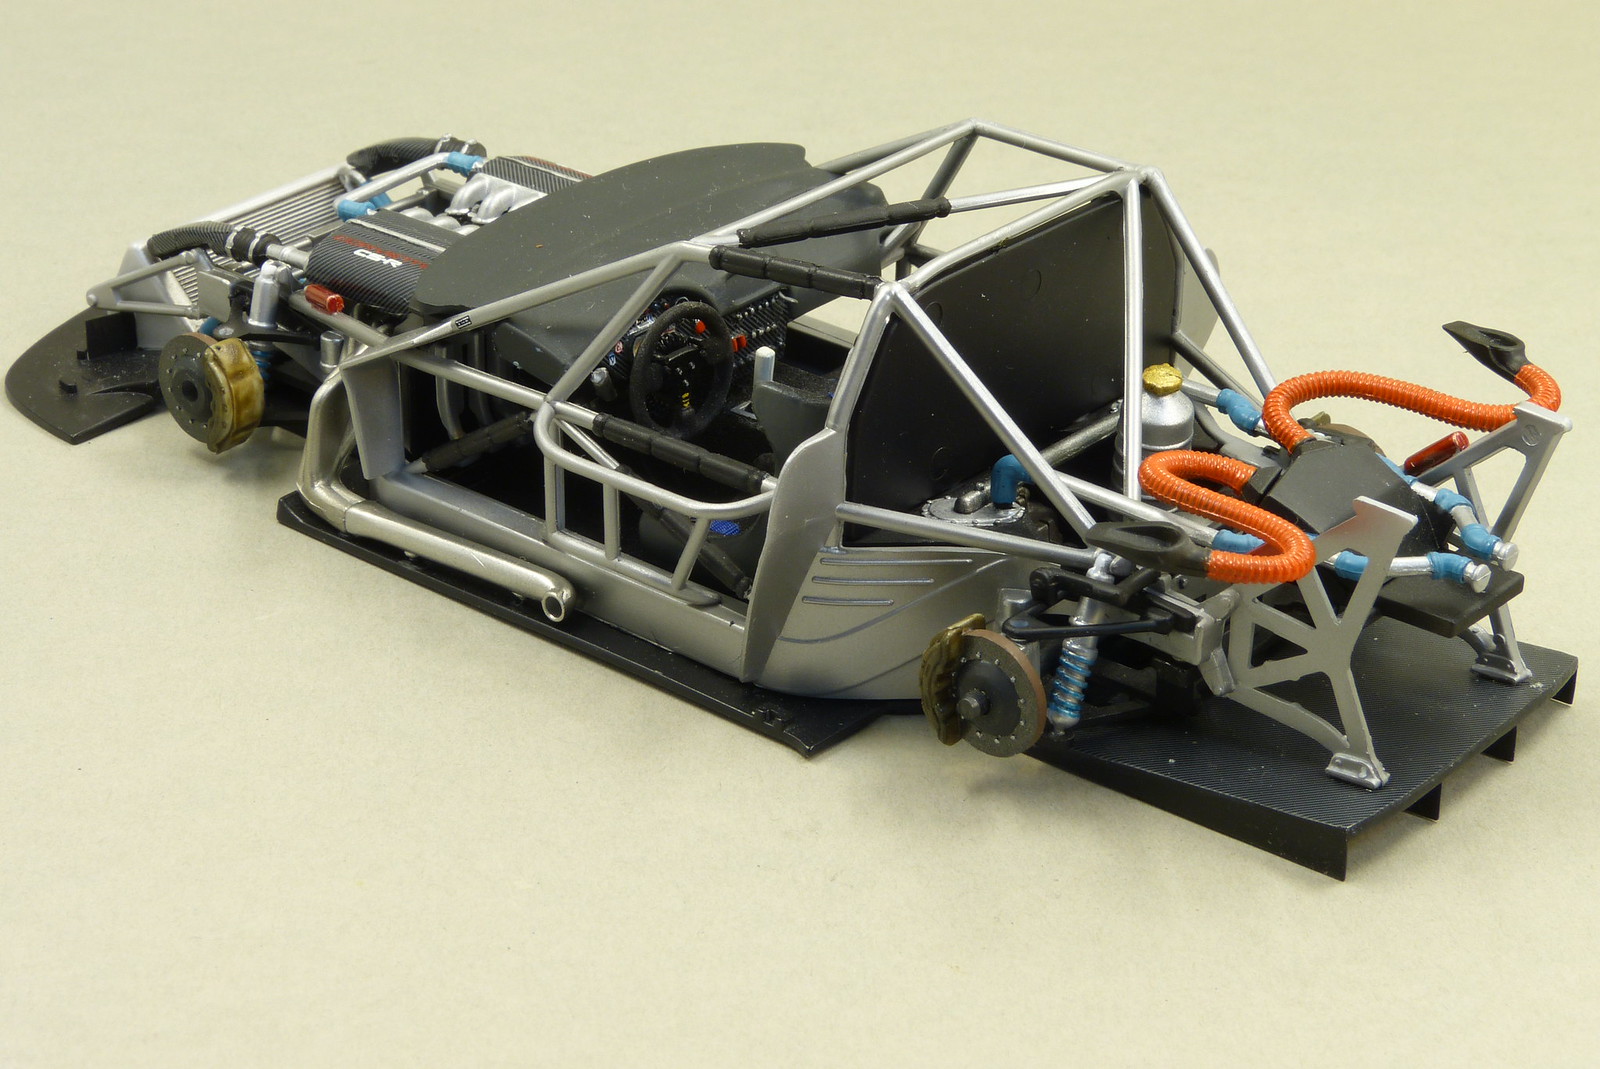
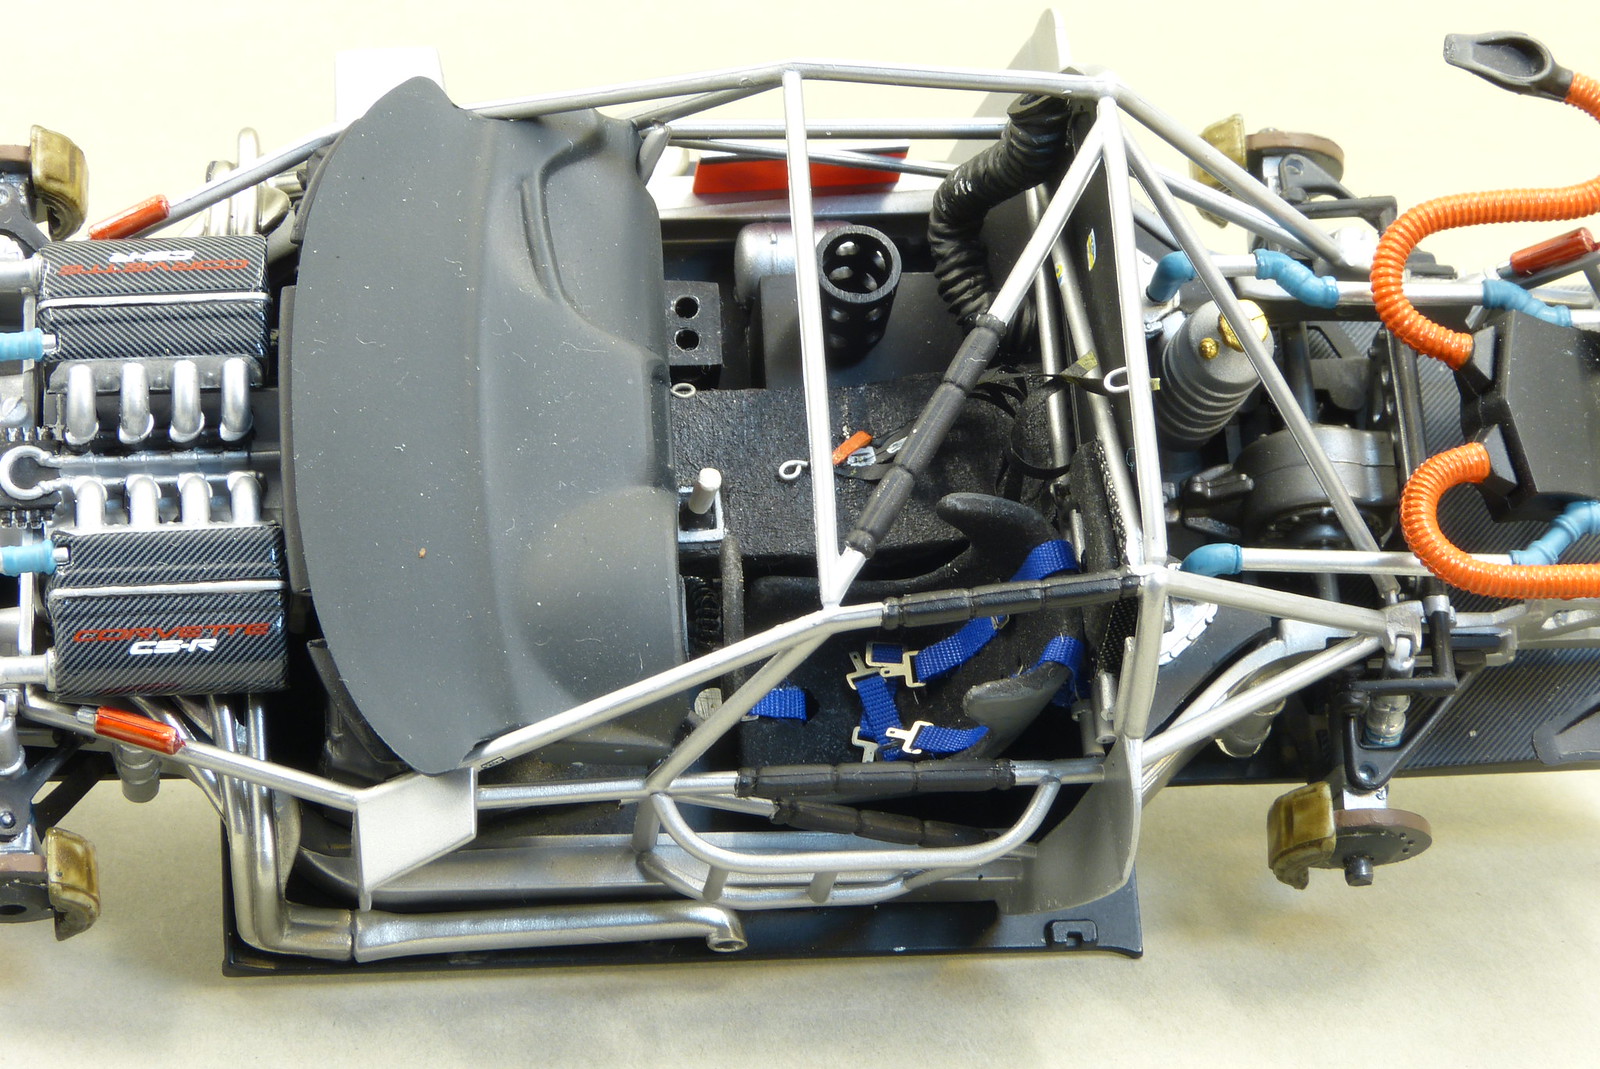
The interior has finally been finished.
Not without a few hiccups. I really wonder who decided on the building order... At the end of the instructions you're asked to mount the rear ARB. This sits on top of the rollcage and connects to the rear upper suspension arms.
For some reason though Revell has you attach the fuel cell/oil cooling ducts (at least I think they are) in step 11. And in the final step (19, for the interior that is) you're required to glue the rear ARB in place. To get this in place you must twist and turn the ARB part in between the cooling ducts and the roll cage. A bit fiddly, but it can be done.
It could have been done a lot easier though. A good lesson to never trust the building instructions, although in the end all came good.
With all the fiddling and fumbling around, paint has chipped off in several places due to the handling and/or the glue.
So before closing everything up I will have to wield the airbrush for a final time and respray a few details to give everything an uniform appearance.
The current state of affairs for the interior (without the touching up).
The last of the decals have also been applied to the body.
The arrows for the quick release latches and towing eyes weren't yet applied. Sadly Revell didn't provide all the required arrows for some reason.
In the end I needed something like 16 arrows, but the decal sheet only provided me with 14. But only the eagle-eyed will spot the missing arrows...
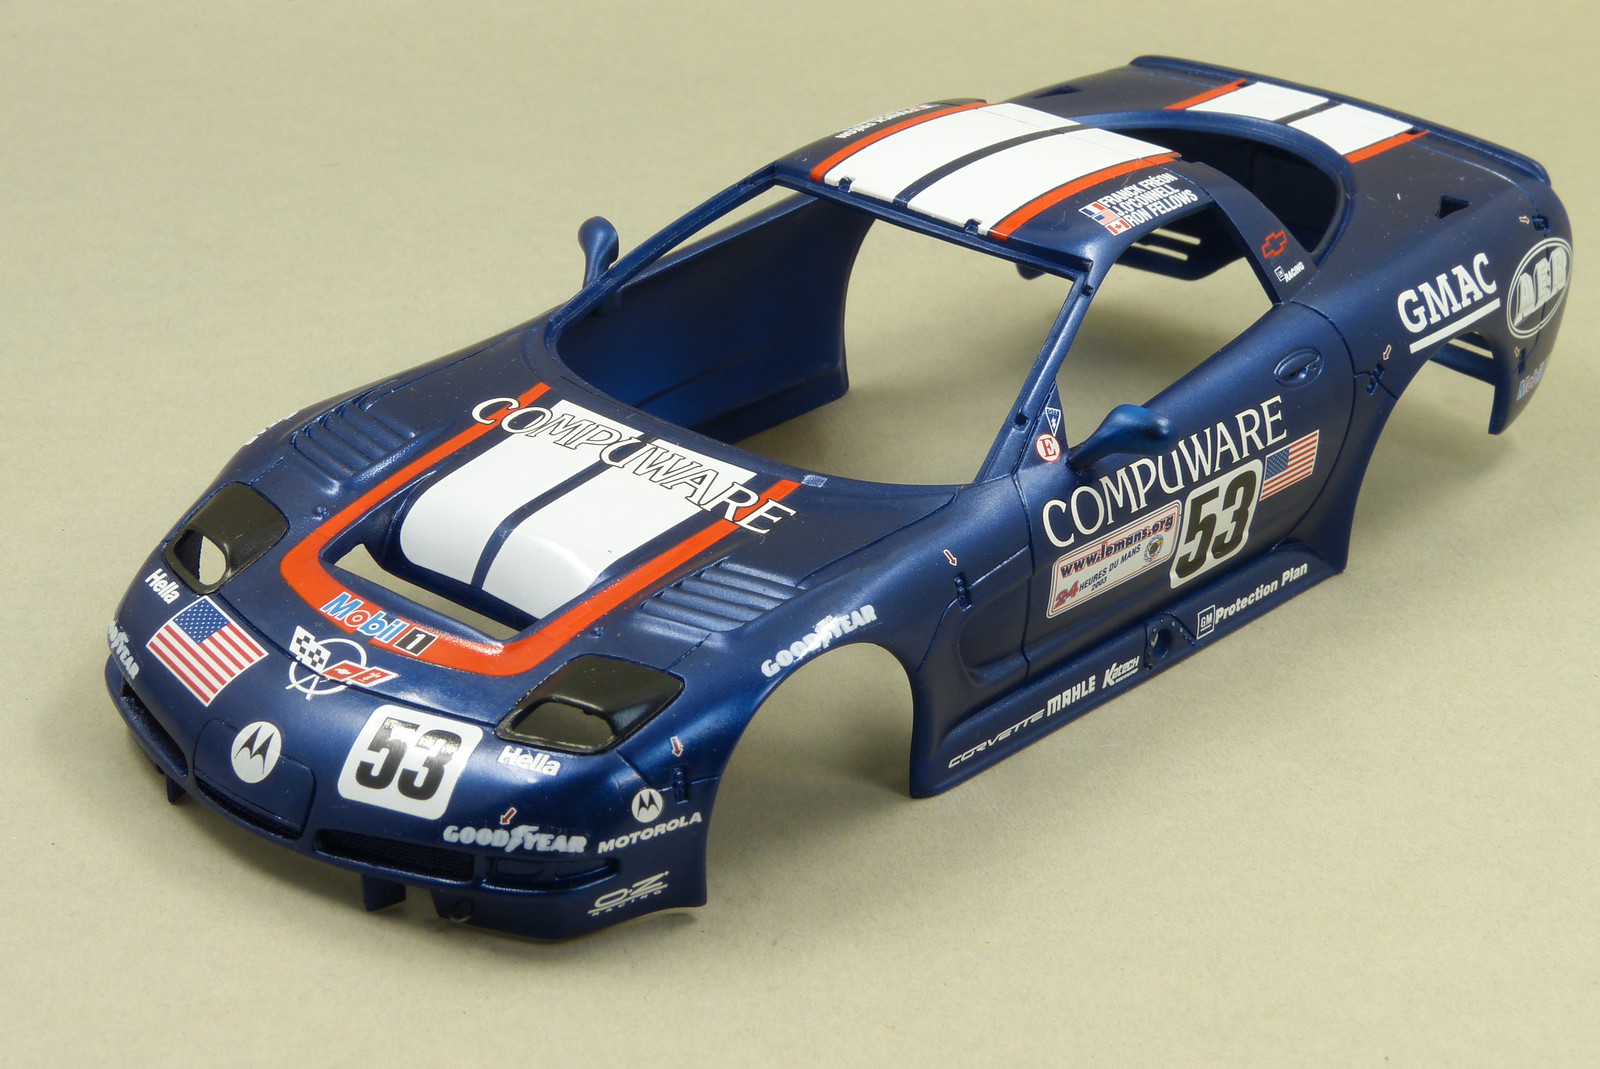
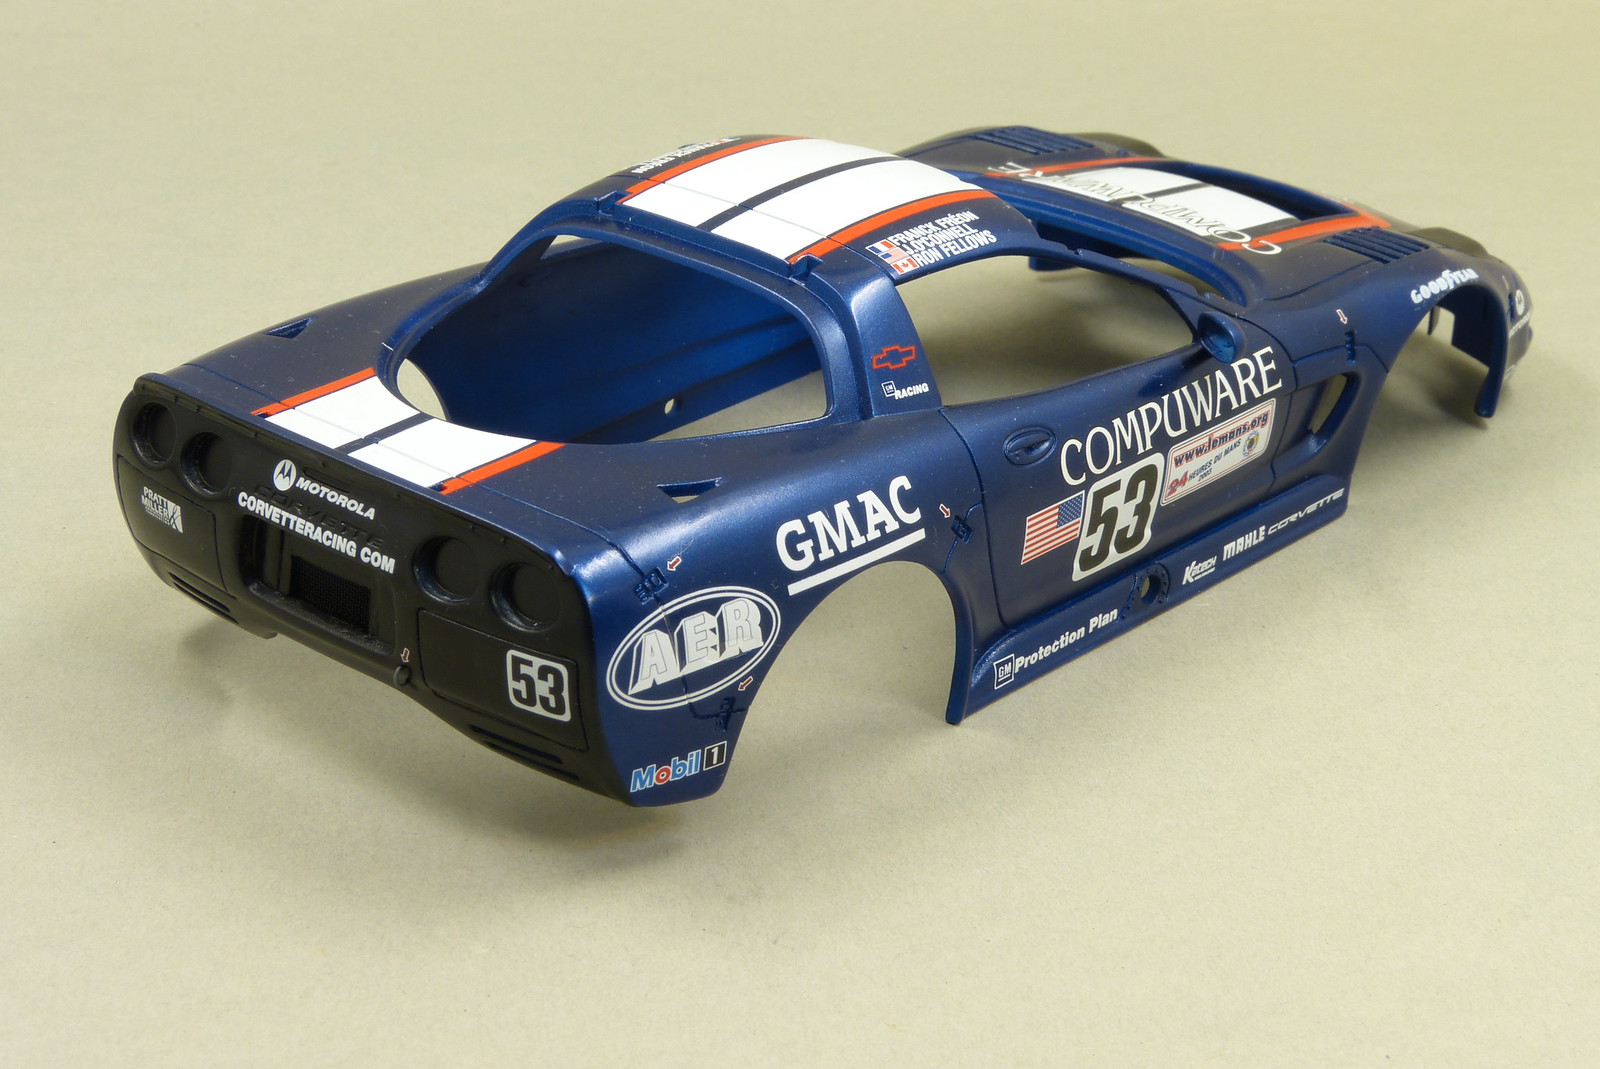
I also took care of the red striping (as can be seen in the pictures above).
A bit of a delicate affair, but I'm quite happy with the result.
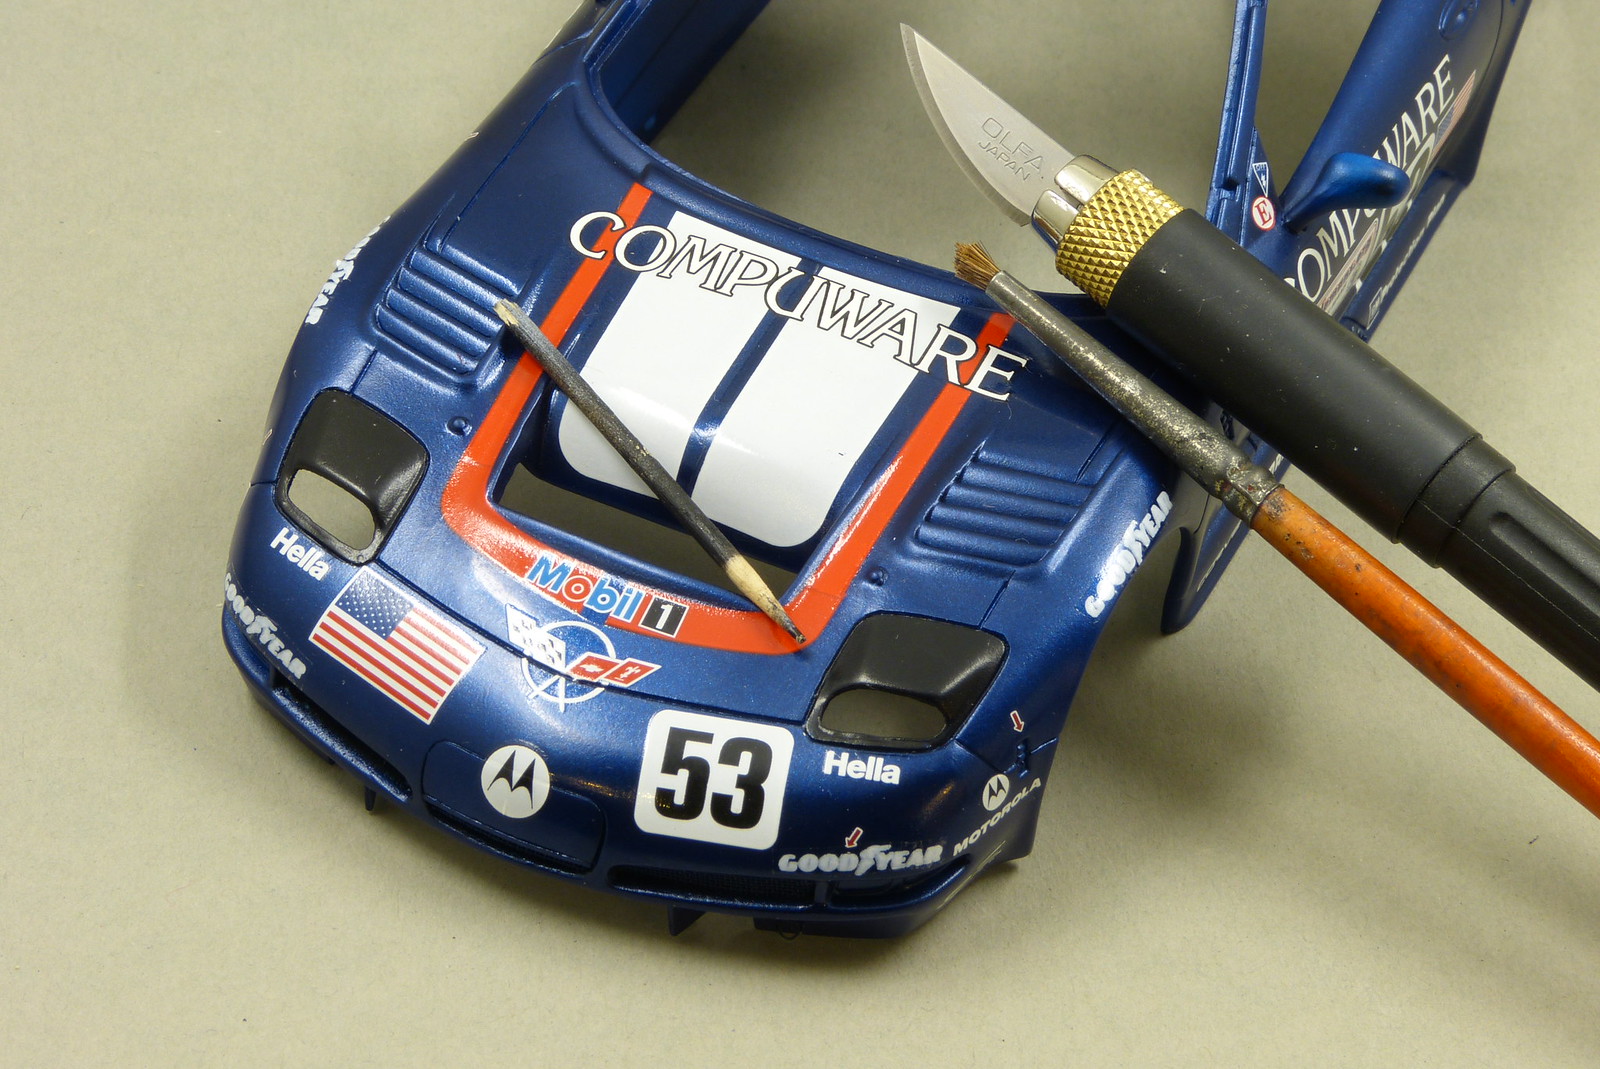
After a tip on a German forum I made a cut in the decals to split the decals so I could remove the offending sections.
To that end I used a stiff brush and some Micro Set to soak and rub the parts to be removed.
After the parts had been sufficiently soaked I used a toothpick to rub the sections off.
The clearcoat I sprayed before did it's job perfectly. The paint wasn't affected by all the handling.
This actually turned out better than I expected.
Now it's time for the clear coat.
This time I won't be using the Alclad Aqua Gloss clear. I'll give some 1K clear from Zero Paints a go.
Not without a few hiccups. I really wonder who decided on the building order... At the end of the instructions you're asked to mount the rear ARB. This sits on top of the rollcage and connects to the rear upper suspension arms.
For some reason though Revell has you attach the fuel cell/oil cooling ducts (at least I think they are) in step 11. And in the final step (19, for the interior that is) you're required to glue the rear ARB in place. To get this in place you must twist and turn the ARB part in between the cooling ducts and the roll cage. A bit fiddly, but it can be done.
It could have been done a lot easier though. A good lesson to never trust the building instructions, although in the end all came good.
With all the fiddling and fumbling around, paint has chipped off in several places due to the handling and/or the glue.
So before closing everything up I will have to wield the airbrush for a final time and respray a few details to give everything an uniform appearance.
The current state of affairs for the interior (without the touching up).
The last of the decals have also been applied to the body.
The arrows for the quick release latches and towing eyes weren't yet applied. Sadly Revell didn't provide all the required arrows for some reason.
In the end I needed something like 16 arrows, but the decal sheet only provided me with 14. But only the eagle-eyed will spot the missing arrows...
I also took care of the red striping (as can be seen in the pictures above).
A bit of a delicate affair, but I'm quite happy with the result.
After a tip on a German forum I made a cut in the decals to split the decals so I could remove the offending sections.
To that end I used a stiff brush and some Micro Set to soak and rub the parts to be removed.
After the parts had been sufficiently soaked I used a toothpick to rub the sections off.
The clearcoat I sprayed before did it's job perfectly. The paint wasn't affected by all the handling.
This actually turned out better than I expected.
Now it's time for the clear coat.
This time I won't be using the Alclad Aqua Gloss clear. I'll give some 1K clear from Zero Paints a go.
Comments
Post a Comment