...3D printed parts.
Way back in 2015 I posted an entry about 3D modelling and printing, a post started because of the need for special wheels for a(nother) project.
Fast forward almost three years and it has finally happened. My first 3D printed parts. In this case being the rear wheels of the no. 71 Ferrari F458GT2 that was raced at the 2013 edition of the Le Mans 24 hours race, with (amongst others) Kamui Kobayashi at the wheel.
But things have changed a bit.
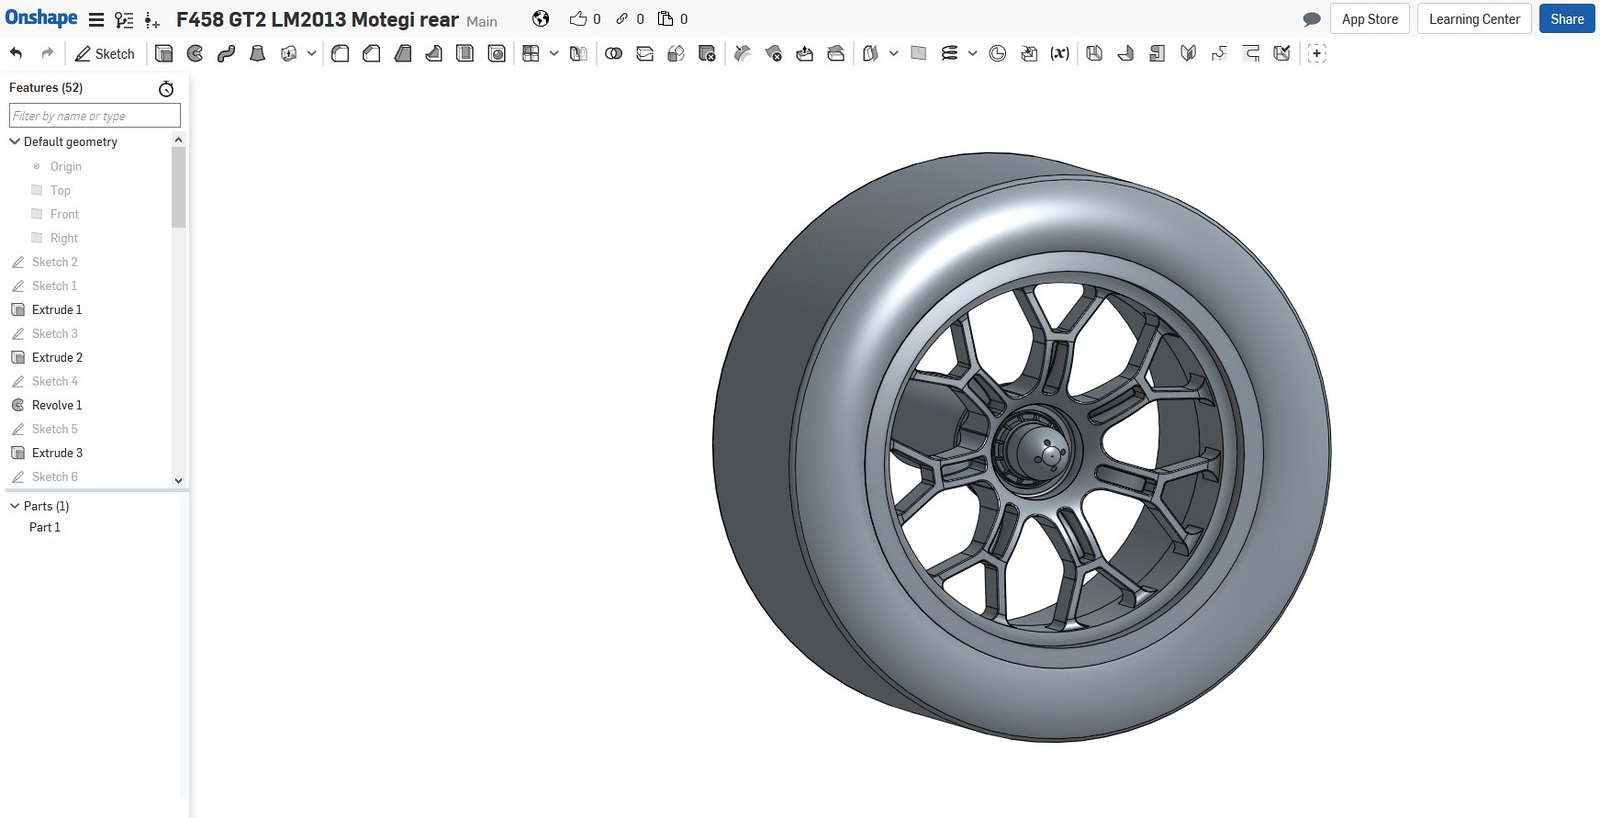
For one, I switched CAD programs. The first version was drawn in SolidWorks. But the final version has been drawn in OnShape (an on-line 3D CAD program).
And I haven't used any third party sevice like Shapeways but "just" bought my own 3D printer...
But let's start at the beginning: The 3D model.
The first model which I made in SolidWorks was rather crude. After upgrading my PC (I'm talking 2016 here), I didn't bother reinstalling SolidWorks and went with OnShape instead. The differences are minimal, but the best feature of OnShape is the fact that I can access my 3D models anywhere (yes, I know there are other similar services, but I rather like this one and can't really be bothered to look into alternatives).
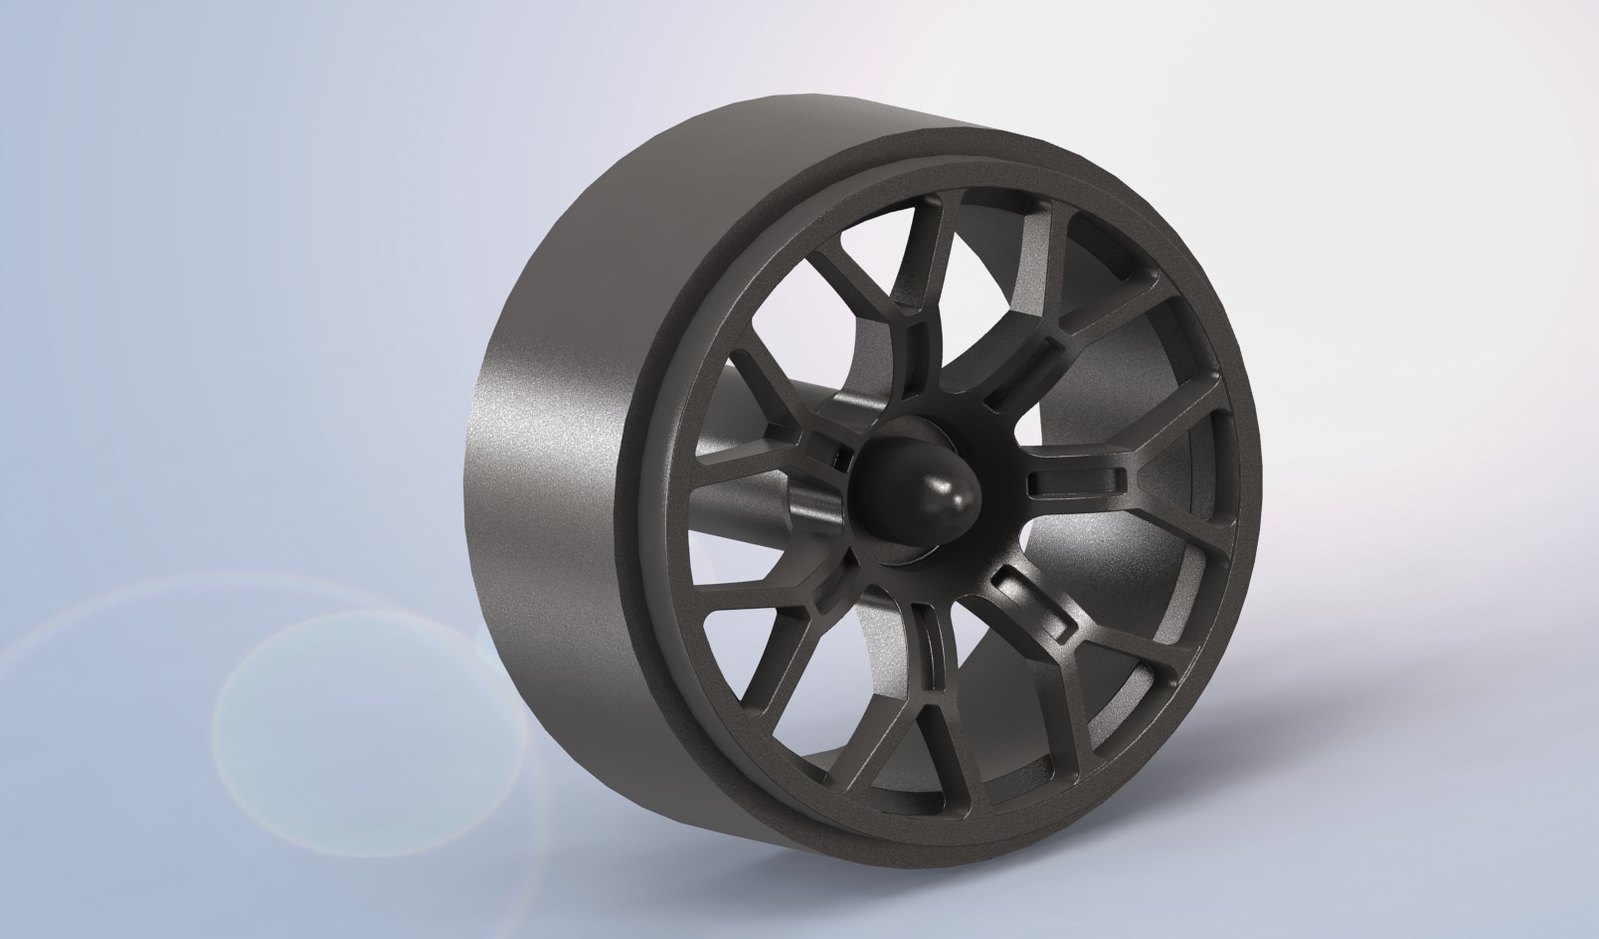
At first I was planning to print only the rims, but I soon decided that it would be easier to print the complete wheels (rim and tire). I measured up the existing wheels from the kit and began work. To make life a bit easier I inserted a picture of the original wheel into my CAD model. And in the end the final version looked like this:
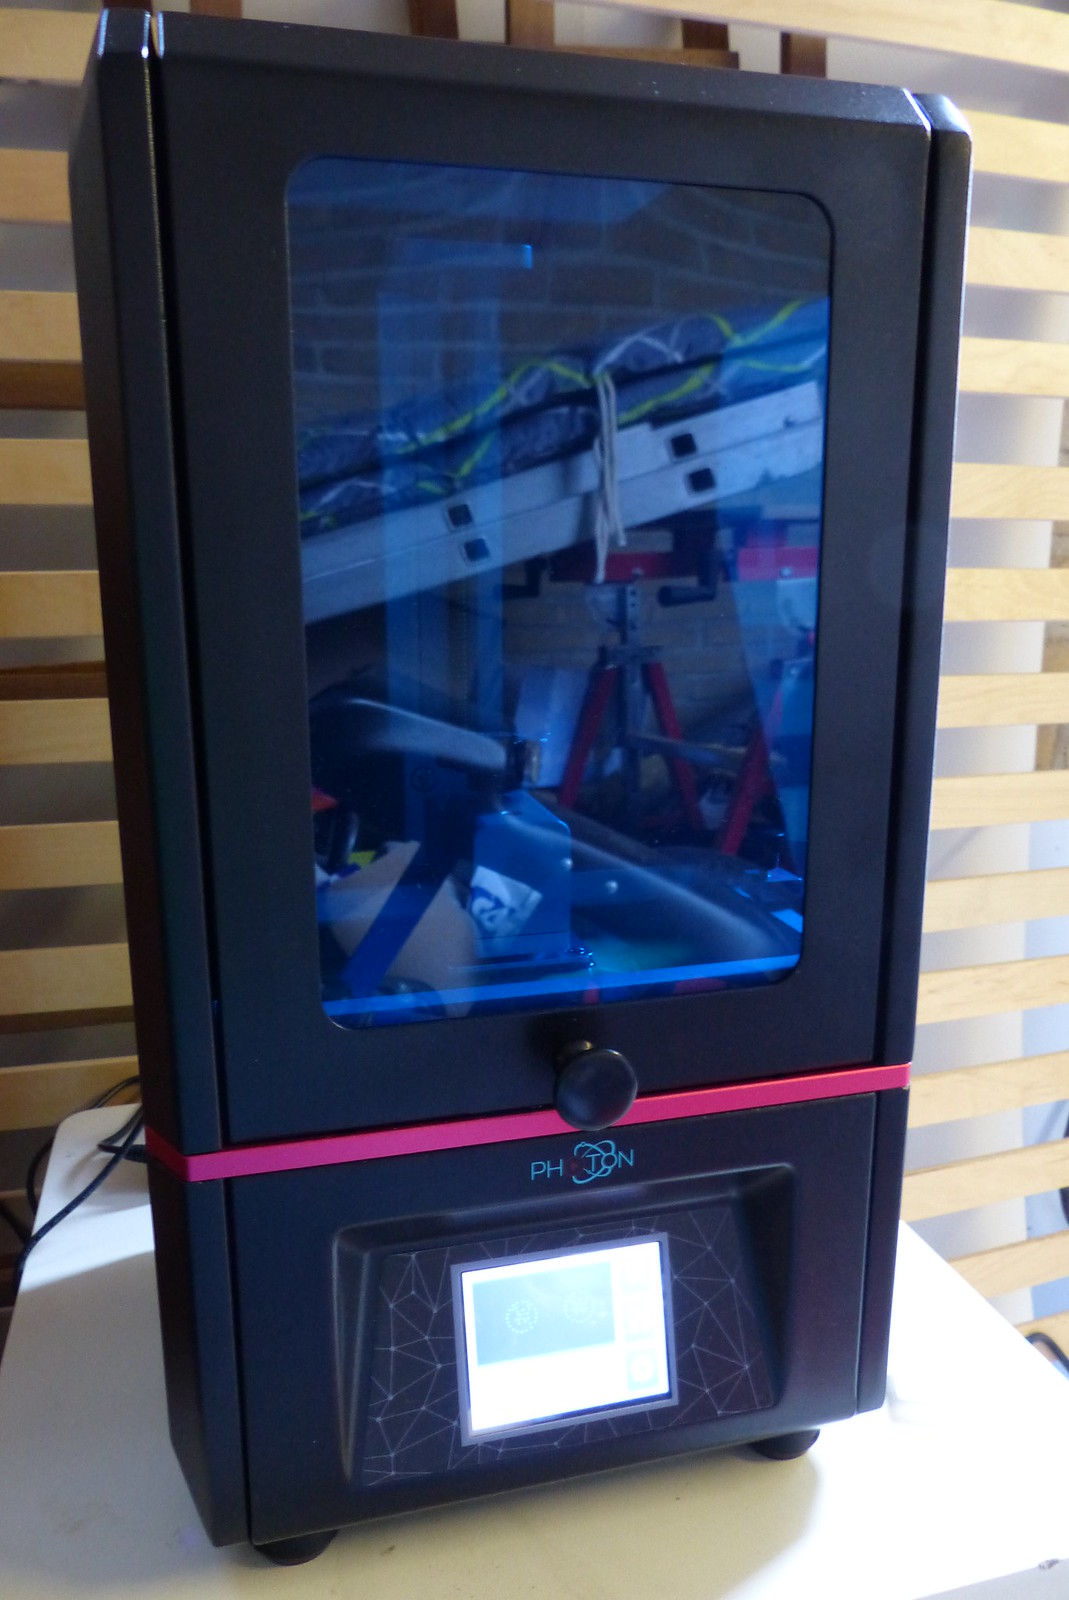
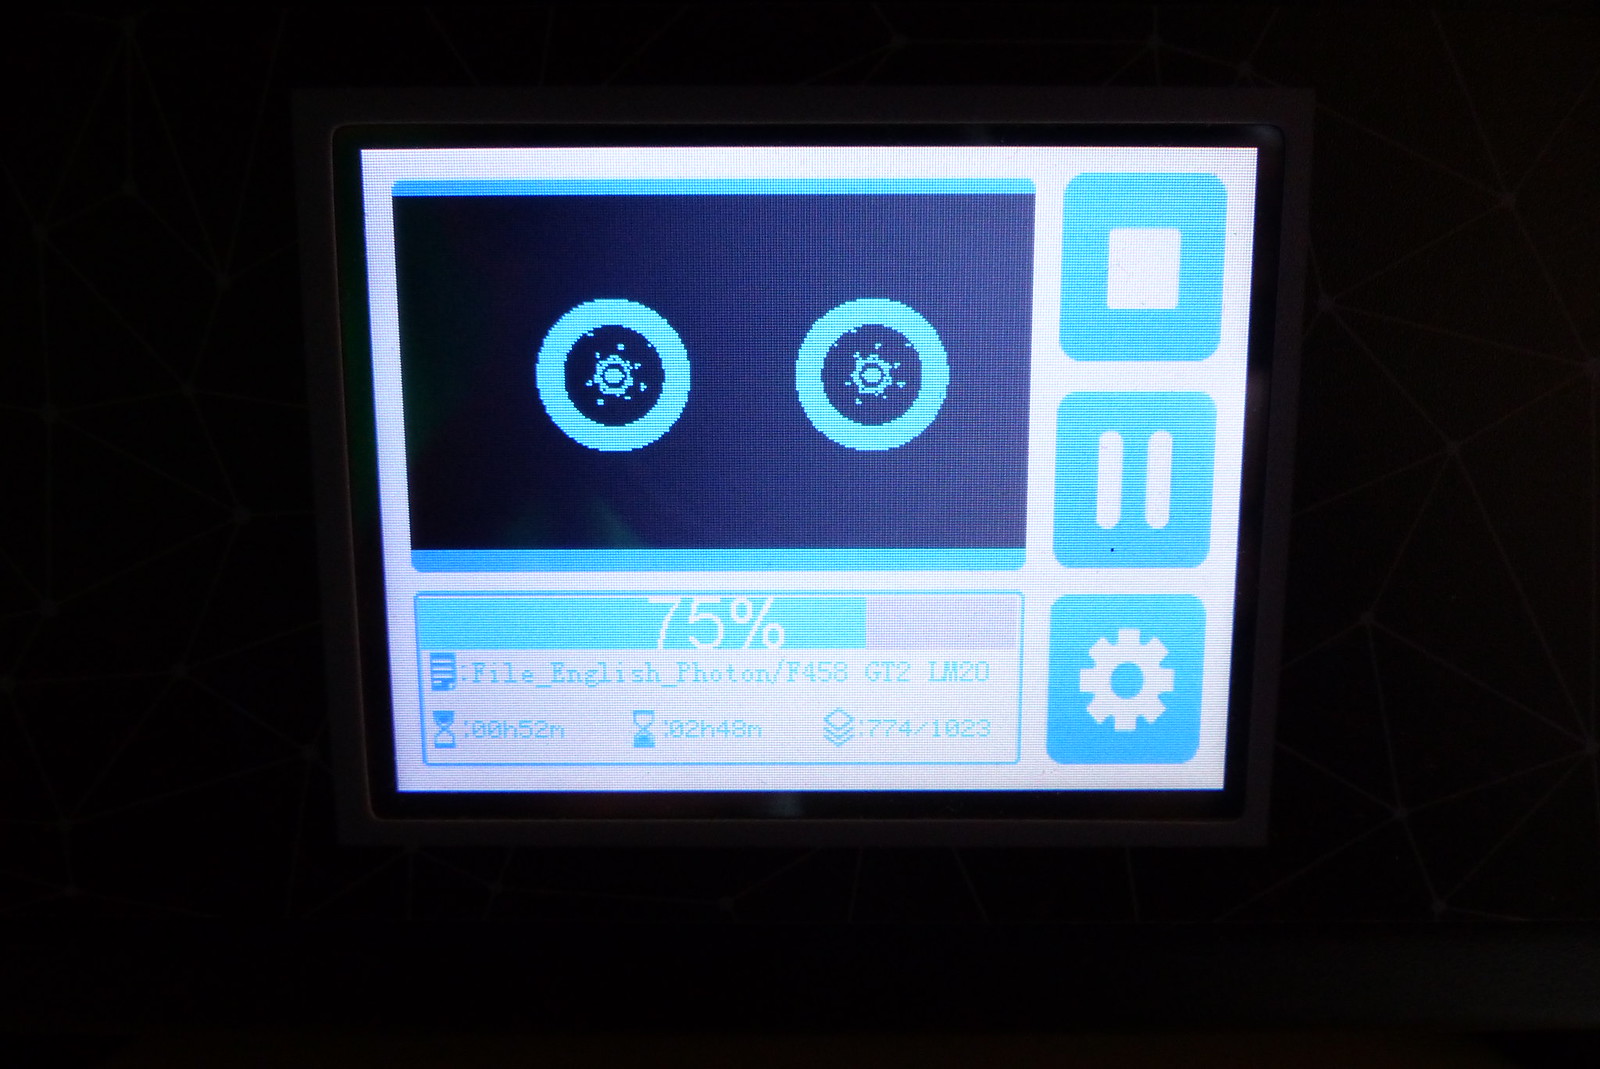
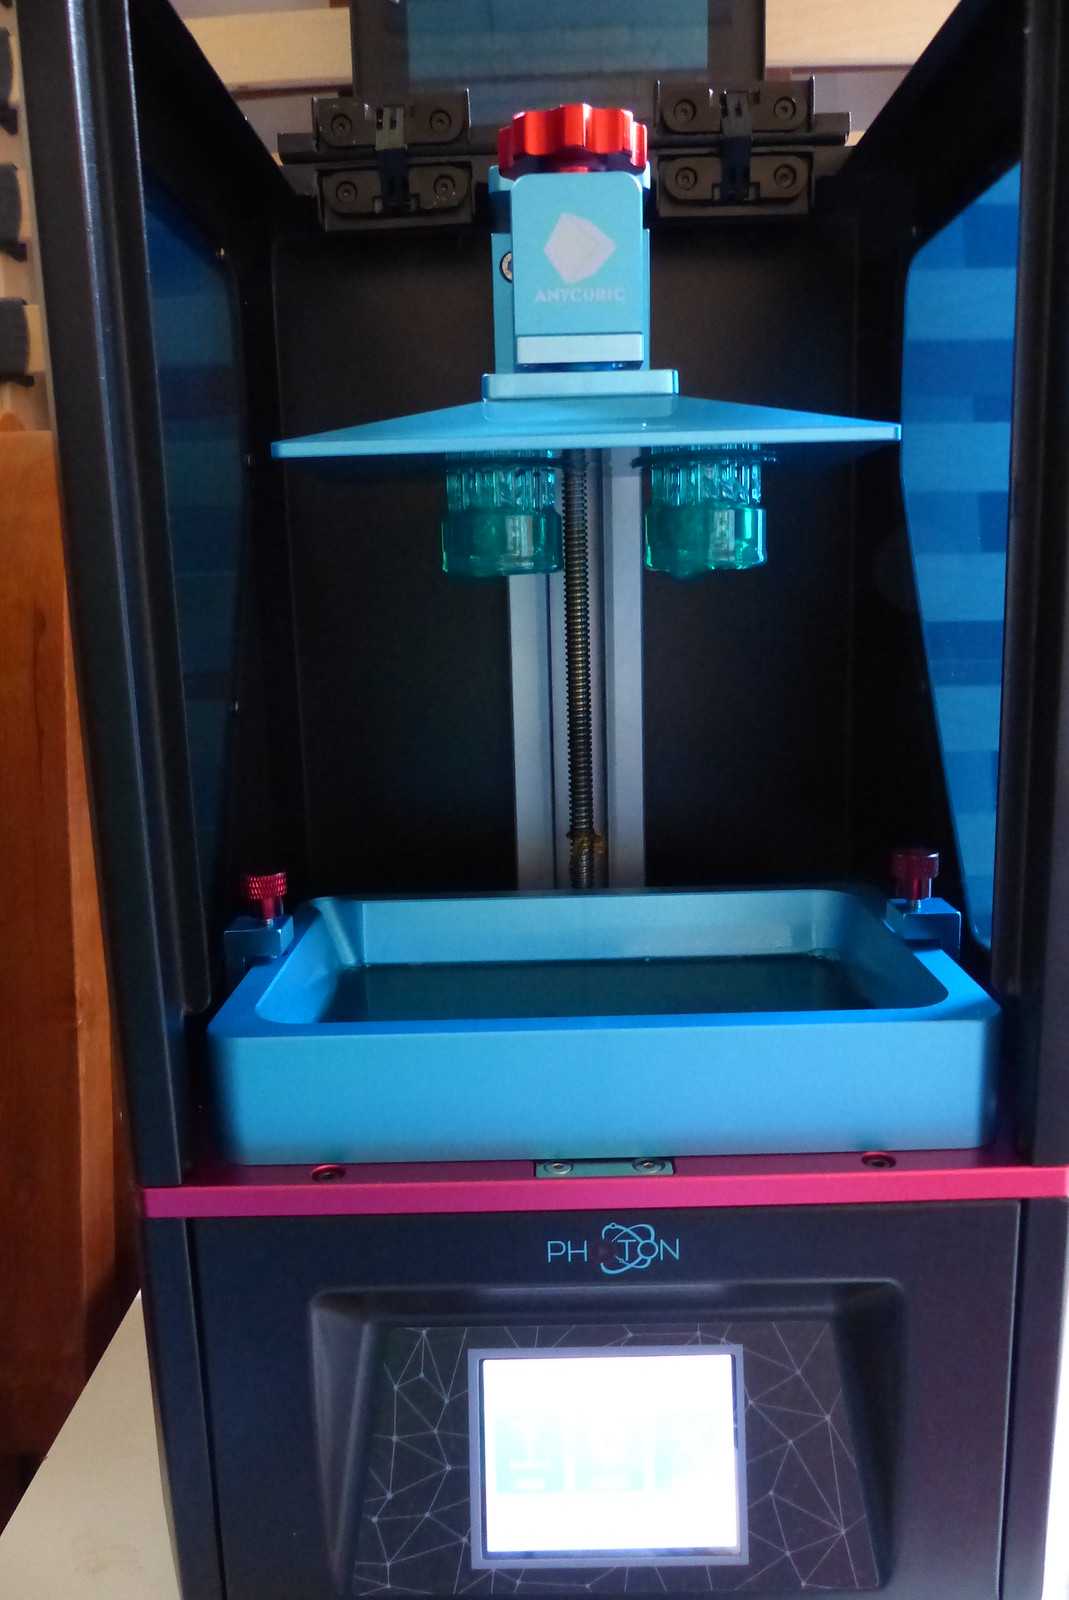
Original plan was to send the STL-file of the finished model to a third party service but that plan got ditched when I read about a particular 3D printer on the German Das Modellboard forum. There I read about the Anycubic Photon printer, which wasn't an "ordinary" FDM printer but used UV-curing resin as a printing material. After seeing several YouTube videos on the printer and the apparent quality of the parts I decided to buy one. Although I bought the printer sometime at the end of July, it took me until last weekend to finally print something. I set the printer up in the garage (as the smell during printing is quite strong and probably not the healthiest type of fumes to inhale) and after a considerable waiting time of 3 hours and 10 minutes the parts were ready.
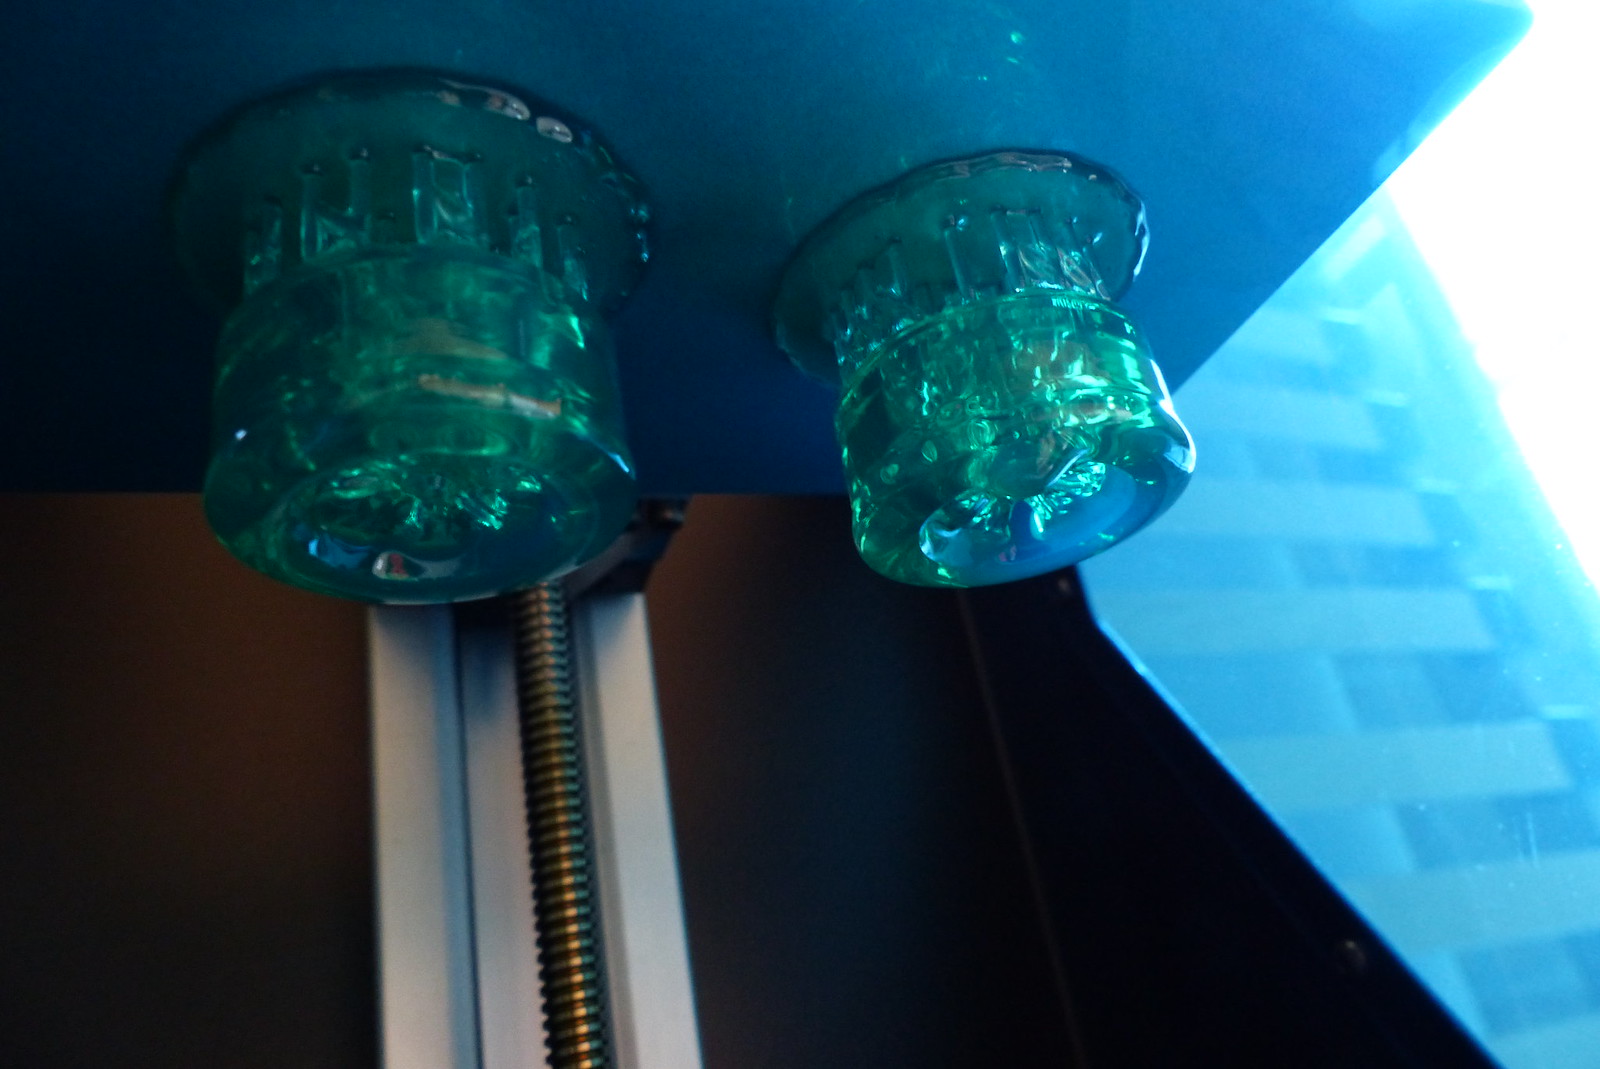
After a quick clean-up with alcohol (96%) to remove the remnants of the liquid resin I placed the rims outside in the very comfy Octobre sun to let the parts cure thoroughly. Immediately after printing the parts still felt a bit sticky (although they are solid enough) and it is advised to let them cure in direct sunlight or under a UV-lamp. So after a good cure in the sun they look like this:


The resin is slighly translucent, so it is hard to see the details, but the detail is actually quite nice. As you can see there are several imperfections visible here and there. Just remember that these parts haven't been treated in any way yet.
To keep this blog post a decent size I've decided to go a bit deeper into the settings I used for printing and the things I noticed and experienced during printing and after cleaning up the parts.
So keep an eye on this blog... Got some catching up to do.
Way back in 2015 I posted an entry about 3D modelling and printing, a post started because of the need for special wheels for a(nother) project.
Fast forward almost three years and it has finally happened. My first 3D printed parts. In this case being the rear wheels of the no. 71 Ferrari F458GT2 that was raced at the 2013 edition of the Le Mans 24 hours race, with (amongst others) Kamui Kobayashi at the wheel.
But things have changed a bit.
For one, I switched CAD programs. The first version was drawn in SolidWorks. But the final version has been drawn in OnShape (an on-line 3D CAD program).
And I haven't used any third party sevice like Shapeways but "just" bought my own 3D printer...
But let's start at the beginning: The 3D model.
The first model which I made in SolidWorks was rather crude. After upgrading my PC (I'm talking 2016 here), I didn't bother reinstalling SolidWorks and went with OnShape instead. The differences are minimal, but the best feature of OnShape is the fact that I can access my 3D models anywhere (yes, I know there are other similar services, but I rather like this one and can't really be bothered to look into alternatives).
 |  |
| The original | My first attempt in SolidWorks |
At first I was planning to print only the rims, but I soon decided that it would be easier to print the complete wheels (rim and tire). I measured up the existing wheels from the kit and began work. To make life a bit easier I inserted a picture of the original wheel into my CAD model. And in the end the final version looked like this:
 |  |
| Cheating along... | Final version in OnShape |
Original plan was to send the STL-file of the finished model to a third party service but that plan got ditched when I read about a particular 3D printer on the German Das Modellboard forum. There I read about the Anycubic Photon printer, which wasn't an "ordinary" FDM printer but used UV-curing resin as a printing material. After seeing several YouTube videos on the printer and the apparent quality of the parts I decided to buy one. Although I bought the printer sometime at the end of July, it took me until last weekend to finally print something. I set the printer up in the garage (as the smell during printing is quite strong and probably not the healthiest type of fumes to inhale) and after a considerable waiting time of 3 hours and 10 minutes the parts were ready.
After a quick clean-up with alcohol (96%) to remove the remnants of the liquid resin I placed the rims outside in the very comfy Octobre sun to let the parts cure thoroughly. Immediately after printing the parts still felt a bit sticky (although they are solid enough) and it is advised to let them cure in direct sunlight or under a UV-lamp. So after a good cure in the sun they look like this:
The resin is slighly translucent, so it is hard to see the details, but the detail is actually quite nice. As you can see there are several imperfections visible here and there. Just remember that these parts haven't been treated in any way yet.
To keep this blog post a decent size I've decided to go a bit deeper into the settings I used for printing and the things I noticed and experienced during printing and after cleaning up the parts.
So keep an eye on this blog... Got some catching up to do.
Comments
Post a Comment