Slow progress
As the title of this update reads, work has been a bit slow on this car.
Most of my time has been devoted to the other 2 cars I am building.
As a matter of fact, I actually demodelled this car a bit, leaving me with more work to do, instead of less.
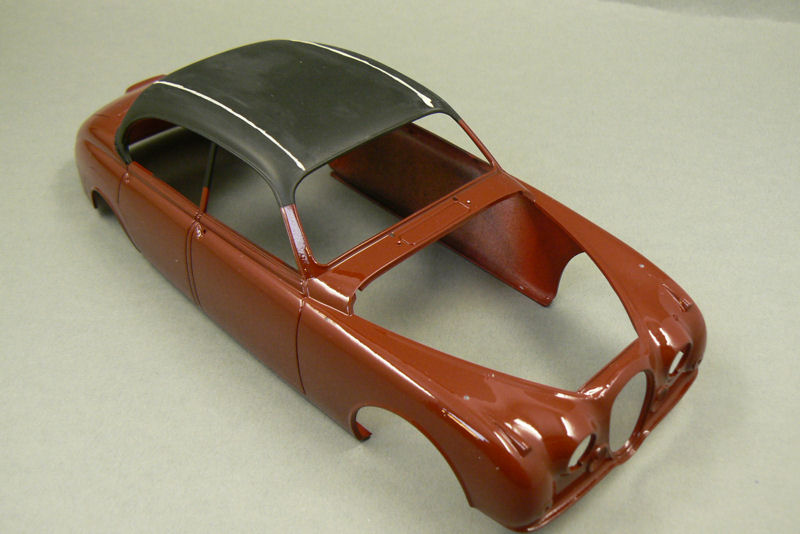
I've been not quite happy with the way tho roof looked. Especially the seams of the vinyl roof I had created with thin wire (0.25 mm).
Although the wire is very thin, I still found it out of scale, so I removed the "seams" from the roof, to replace them with thinner wire. And hoping that it will look more in scale.
Another valid reason for removing the wires was because I had been a bit sloppy with the glue. And because the layer of paint on the roof was very thin, the spilled glue stood out quite sharply.
So, after I had removed the wires, I sanded the roof smooth. Only thing to do now is glue some new, thinner (I have 0.15 lying around) wires to the roof, and repaint it.
 Wheels keep on turning
While scouring eBay for some kits I accidentaly stumbled upon the following kit:
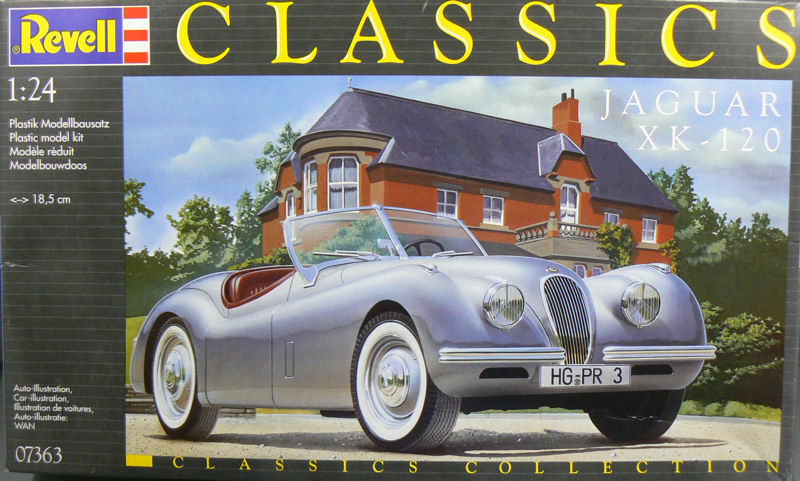 The wheels of this car immediately caught my attention. They looked just like the wheels on the Inspectors car.
So I bought the kit. Only to find out that, although the wheels are indeed the ones I'm looking for, mounting them to the Inspectors car will be a whole different story.
Apart from the fact that I think it might be quite a challenge fitting Tamiya's soft vinyl tires around these rims.
Because, where Tamiya's wheels are made as one piece, the wheels from the Revell kit are made up of several parts (partly integrated with the tire). And that's not taking into account the different mounting principle.
First two pictures below are from Revell, the last one is from Tamiya.


 In other words. I've got quite some work to do on this one.
End of this update.
As the title of this update reads, work has been a bit slow on this car.
Most of my time has been devoted to the other 2 cars I am building.
As a matter of fact, I actually demodelled this car a bit, leaving me with more work to do, instead of less.
I've been not quite happy with the way tho roof looked. Especially the seams of the vinyl roof I had created with thin wire (0.25 mm).
Although the wire is very thin, I still found it out of scale, so I removed the "seams" from the roof, to replace them with thinner wire. And hoping that it will look more in scale.
Another valid reason for removing the wires was because I had been a bit sloppy with the glue. And because the layer of paint on the roof was very thin, the spilled glue stood out quite sharply.
So, after I had removed the wires, I sanded the roof smooth. Only thing to do now is glue some new, thinner (I have 0.15 lying around) wires to the roof, and repaint it.
While scouring eBay for some kits I accidentaly stumbled upon the following kit:
So I bought the kit. Only to find out that, although the wheels are indeed the ones I'm looking for, mounting them to the Inspectors car will be a whole different story.
Apart from the fact that I think it might be quite a challenge fitting Tamiya's soft vinyl tires around these rims.
Because, where Tamiya's wheels are made as one piece, the wheels from the Revell kit are made up of several parts (partly integrated with the tire). And that's not taking into account the different mounting principle.
First two pictures below are from Revell, the last one is from Tamiya.
End of this update.
Comments
Post a Comment