a major mishap
To keep my updates in style, I decided to start this update also with a mishap. An unintentional one, but a mishap it was. A major mishap to be precise.
Last update I mentioned that I wanted to take this car to the Euro Scale Modeling contest in Nieuwegein. But thanks to this major f*ck up, the car stays at home. Inside a nice comfy bath of brake fluid...
After I had sanded the very mild orange-peel out of the paint with MicroMesh sanding cloths, I took out the Tamiya Fine Compound (the one with the blue cap) to give the paint a nice finish.
And everything was going quite alright. I got a nice shine out of the paint and was quite satisfied with the finish. Only problem was that there were still minor swirl-marks visible because of the polishing process.
And for some reason I wasn't able to get rid of these marks.
In the meantime I had ordered some stuff from Hiroboy, amongst which was Finishing Compound from Tamiya. But as I wasn't sure whether I would receive this compound in time, I decided last weekend to put some clear over the paint, to hide the swirlmarks and give the paint a tough protecting layer.
While I had used Tamiya's X22 Clear for the Jaguar of Inspector Morse, I didn't want to use this clear on this car because of the problems I'd had with achieving a smooth layer.
I decided to use Revell's Aqua Colour clear for this project, because I've had only positive results with Revell's series of paint.
Until last weekend that is. Because, although the paint layed down perfectly and smooth on the car, it dried rough and almost flat with no shine at all.
I can say that I wasn't really thrilled with this result. Sunday evening I tried for almost an hour to see whether is was possible to salvage the paint job, but alas. No go for the ESM and go for the brake fluid.
The worst part however, is that I really can't pin down what went wrong here. It could be that I thinned the clear too much, but I really don't think so.
But in the future I won't be using this clear on my cars anymore, unless I find out what went wrong.
Below are a few pictures of the car body, before it went into the brake fluid. The second picture is from the roof, after I tried to save what could be saved...
Sadly I forgot to take any pictures before I applied the clear, so there's no proof that the car looked better before...

 Not all was bad
Not taking into account the disaster I had with the clear coat, this build was actually coming along quite well.
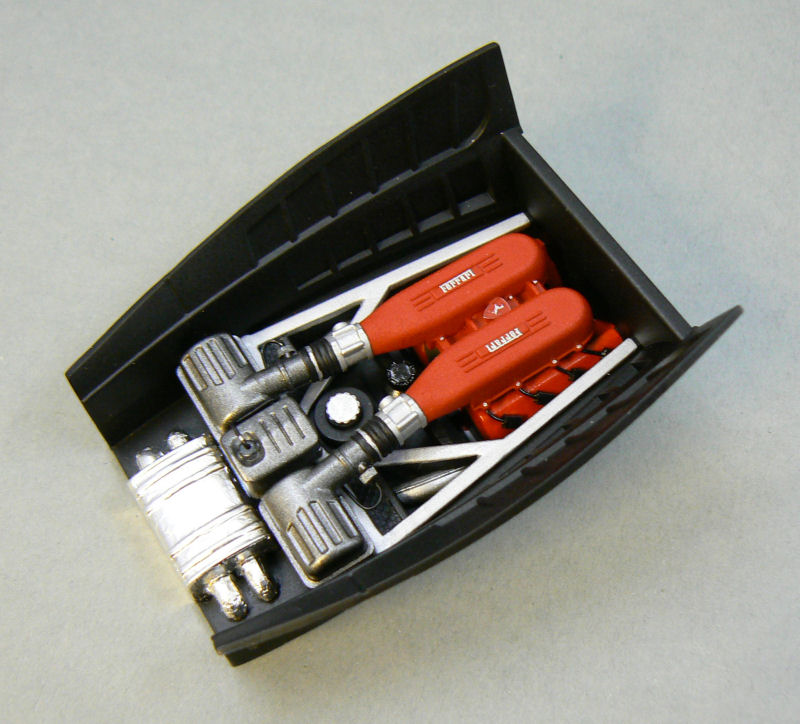
The engine room has received a few extra details and has been finished.
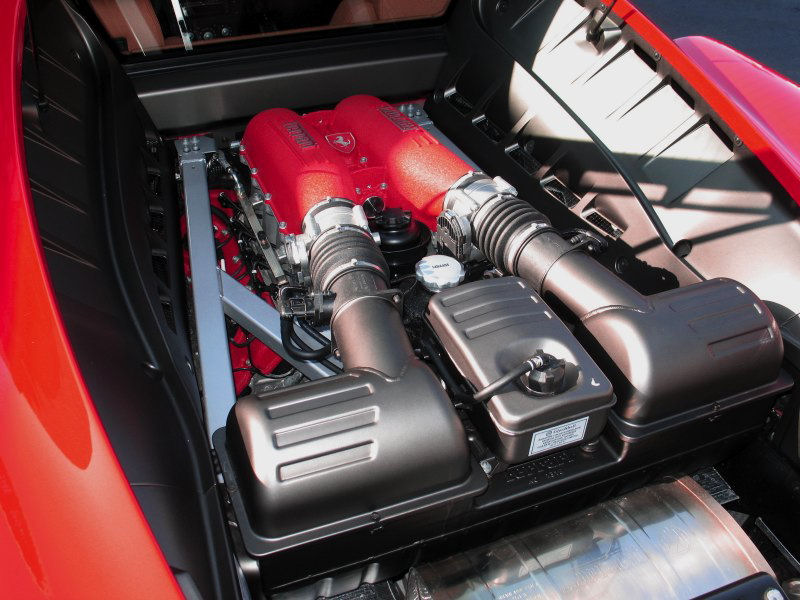
I used several photo's (of which one is shown below as a comparance) as reference to add the cables and hoses that are in the engine room. Not 100% accurate (which is impossible anyway, because Fujimi has simplified the engine compartment in this kit a lot), but it looks quite nice anyway (at least in my opinion).
 The interior has also been finished in the meantime.
And here I also added several extra's to spice things up a bit.
As the interior is quite bright I felt the need to add those extra's because the interior will be quite visible when the car is complete.
So I made a few extra bits with some styrene materials and I also added seatbelts using PE parts from the Crazy Modeler detail set and black silk ribbon (2 mm wide).

 And after the interior and engine room had been finished I mounted them onto the chassis:


 The final thing I've been working on are the windows.
I had already painted the black areas of the windows. But as the build progressed I felt that I also had to paint the interior of the clear part that's been used for the windows.
It probably won't be visible to the casual observer, but I felt it was something that needed to be done here, as the interior will be very visible.
 End of this update.
I hope I'll be able to show the finished car in the next update.
To keep my updates in style, I decided to start this update also with a mishap. An unintentional one, but a mishap it was. A major mishap to be precise.
Last update I mentioned that I wanted to take this car to the Euro Scale Modeling contest in Nieuwegein. But thanks to this major f*ck up, the car stays at home. Inside a nice comfy bath of brake fluid...
After I had sanded the very mild orange-peel out of the paint with MicroMesh sanding cloths, I took out the Tamiya Fine Compound (the one with the blue cap) to give the paint a nice finish.
And everything was going quite alright. I got a nice shine out of the paint and was quite satisfied with the finish. Only problem was that there were still minor swirl-marks visible because of the polishing process.
And for some reason I wasn't able to get rid of these marks.
In the meantime I had ordered some stuff from Hiroboy, amongst which was Finishing Compound from Tamiya. But as I wasn't sure whether I would receive this compound in time, I decided last weekend to put some clear over the paint, to hide the swirlmarks and give the paint a tough protecting layer.
While I had used Tamiya's X22 Clear for the Jaguar of Inspector Morse, I didn't want to use this clear on this car because of the problems I'd had with achieving a smooth layer.
I decided to use Revell's Aqua Colour clear for this project, because I've had only positive results with Revell's series of paint.
Until last weekend that is. Because, although the paint layed down perfectly and smooth on the car, it dried rough and almost flat with no shine at all.
I can say that I wasn't really thrilled with this result. Sunday evening I tried for almost an hour to see whether is was possible to salvage the paint job, but alas. No go for the ESM and go for the brake fluid.
The worst part however, is that I really can't pin down what went wrong here. It could be that I thinned the clear too much, but I really don't think so.
But in the future I won't be using this clear on my cars anymore, unless I find out what went wrong.
Below are a few pictures of the car body, before it went into the brake fluid. The second picture is from the roof, after I tried to save what could be saved...
Sadly I forgot to take any pictures before I applied the clear, so there's no proof that the car looked better before...
Not taking into account the disaster I had with the clear coat, this build was actually coming along quite well.
The engine room has received a few extra details and has been finished.
I used several photo's (of which one is shown below as a comparance) as reference to add the cables and hoses that are in the engine room. Not 100% accurate (which is impossible anyway, because Fujimi has simplified the engine compartment in this kit a lot), but it looks quite nice anyway (at least in my opinion).
And here I also added several extra's to spice things up a bit.
As the interior is quite bright I felt the need to add those extra's because the interior will be quite visible when the car is complete.
So I made a few extra bits with some styrene materials and I also added seatbelts using PE parts from the Crazy Modeler detail set and black silk ribbon (2 mm wide).
I had already painted the black areas of the windows. But as the build progressed I felt that I also had to paint the interior of the clear part that's been used for the windows.
It probably won't be visible to the casual observer, but I felt it was something that needed to be done here, as the interior will be very visible.
I hope I'll be able to show the finished car in the next update.
Comments
Post a Comment