
Jaguar XJ220 "Martini" GT, Italian GT championship 1993 (part 1)


After the setback I experienced with the Ferrari F430 I decided that I would start (or at least select) another kit from my stack to get my spirits up.
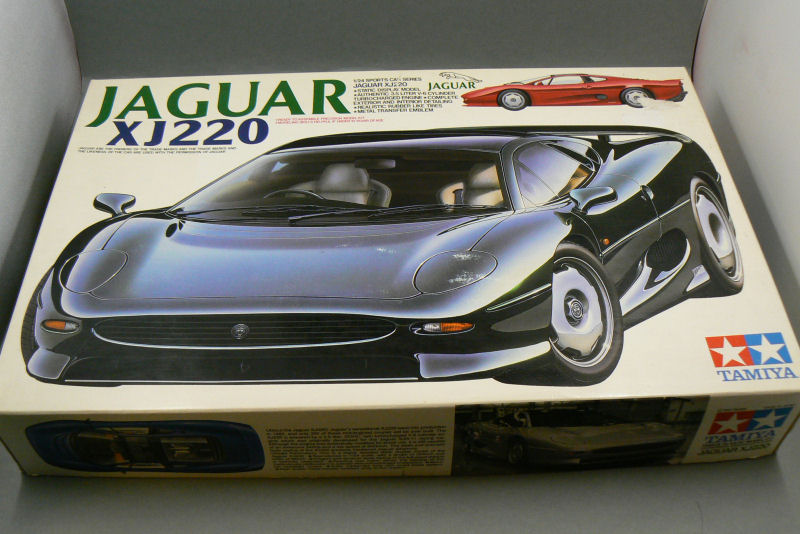
And the kit I selected is the Jaguar XJ220 from Tamiya (kitno. 24129).
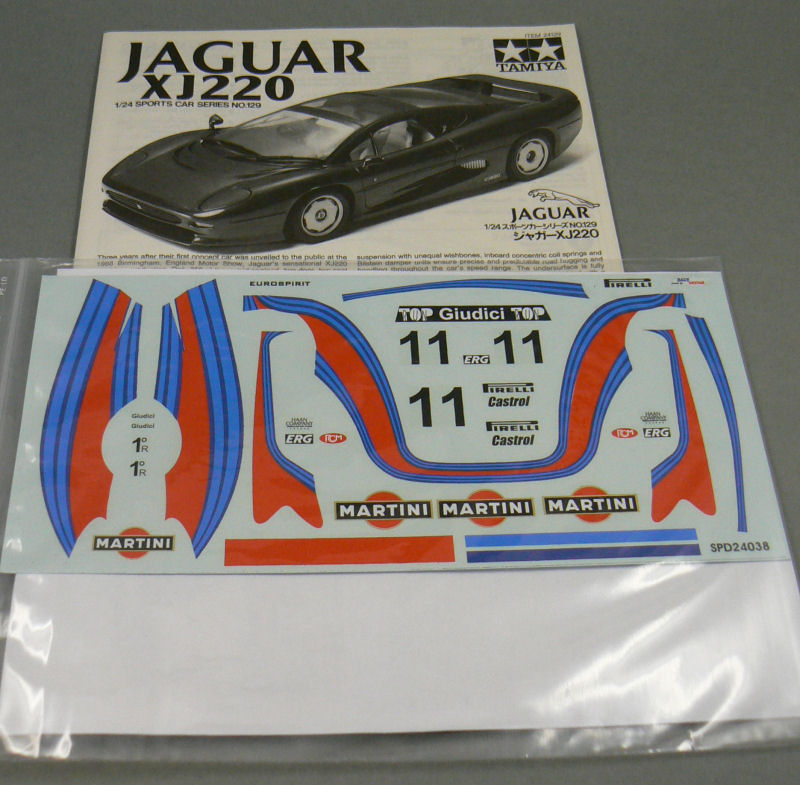
But I won't be building the street version of this car. While checking out some on-line stores looking for after market parts for this kit I stumbled upon a decalset by scaleproduction.de on the MediaMix Hobby internet site.
With this decalset it was possible to make the Martini-sponsored GT Racing car of the Jaguar XJ220. And that is the end of it really. I was instantly hooked. Any car looks great in Martini-livery and especially this one. So the decision was quickly taken to try and build the Martini-sponsored version of this car.
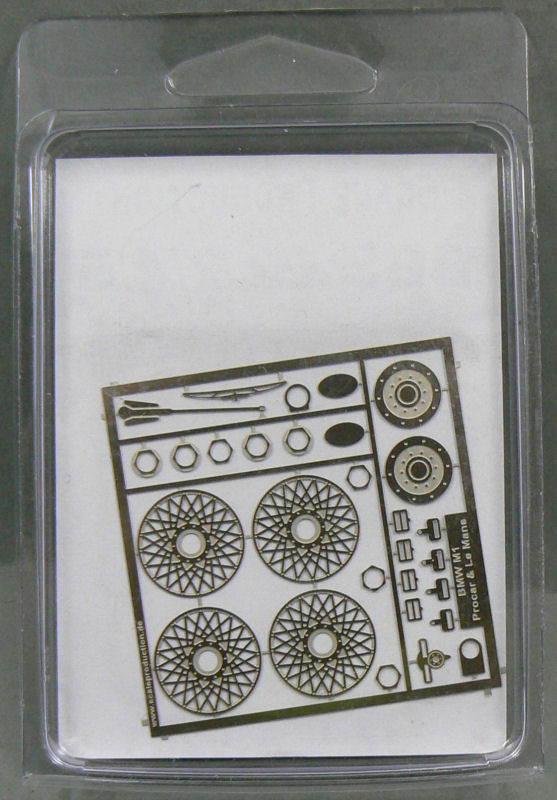
I ordered the decalset from MediaMix (while Scaleproduction didn't have them anymore) and ordered the required BBS wheels directly from Scaleproduction.

I was ready to build.
Or wasn't I ? The few reference pictures provided with the decalsheet were nice for deciding where the decals should go. But what about the interior or the engineroom ?
The engineroom wasn't that important, but I surely couldn't leave the interior like the streetversion of this car.
But everywhere I looked, no pictures (or incredibly small ones) to be found.
Until a few weeks ago. While searching, once more, for pictures on this car, Google directed me to a Canon photography forum. And what do you know ? There were some excellent pictures all of a sudden.
It appeared that a Jaguar dealer in England had had this GT Racing Jaguar on display and a member of this forum (Tim Dunlop to be precise) had taken some pictures of the car.
I decided to contact Mr. Dunlop and he kindly provided me with a link to his webpage where more pictures were to be found.
Finally I had some useful pictures for building this car, and that is what I intend to do in this Build Report.

First I'll show a picture of how this build should turn out. All the pictures of the real car in this thread were taken by Tim Dunlop.
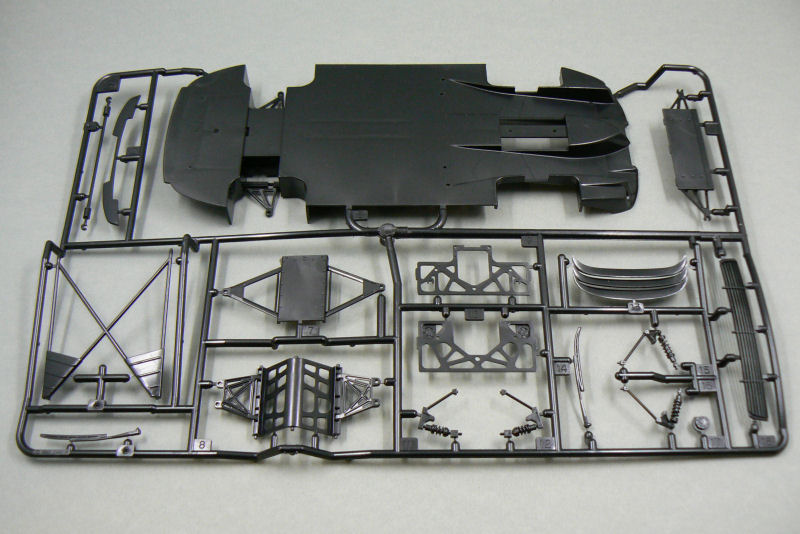
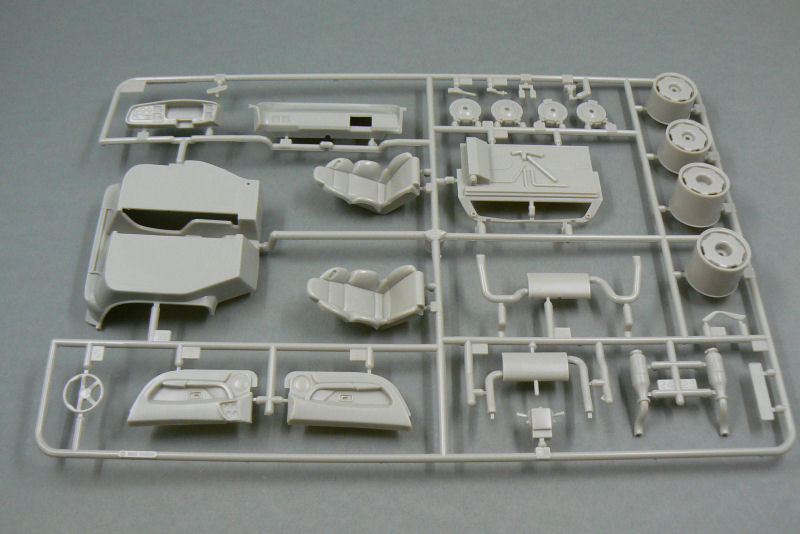
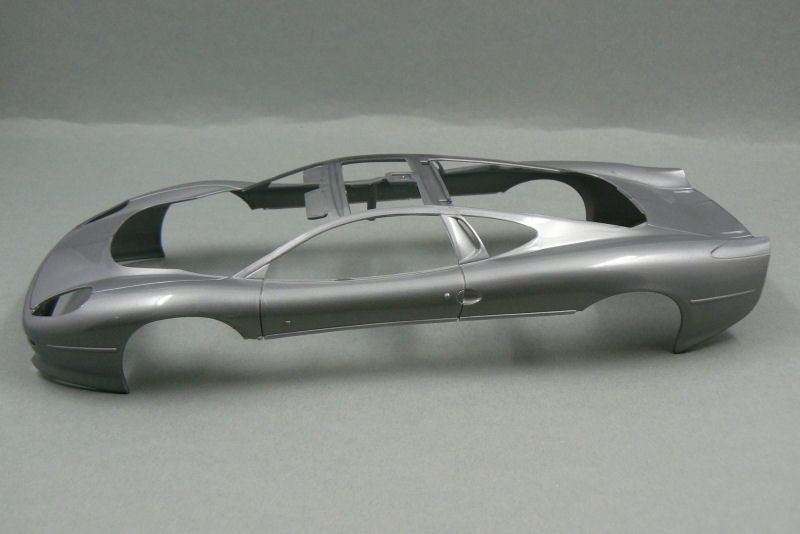


What's in the box ?
Next I'll show a few pictures of what's in the box:
The clear parts aren't featured in those pictures. I've left them inside their plastic bag to protect them against scratches from handling. I'll take them out of the bag when I'll use them.

Next are a few pictures of the after market parts I'm going to use on this kit:
Now that I've presented my newest project, there's only one thing left to do: Start the project.
But the start of the project will be for the next update.

Comments

Popular posts from this blog

Citroën Xsara WRC - Francois Duval, ADAC Rallye Deutschland 2007 (part 2)

As promised, only a few days since the first part, here's the second part of this build. Once in a while I tend to keep a promise... As mentioned in the previous part I have been studying the manual to figure out what needs to be modified for this build. A few things were already shown in the previous part. Here I will discuss the other modifications I'm planning. This will be a nice exercise for when I'm going to build Gigi Galli's slightly beaten Xsara WRC from rally Portugal 2007... Renaissance transkit 24/96 contains a PE sheet with mesh sections for the vents in the hood and the main grille in the front bumper. Renaissance tells you to glue the mesh over the appropriate sections of the body. But I'm intending to remove the plastic and create some sort of box under/behind the openings to suggest depth. The body needs some parts removed and filled. The molded quick-release bonnet and boot pins need to be removed as they will be replaced with PE items. The holes

Citroën Xsara WRC - Francois Duval, ADAC Rallye Deutschland 2007 (part 1)

And off we go on another project. When modelling WRC subjects, you cannot ignore the Citroën Xsara WRC as it is some kind of legend. Especially in the hands of a certain French driver. That's why I have 3 Xsara kits in my stash. None of said driver, that is. But rest assured, he is also present in my WRC collection. With this particular build I'm going to build the car that Francois Duval drove so expertly to the runner-up spot in the 2007 ADAC Rallye Deutschland. Sadly, where the Citroën Xsara WRC is a bit of a legend, the same thing can not be said of the only injection moulded kit if the same car... As said, there's not much choice, as Heller is the only kit manufacturer for this car (although the same kit has also been released by Airfix and Italeri). For this build I'll be using Heller kit no. 80769. Let's just say,it's not a Tamiya kit... By far. For several reasons I chose this particular car because I like the livery and I like Francois Duval too beca

Citroën Xsara WRC - Francois Duval, ADAC Rallye Deutschland 2007 (part 5)

As promised in the previous part in this update I'll show what I changed on the roll cage. The roll cage as included in the kit is far from complete. When looking at on-board footage and reference images found on the internet the roll cage needs some extra tubing added.  Over the years the roll cage of the Xsara WRC has had several variants as I've noticed studying my reference images. Which isn't that strange as the crash test and safety regulations have changed over the years.  The reference images I have of the specific chassis (#28) which Duval raced during the 2007 ADAC Rallye Deutschland are sadly inconclusive about which version of the roll cage was fitted. Which means that the adaptations I made are at best a good "guesstimate"... As long as it looks and feels right, it is right I guess... I used Evergreen styrene rod of 1.6 mm in diameter for the added sections for the rollcage.  The added sections are highlighted in the images below. Another section I&#