First post of 2015.
A happy new year to my readers!
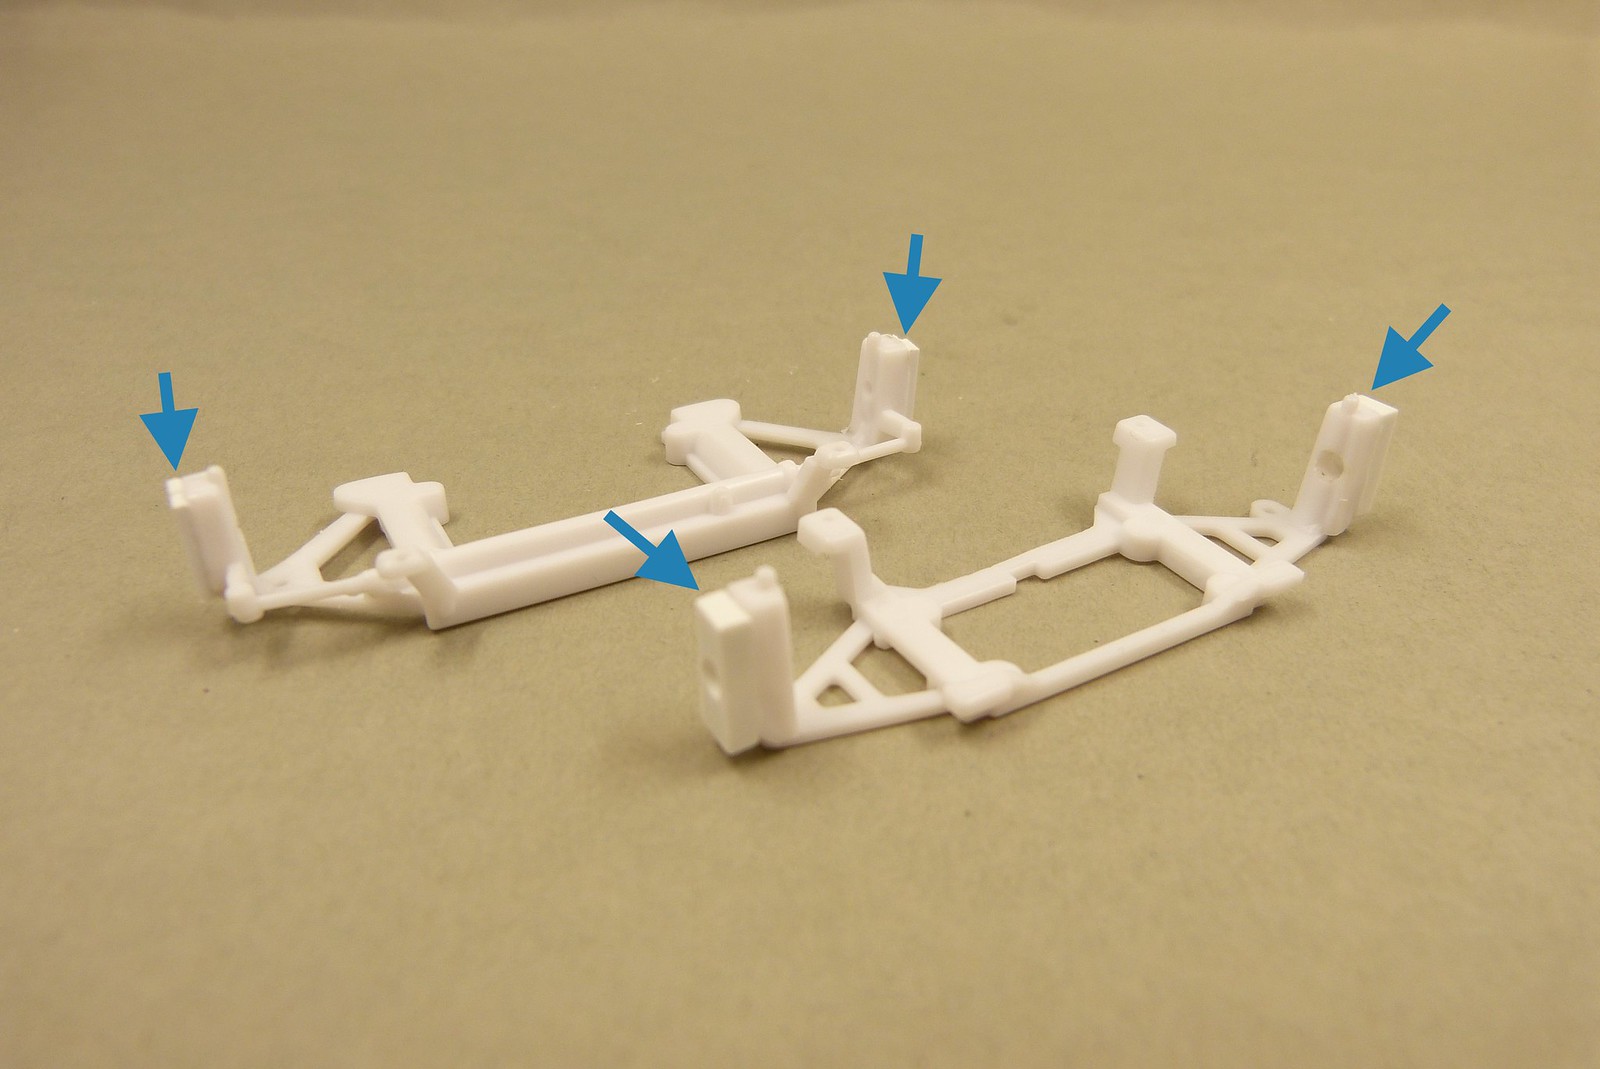
As I pointed out in the previous post of this build, the wheels sit too deep into the wheel wells.
With Evergreen profiles I made the suspension parts wider, so the wheels don't sit so deep anymore.
I forgot to take a picture of the final testfit, but I did make a picture of the adapted suspension elements.
Next I continued work on the interior of the car. According to my reference images, several parts were missing in the Revell kit.
The most obvious part missing in my eyes was the piece of rollcage directly behind the driver's seat.
I constructed the additional piece of rollcage with Evergreen profile and sheet. I also made the driver's head rest from evergreen sheet (the white part on top of the roll cage)

Now it is possible to attach the seat belts to the roll cage.
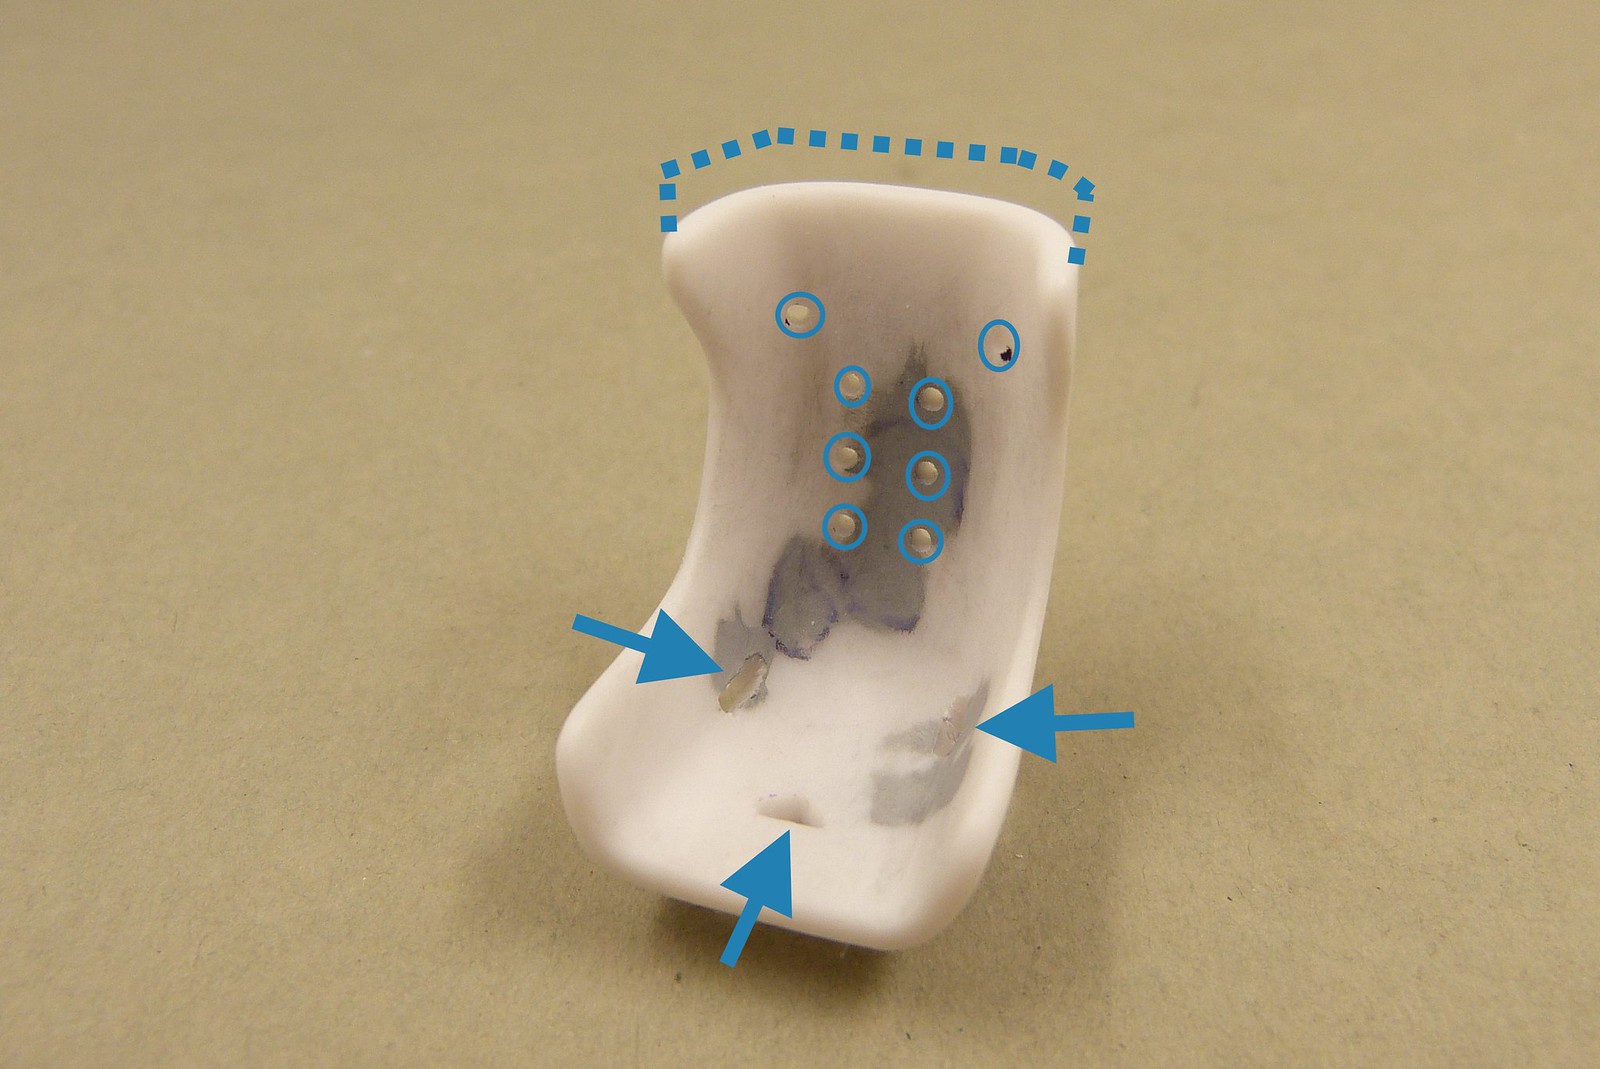
But to make this possible I had the adapt the driver's seat. The seat included in the kit differed quite from the seat in the reference images.
I had to trim quite a large piece from the top of the seat. The molded-on seat belts were removed and the (lightening?) holes have been added to the seat.Finally I also added some additional holes for the seat belts in the seat.
As I was busy making parts for the interior I also made the 2 mysterious boxes on the co-driver side from Evergreen sheet.
As my reference images weren't very clear the boxes are an educated guess and are probably not 100% correct. But they're good enough for me (until I find more and better reference images...).

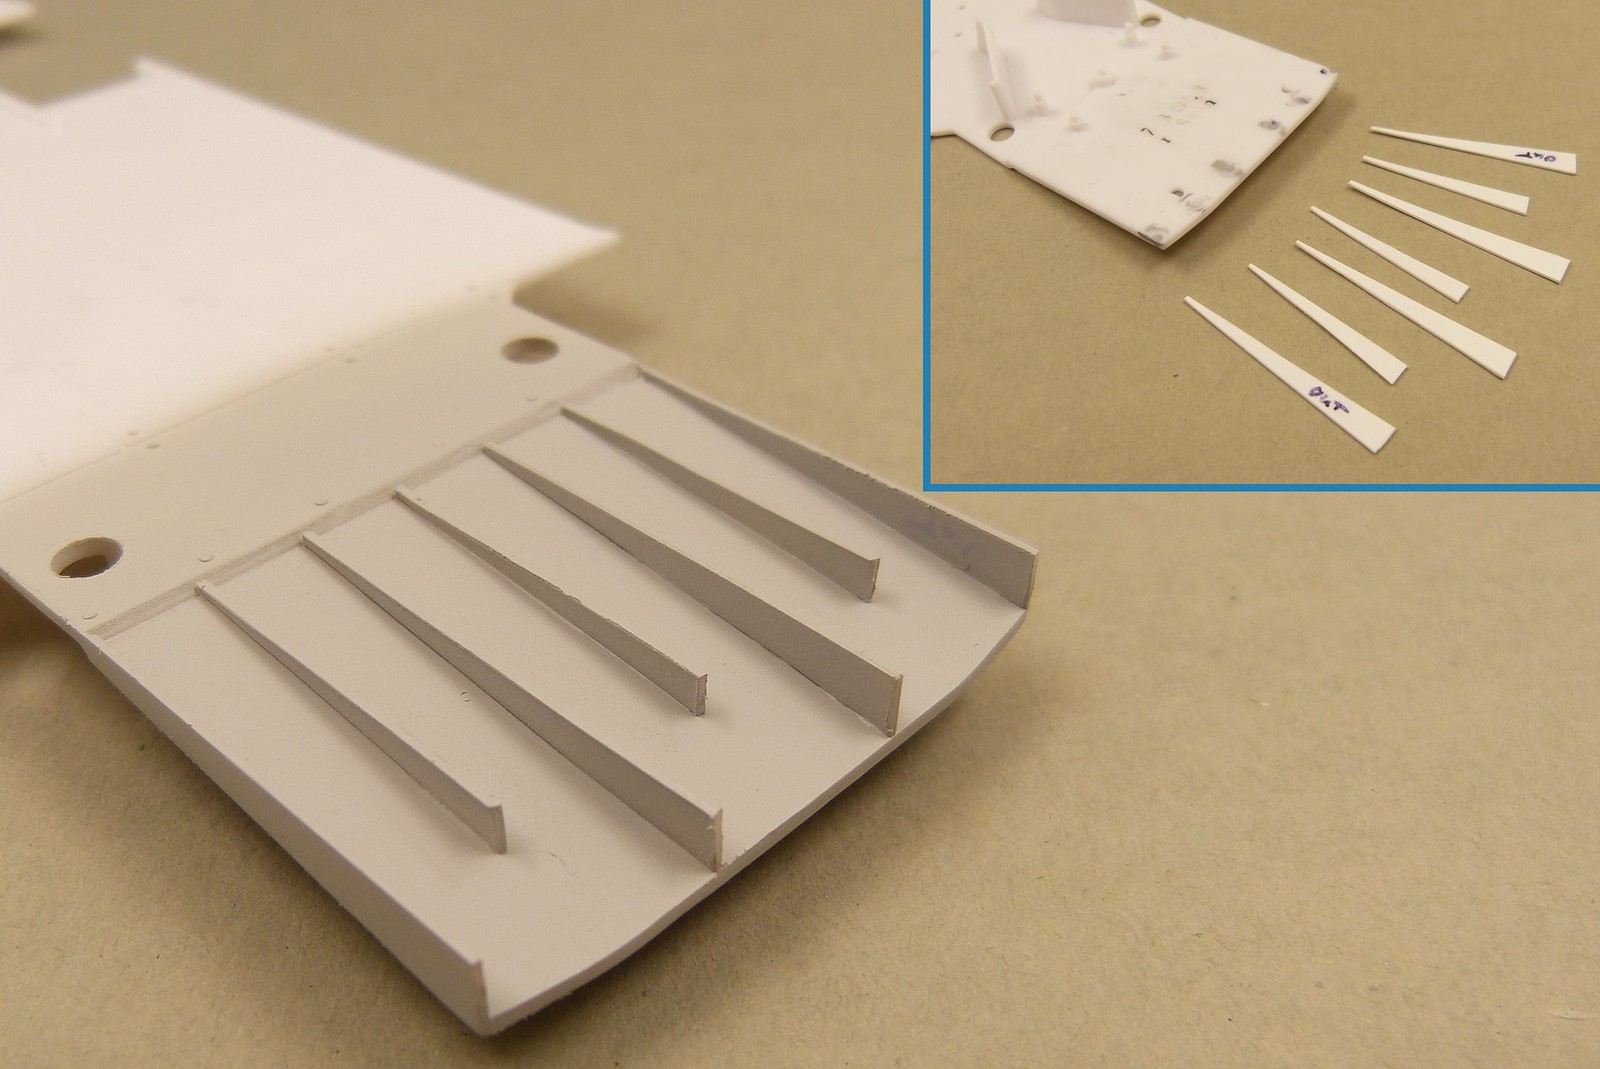
In the meantime I also started rebuilding the diffusor. After I removed the original diffusor strakes I constructed new strakes from 0.5 mm Evergreen sheet.
After determining and marking the positions for the newly fabricated strakes, I glued them to the floor. This went rather well to my surprise. I'm even astonished at how strong the bond between the strakes and the floor is. I glued the parts with Tamiya thin liquid glue (the one with the green cap).
Only once did one of the strakes come loose when I was sanding the seam. My fault in being a bit too impatient and putting to much pressure on the sanding pad.
After I'd rebuild the diffusor it was about time to introduce some primer to the parts.
I almost exclusively use Tamiya Fine Surface Primer for this. I decant the primer from the spray can into a jar and after the primer has gassed out I dilute it with Tamiya Lacquer Thinner to the desired consistency.
I must admit that I was a bit afraid of how the body and floor with new diffusor in particular would like under a coat of primer.
In short : It was a bit disappointing...
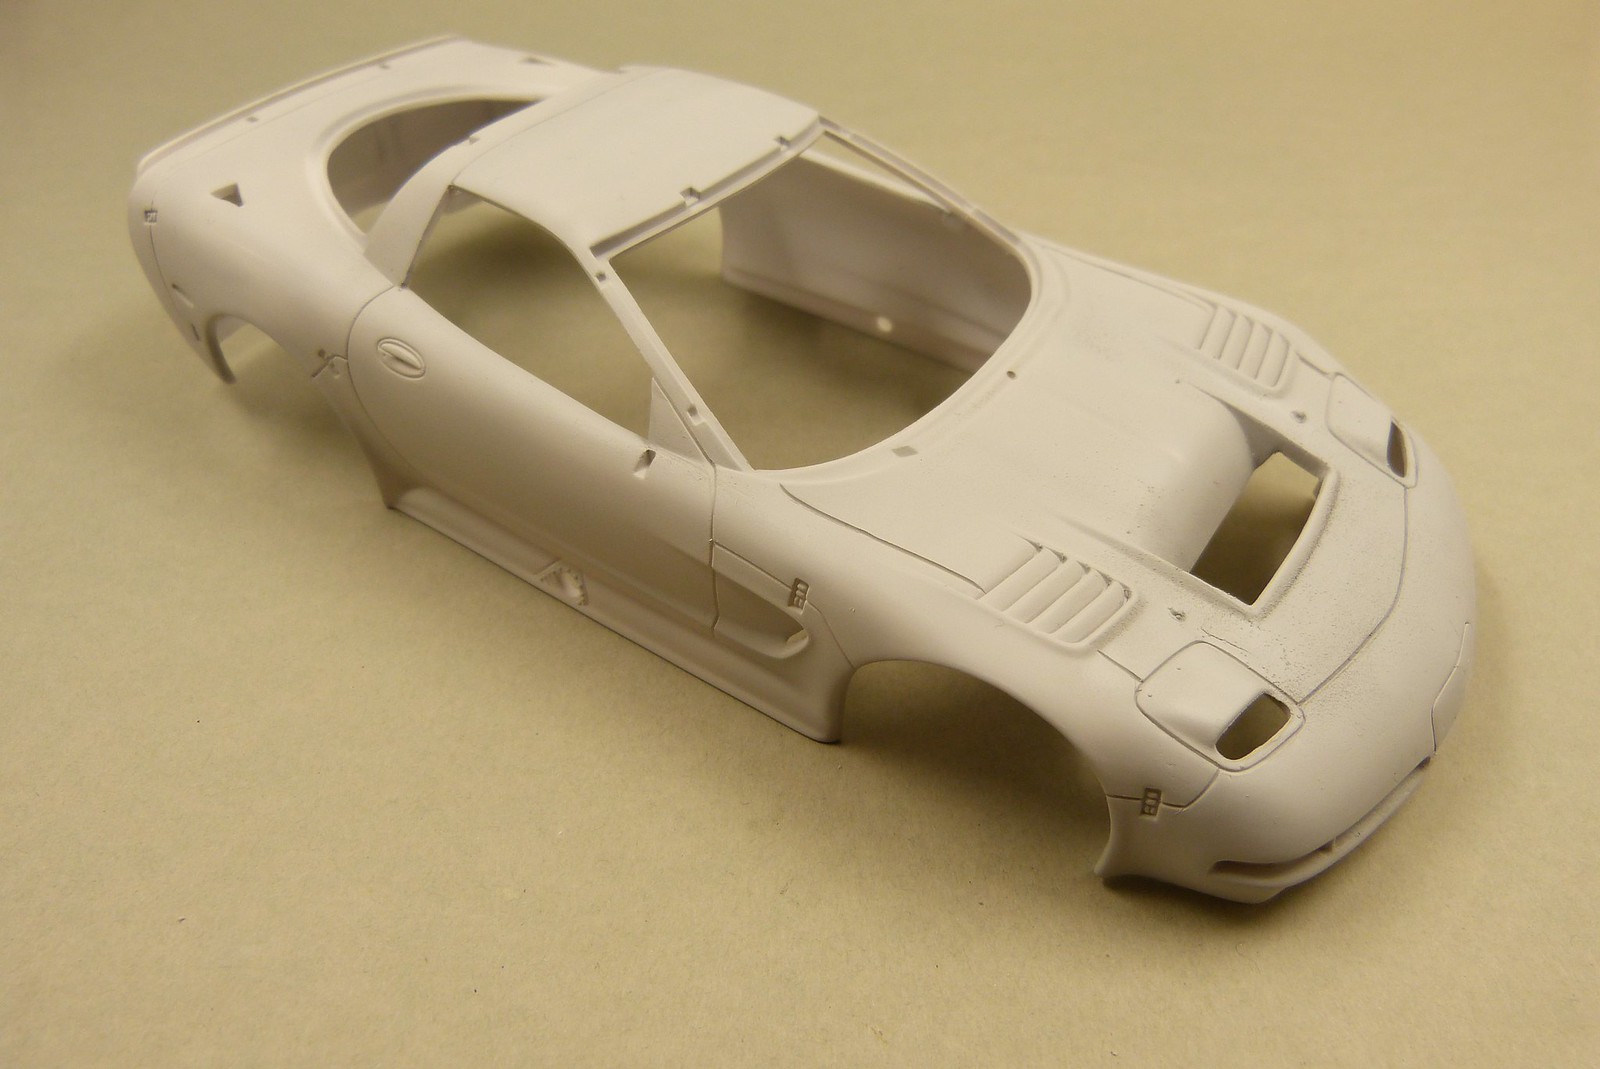
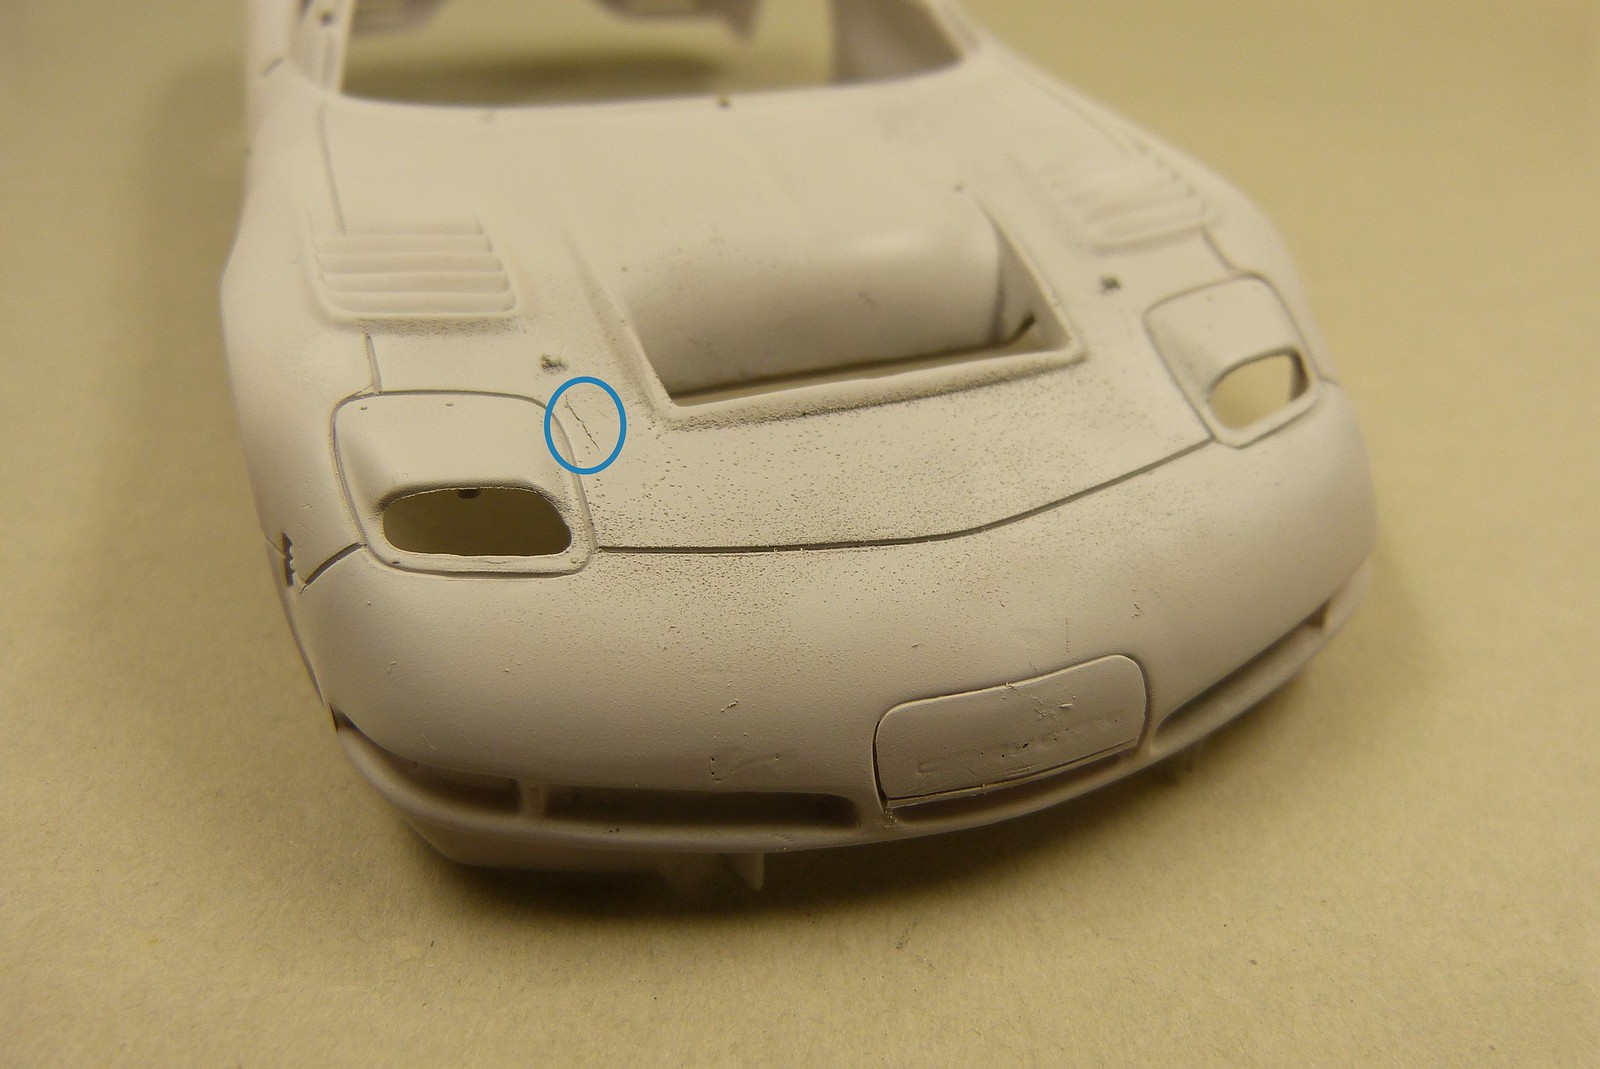
There are several spots and areas that need some more filling and sanding.
What is bothering me the most is the small crack visible near the filled right naca-duct. Sure, it won't be a problem to fill the crack and sand it flush, but I'm a bit afraid the this crack might turn up later when the paint and/or clearcoat is on....
If somebody has a good (or probable) solution, feel free to leave a comment to this post.
That's it for this post. See you next time.
A happy new year to my readers!
As I pointed out in the previous post of this build, the wheels sit too deep into the wheel wells.
With Evergreen profiles I made the suspension parts wider, so the wheels don't sit so deep anymore.
I forgot to take a picture of the final testfit, but I did make a picture of the adapted suspension elements.
Next I continued work on the interior of the car. According to my reference images, several parts were missing in the Revell kit.
The most obvious part missing in my eyes was the piece of rollcage directly behind the driver's seat.
I constructed the additional piece of rollcage with Evergreen profile and sheet. I also made the driver's head rest from evergreen sheet (the white part on top of the roll cage)
Now it is possible to attach the seat belts to the roll cage.
But to make this possible I had the adapt the driver's seat. The seat included in the kit differed quite from the seat in the reference images.
I had to trim quite a large piece from the top of the seat. The molded-on seat belts were removed and the (lightening?) holes have been added to the seat.Finally I also added some additional holes for the seat belts in the seat.
As I was busy making parts for the interior I also made the 2 mysterious boxes on the co-driver side from Evergreen sheet.
As my reference images weren't very clear the boxes are an educated guess and are probably not 100% correct. But they're good enough for me (until I find more and better reference images...).
In the meantime I also started rebuilding the diffusor. After I removed the original diffusor strakes I constructed new strakes from 0.5 mm Evergreen sheet.
After determining and marking the positions for the newly fabricated strakes, I glued them to the floor. This went rather well to my surprise. I'm even astonished at how strong the bond between the strakes and the floor is. I glued the parts with Tamiya thin liquid glue (the one with the green cap).
Only once did one of the strakes come loose when I was sanding the seam. My fault in being a bit too impatient and putting to much pressure on the sanding pad.
After I'd rebuild the diffusor it was about time to introduce some primer to the parts.
I almost exclusively use Tamiya Fine Surface Primer for this. I decant the primer from the spray can into a jar and after the primer has gassed out I dilute it with Tamiya Lacquer Thinner to the desired consistency.
I must admit that I was a bit afraid of how the body and floor with new diffusor in particular would like under a coat of primer.
In short : It was a bit disappointing...
There are several spots and areas that need some more filling and sanding.
What is bothering me the most is the small crack visible near the filled right naca-duct. Sure, it won't be a problem to fill the crack and sand it flush, but I'm a bit afraid the this crack might turn up later when the paint and/or clearcoat is on....
If somebody has a good (or probable) solution, feel free to leave a comment to this post.
That's it for this post. See you next time.
Comments
Post a Comment