My initial intention (I have a lot of those) was to get this build finished in time for the IPMS event in the Netherlands at the end of October (as in October 2015).
Seeing that this blog post is posted a long way into 2016 it is safe to say that I didn't make it.
Maybe, just maybe, I might get this one finished before the end of October this year... Just in time for Euro Scale Modelling 2016. But don't take my word for it.
In the meantime work continues, albeit slowly.
For the time being I'm concentrating my modelling efforts on finishing the interior.
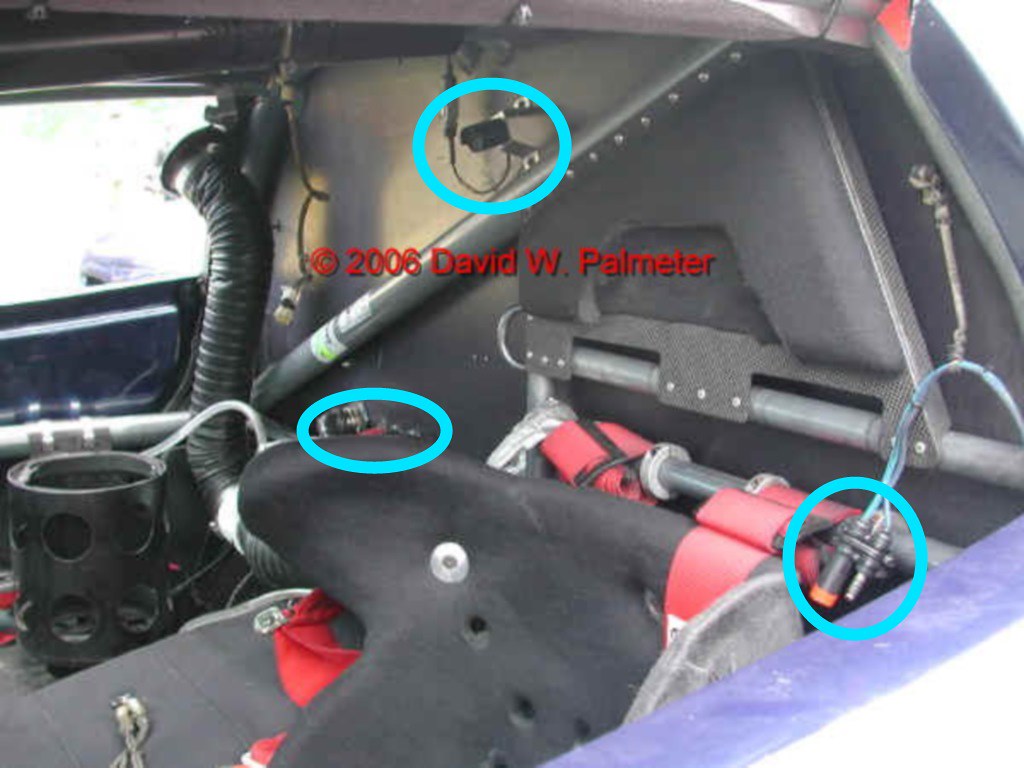
First up were the connectors for the comms system which are hanging from the back wall behind the driver's seat.
I used Evergreen rod 1.6 mm and 0.75 mm and some sheet 0.5 mm for the basic form.
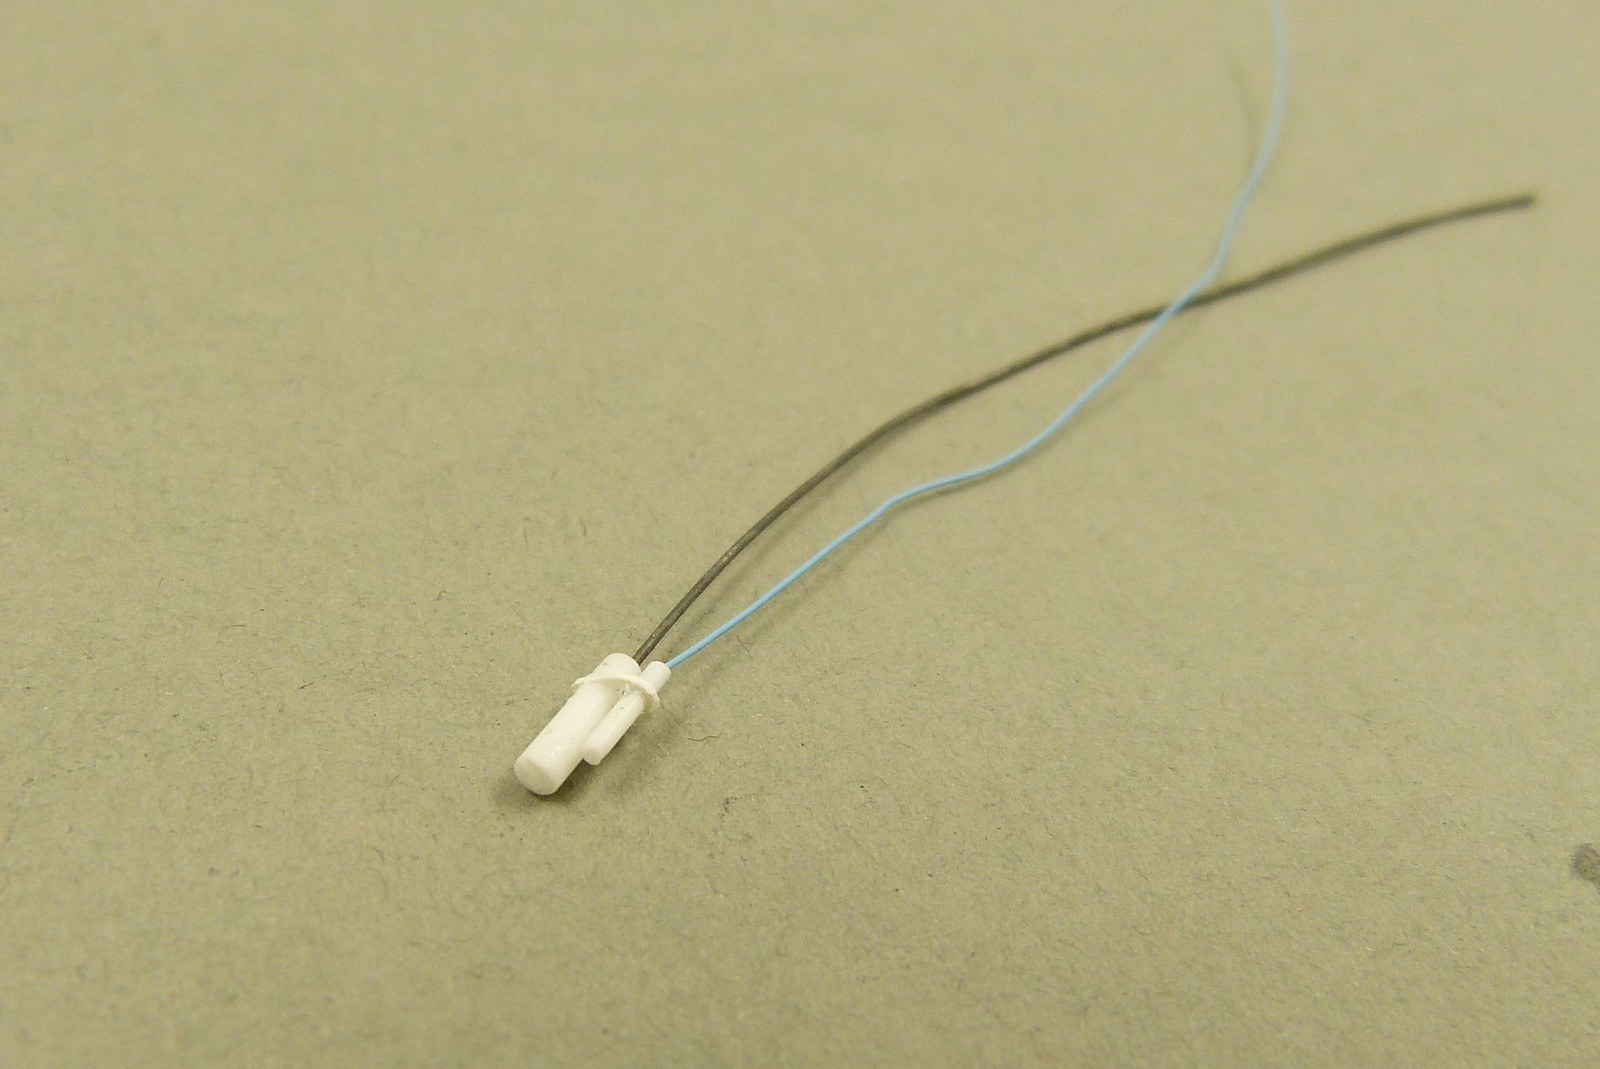
I tried to detail everything with the paintwork. I also attached a few wires to the back of the connectors. For this I had to drill tiny holes into the backs of the connectors.
I used 0.5 mm and 0.3 mm drill bits in my pin vise and glued the appropriate cables into the holes with ZAP medium CA glue.
For the attachment to the rear wall I will use some braided wire to simulate the elastic cord used in the real car.
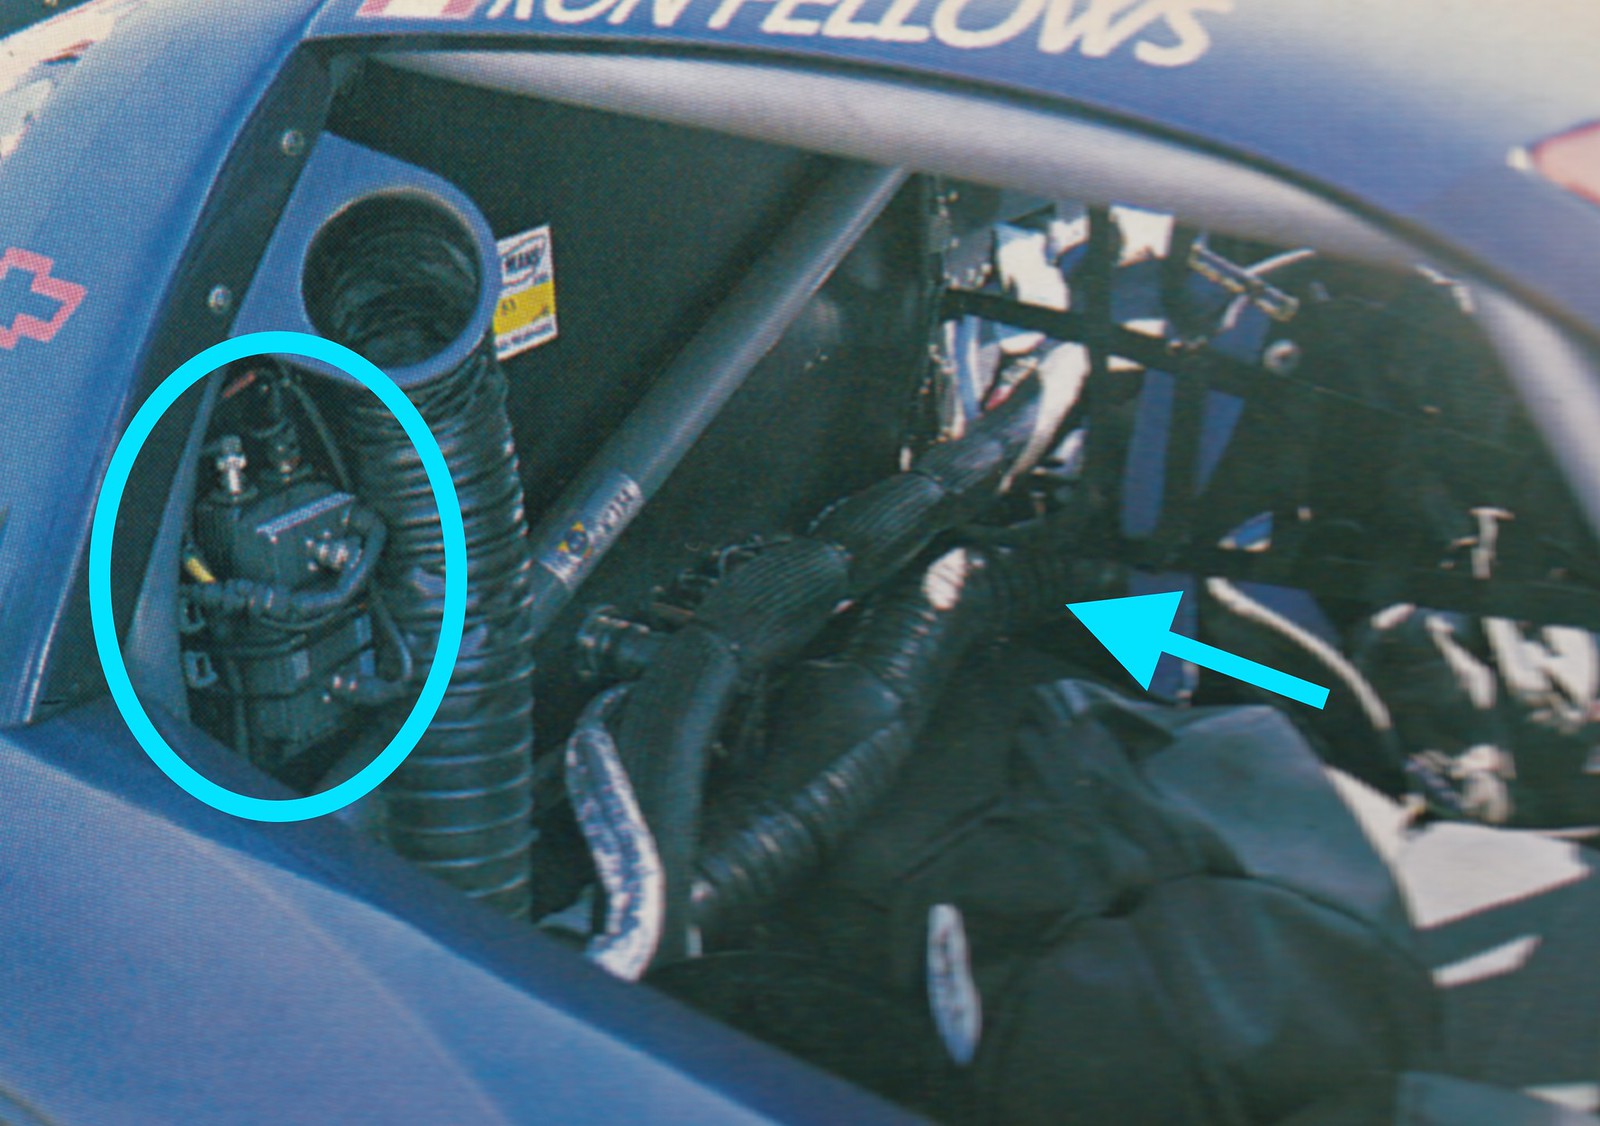
At the end of last year I bought the 2003 Le Mans issue of Auto Modélisme in which are some very helpful images concerning this car, especially concerning the interior.
There is an on-board camera present in some of the images, but not all.
I decided to save me some extra work and won't be adding an on-board camera to the car. That's good.
A control box and several cables are clearly visible, when looking into the car from the passenger side. I will try to add those.
There are also several stickers present on the roll cage and firewall behind the driver. I might be tempted to "simulate" these with some creative painting.
Several parts of the interior remain a bit unclear so I will let my imagination run free there.
Not so good is that I noticed that the refuelling hose is actually running along the firewall and disappears behind the driver's seat. Because I already put quite a bit of effort in my current solution, I will ignore this.
Apart from that, I'm also not convinced that there's enough room available to let the hose run behind the seat in this kit.
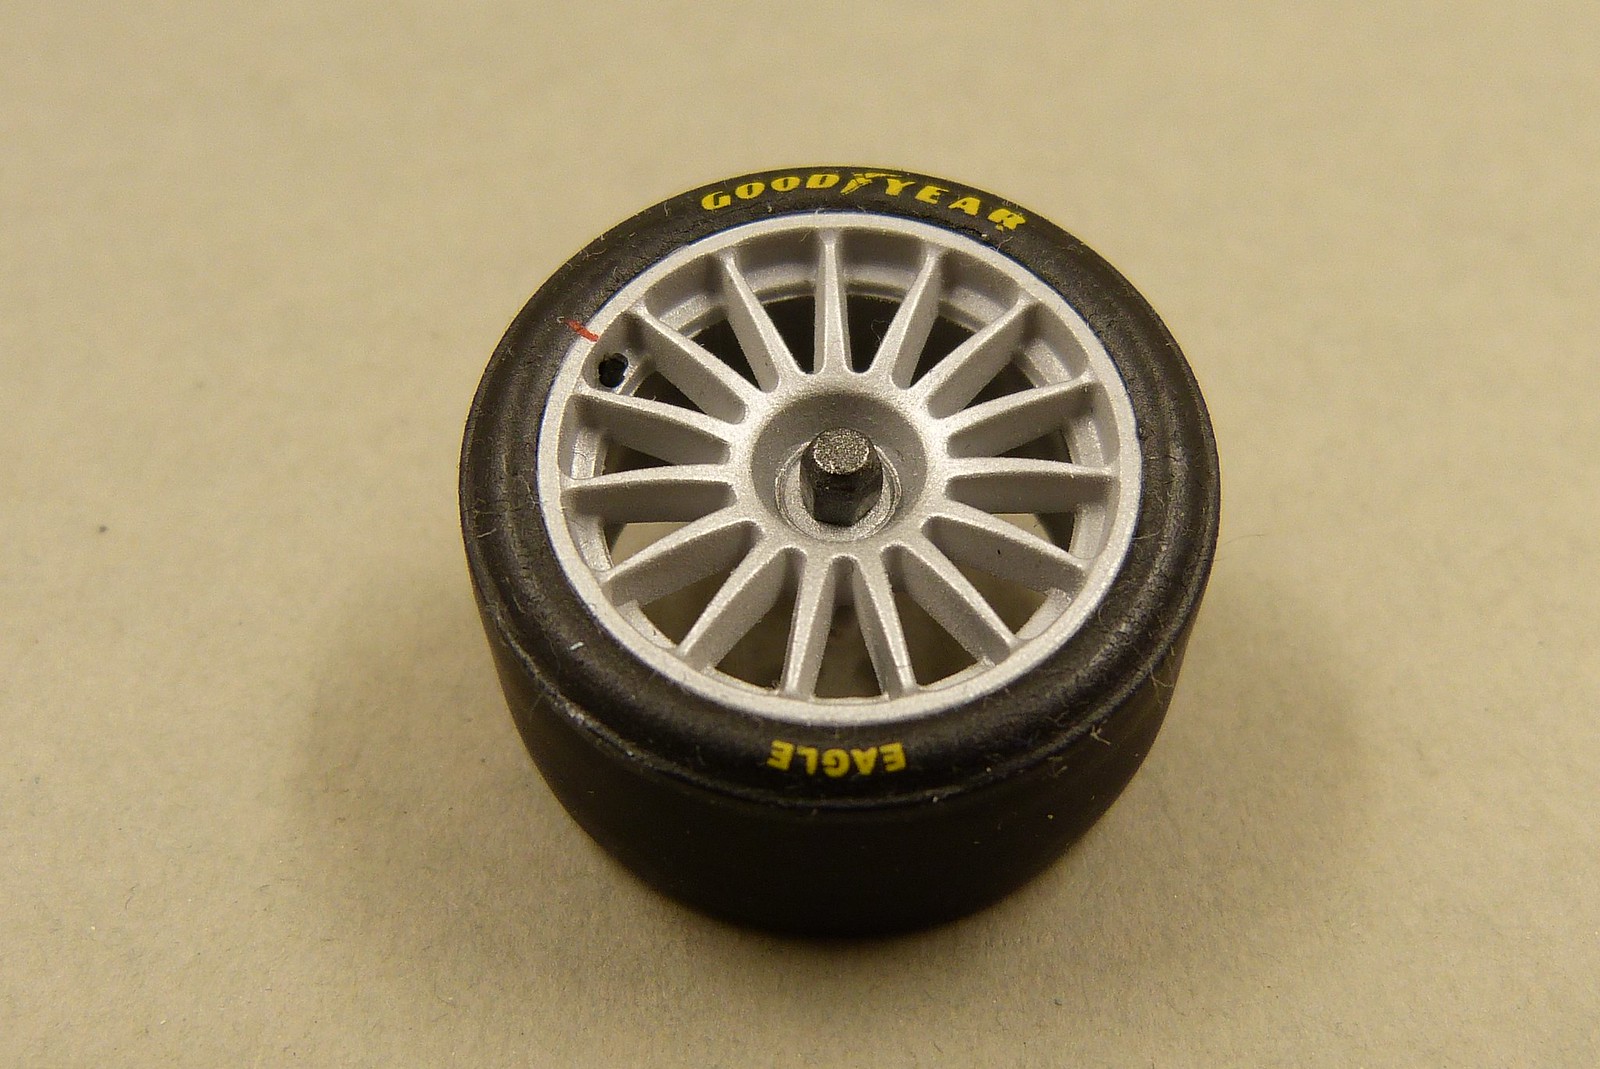
In the meantime I also finished working on the wheel nuts of the front wheels.
After sanding them to shape I painted them with Tamiya X-10 Gun Metal.
At the start of this update I was about to hang my head in shame because of my bad housekeeping.
I managed to loose one of the scratchbuilt parts for the interior. Unbelievable.
But, as I was packing my stuff in preparation for moving to my new house, I found the missing part hidden under the case of my desktop PC. Phew.
Apart from the new parts I made, I also noticed that my paintjob on the rollcage was a bit sloppy and the paint coverage wasn't good everywhere. So I brushpainted some Revell Aqua Color aluminium onto the badly painted sections.
With all the tiny bits and pieces almost out of the way, construction of the interior can commence.
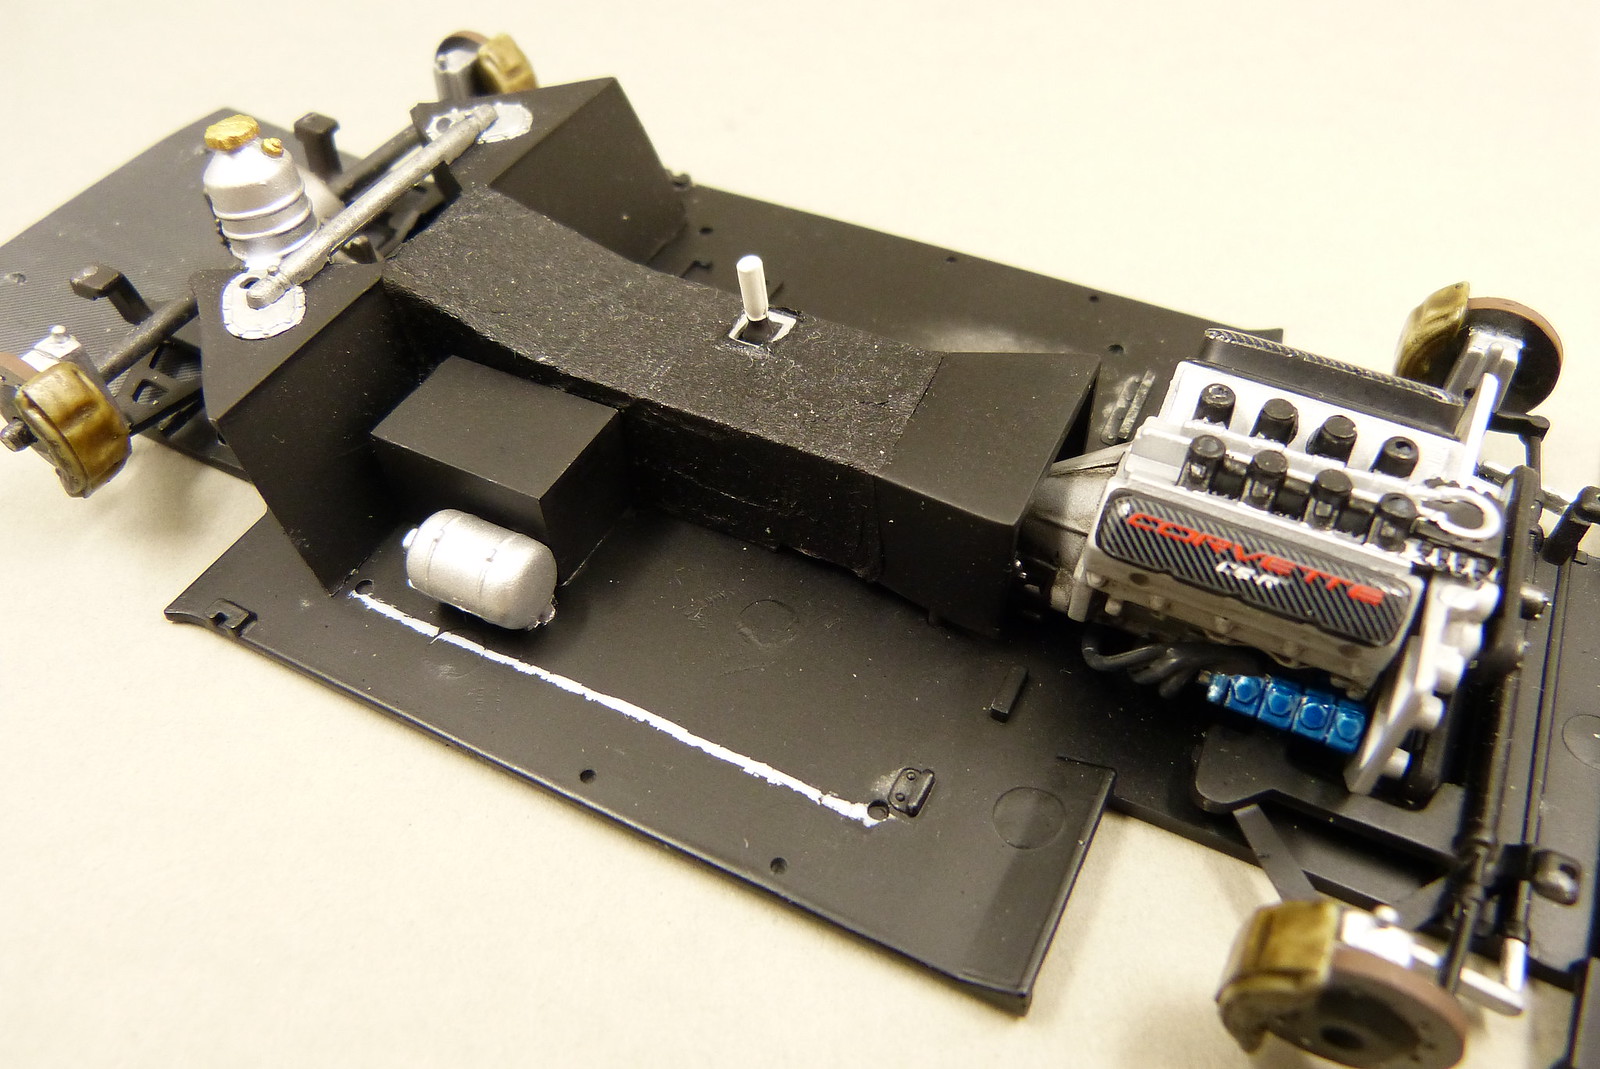
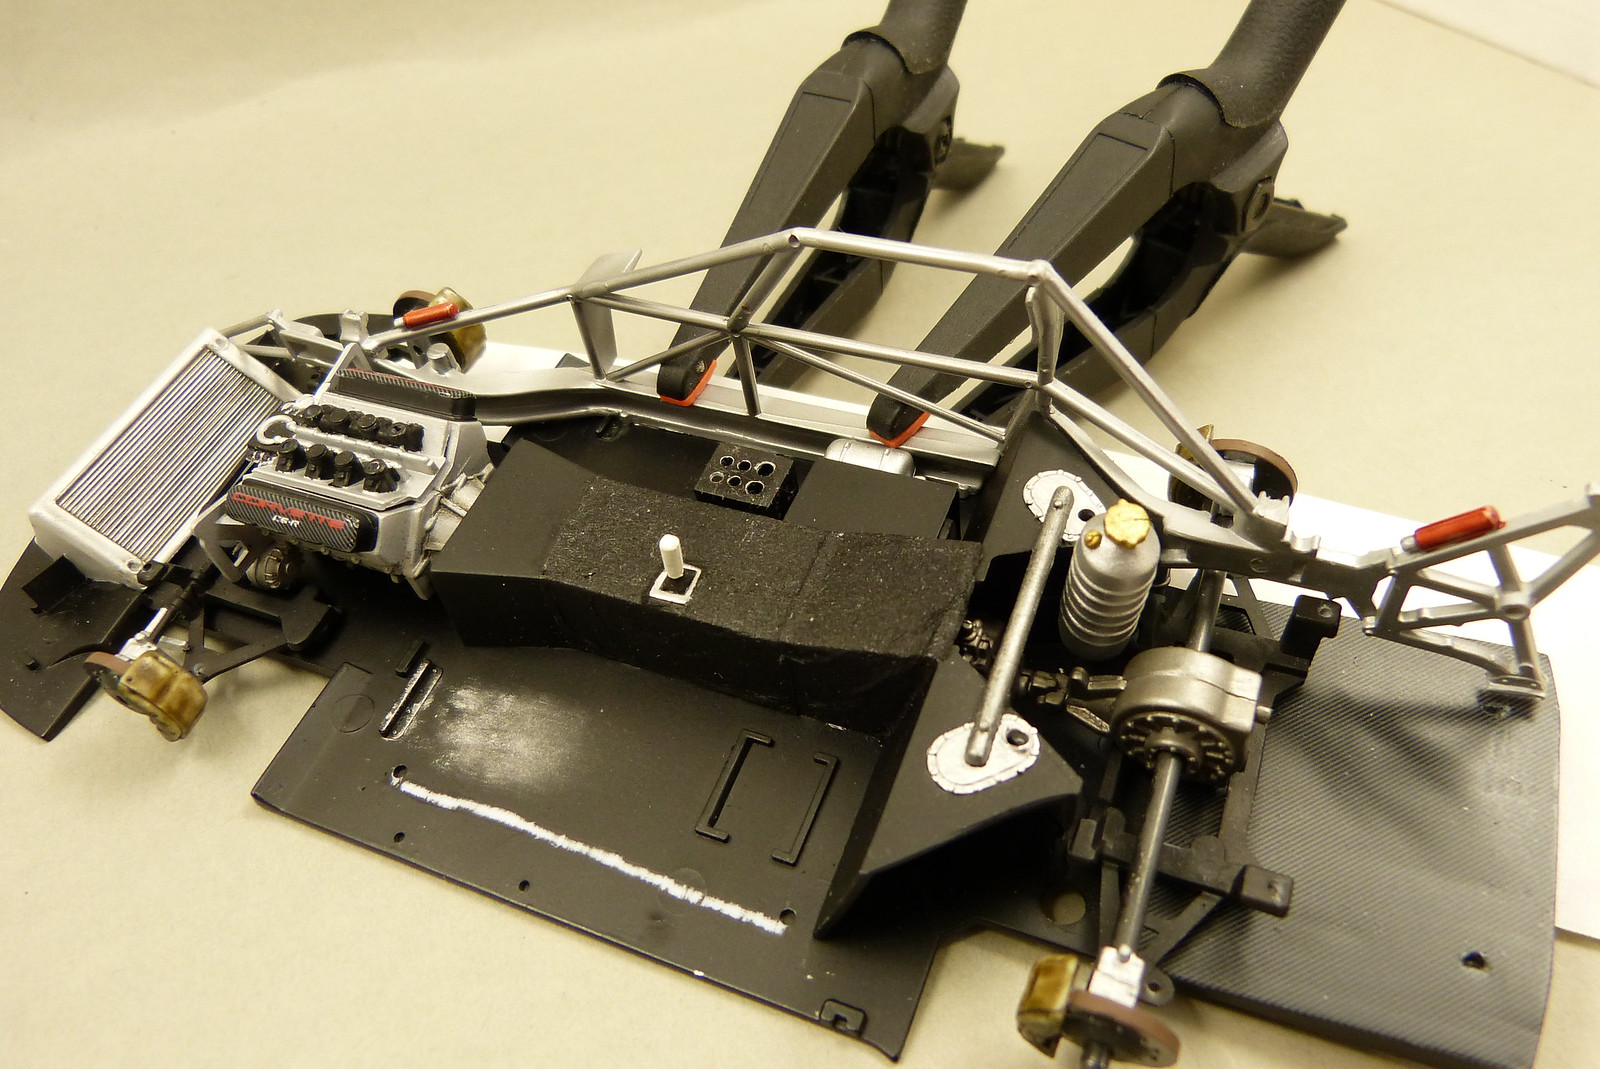
This is where the build stands now.
I already prepared the body for the second layer of paint and intend to get working on it any day now, as the weather is finally making my workplace in the attic a pleasant place to stay again...
Seeing that this blog post is posted a long way into 2016 it is safe to say that I didn't make it.
Maybe, just maybe, I might get this one finished before the end of October this year... Just in time for Euro Scale Modelling 2016. But don't take my word for it.
In the meantime work continues, albeit slowly.
For the time being I'm concentrating my modelling efforts on finishing the interior.
First up were the connectors for the comms system which are hanging from the back wall behind the driver's seat.
I used Evergreen rod 1.6 mm and 0.75 mm and some sheet 0.5 mm for the basic form.
I tried to detail everything with the paintwork. I also attached a few wires to the back of the connectors. For this I had to drill tiny holes into the backs of the connectors.
I used 0.5 mm and 0.3 mm drill bits in my pin vise and glued the appropriate cables into the holes with ZAP medium CA glue.
For the attachment to the rear wall I will use some braided wire to simulate the elastic cord used in the real car.
At the end of last year I bought the 2003 Le Mans issue of Auto Modélisme in which are some very helpful images concerning this car, especially concerning the interior.
There is an on-board camera present in some of the images, but not all.
I decided to save me some extra work and won't be adding an on-board camera to the car. That's good.
A control box and several cables are clearly visible, when looking into the car from the passenger side. I will try to add those.
There are also several stickers present on the roll cage and firewall behind the driver. I might be tempted to "simulate" these with some creative painting.
Several parts of the interior remain a bit unclear so I will let my imagination run free there.
Not so good is that I noticed that the refuelling hose is actually running along the firewall and disappears behind the driver's seat. Because I already put quite a bit of effort in my current solution, I will ignore this.
Apart from that, I'm also not convinced that there's enough room available to let the hose run behind the seat in this kit.
In the meantime I also finished working on the wheel nuts of the front wheels.
After sanding them to shape I painted them with Tamiya X-10 Gun Metal.
At the start of this update I was about to hang my head in shame because of my bad housekeeping.
I managed to loose one of the scratchbuilt parts for the interior. Unbelievable.
But, as I was packing my stuff in preparation for moving to my new house, I found the missing part hidden under the case of my desktop PC. Phew.
Apart from the new parts I made, I also noticed that my paintjob on the rollcage was a bit sloppy and the paint coverage wasn't good everywhere. So I brushpainted some Revell Aqua Color aluminium onto the badly painted sections.
With all the tiny bits and pieces almost out of the way, construction of the interior can commence.
This is where the build stands now.
I already prepared the body for the second layer of paint and intend to get working on it any day now, as the weather is finally making my workplace in the attic a pleasant place to stay again...
Comments
Post a Comment