With the body almost ready for decals, I stepped up my efforts concerning the interior.
I made the electronics box at the passenger side.
I used a small piece of styrene (Evergreen item no. 166 2.0x3.2 mm) and drilled a few holes into it so I could fix the needed wires into the box.
For the wires I used 0.4 mm steel wire. To simulate the connectors I used some styrene rod (Evergreen item no. 221 1.2 mm). Using a pin vise I drilled 0.5 mm holes into the rod, so I could insert the wire.
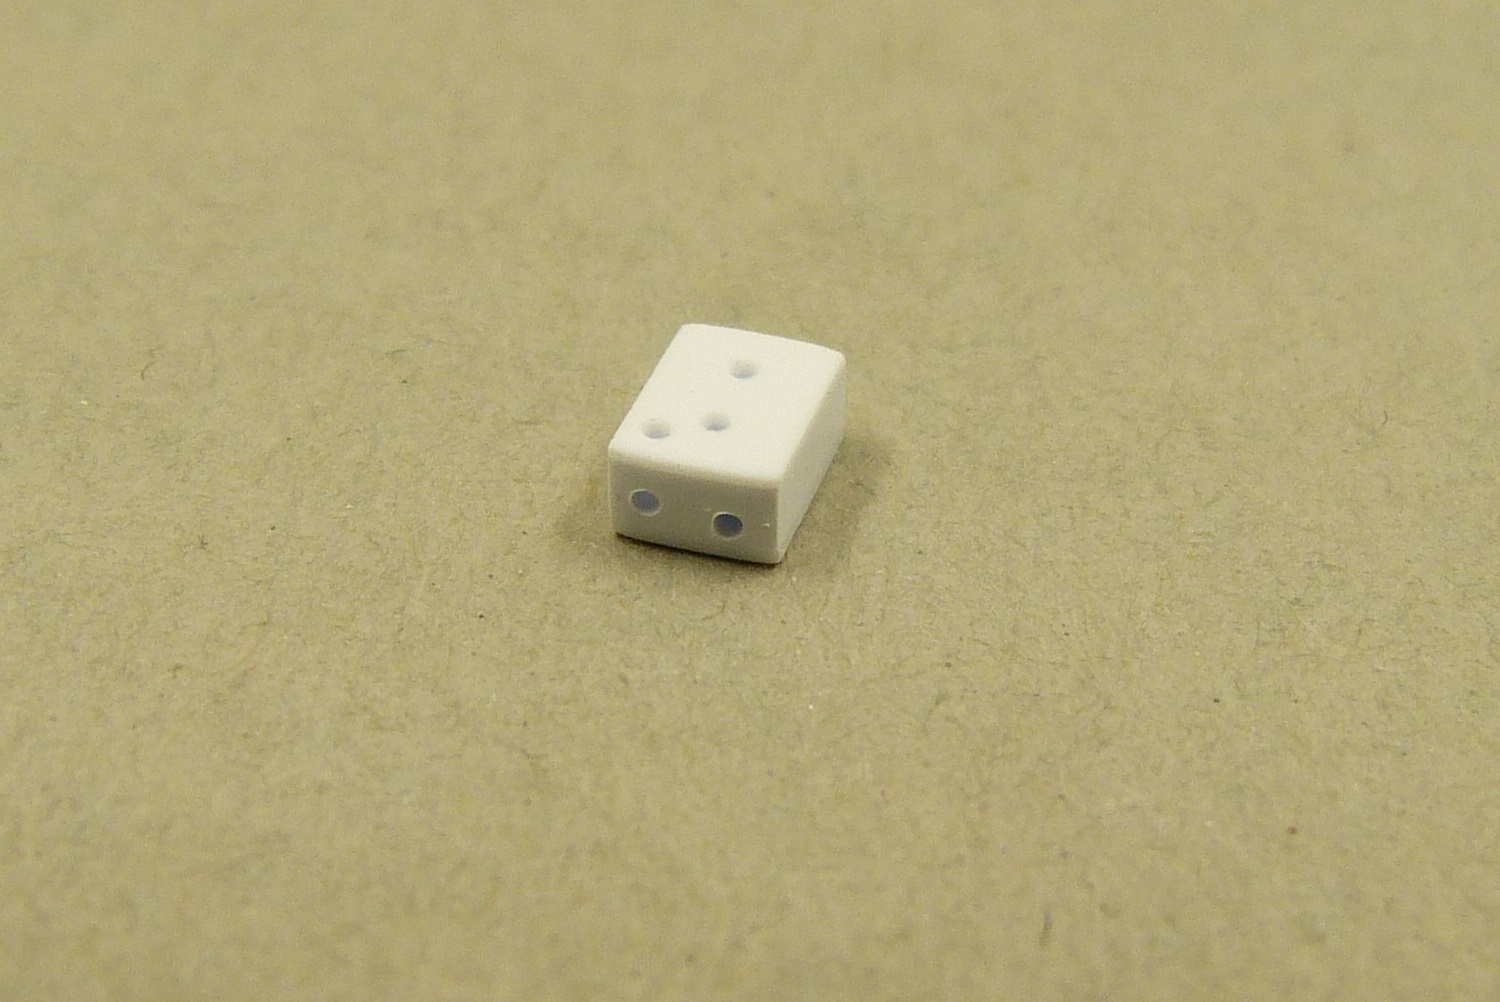
I must say the "connectors" look quite bulky in the picture. But after a coat of paint they look good enough for me.
To further detail the cabling I used some hose clamps from Detail Master (DM-2480) which can also pass as cable ties (with some imagination).
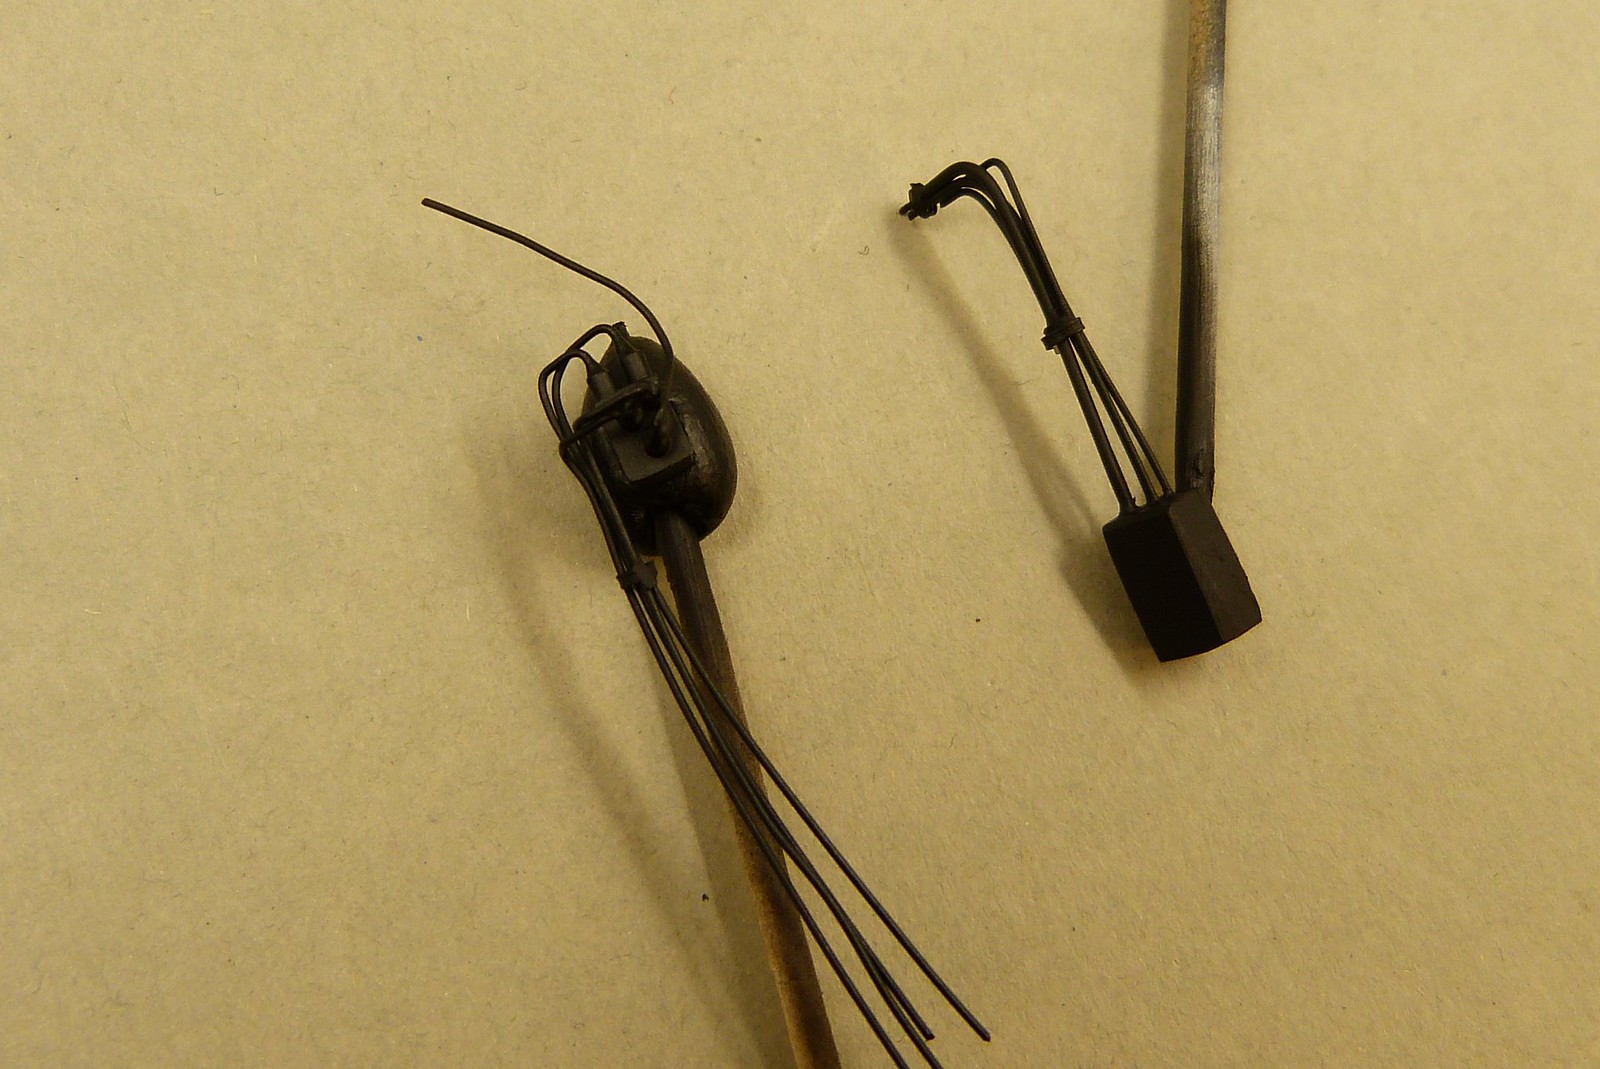
I also made a second electronics box at the passenger side. This one is mounted on the floor.
I'll have to lighten the cables a bit to make it more visible once installed.
As a base I used an electronics box from the kit, sanded to shape to fit the intended location.
Here I also used 0.4 mm steel wire as well as 0.7 mm wire for the thicker cable.
Once again I made use of the Detail Master hose clamps to add a bit of extra detail.
Because the layer of clear turned out to be rather coarse (probably from the slight problems mentioned in my previous post) I had to sand the clear smooth.
For this I used Micromesh clothes from 4000 upward to get a nice smooth finish.
I will definately need more practice with that Alclad Aqua Gloss clear.
I started of with the rear wing. The clear seems quite durable but was nevertheless quite easy to sand smooth.
I also have started the body, but there is quite some work still there.
The rear wing however was nice and ready for its decals.
Which I duly applied last week.
Now I'll let the decals thoroughly dry before applying another layer of clear.
And here I'm still a bit undecided. Will I continu with the Alclad clear? I also have some Zero Paints 1K clear lying around...

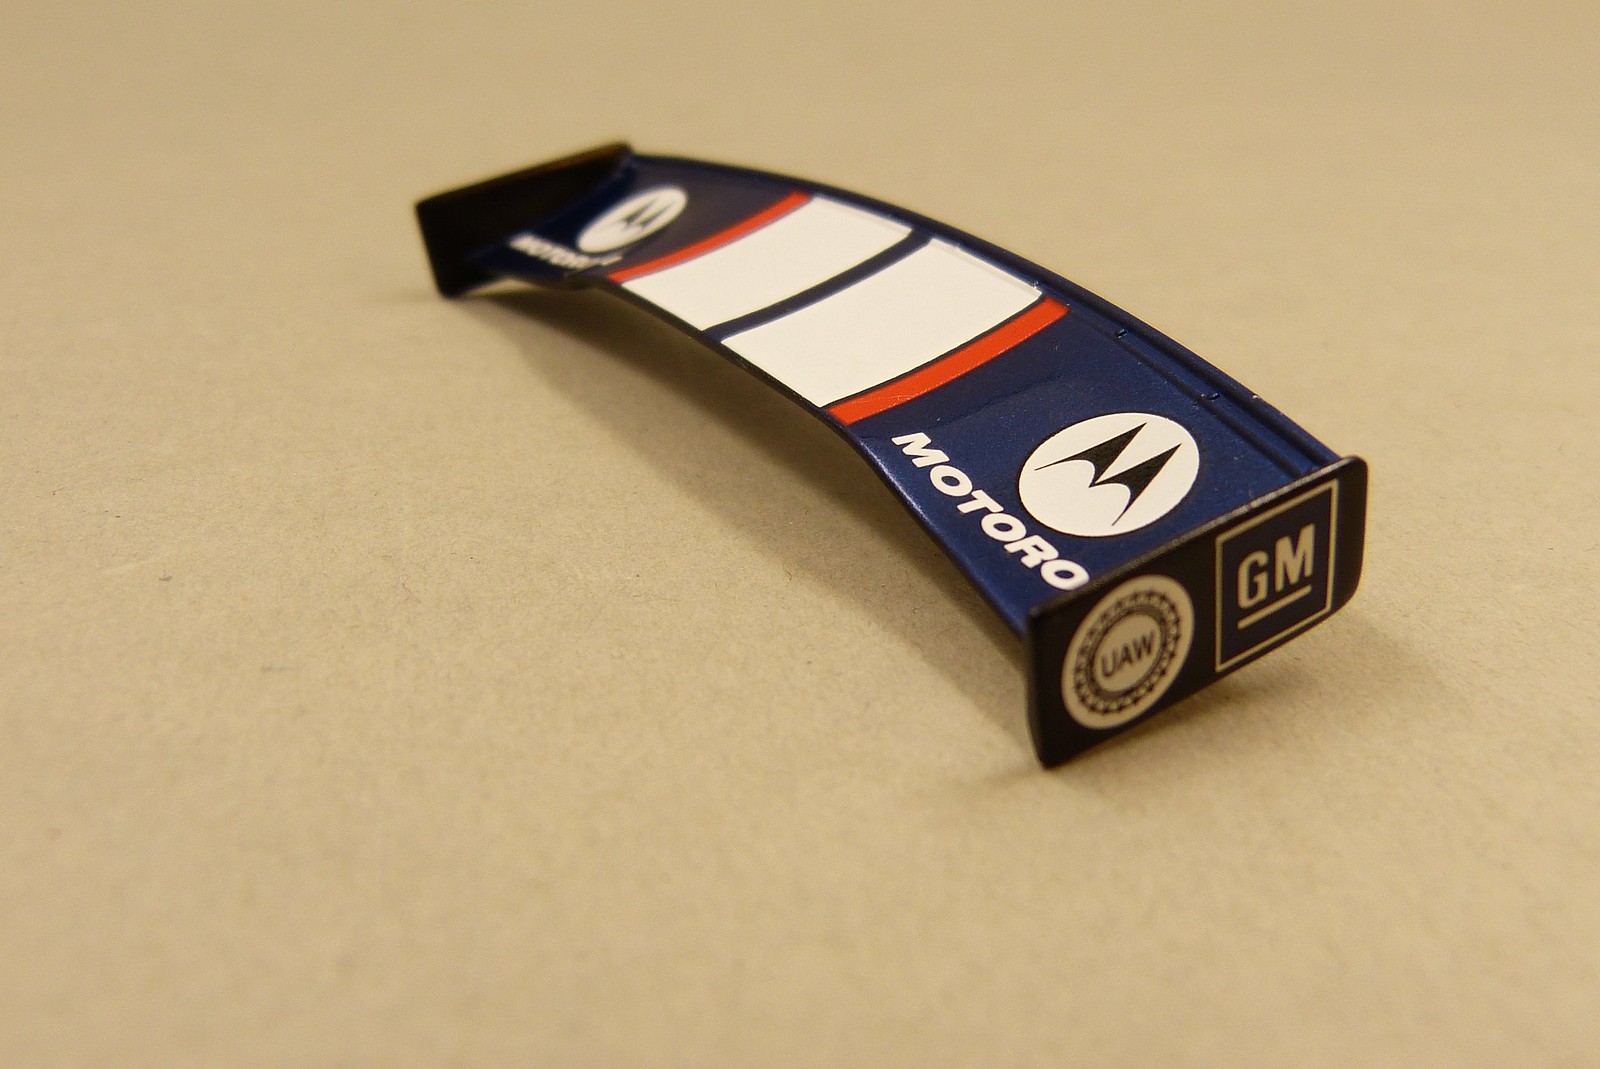
I must say that I was very pleasantly surprised by the quality of the decals. Revell doesn't have the best of names if you believe all the stories on the internet. But for this particular kit they really are very good.
They're nice and thin, have good coverage, react well to Micro Set and Sol. A joy to work with.
Concerning the design of the decals I'm not so happy with the quality and I'm glad that I checked my references because Revell got it slightly wrong with the decals for the wing endplates. The decals should be the same for both left and right endplates, as correctly pictured in the instructions. But for some reason on the decal sheet they are opposites.

This was easily fixed by cutting the decal for one endplate in half. Nobody would have noticed of course, but it was just a minor effort to get it right, so I went for it.
I made the electronics box at the passenger side.
I used a small piece of styrene (Evergreen item no. 166 2.0x3.2 mm) and drilled a few holes into it so I could fix the needed wires into the box.
For the wires I used 0.4 mm steel wire. To simulate the connectors I used some styrene rod (Evergreen item no. 221 1.2 mm). Using a pin vise I drilled 0.5 mm holes into the rod, so I could insert the wire.
I must say the "connectors" look quite bulky in the picture. But after a coat of paint they look good enough for me.
To further detail the cabling I used some hose clamps from Detail Master (DM-2480) which can also pass as cable ties (with some imagination).
I also made a second electronics box at the passenger side. This one is mounted on the floor.
I'll have to lighten the cables a bit to make it more visible once installed.
As a base I used an electronics box from the kit, sanded to shape to fit the intended location.
Here I also used 0.4 mm steel wire as well as 0.7 mm wire for the thicker cable.
Once again I made use of the Detail Master hose clamps to add a bit of extra detail.
Because the layer of clear turned out to be rather coarse (probably from the slight problems mentioned in my previous post) I had to sand the clear smooth.
For this I used Micromesh clothes from 4000 upward to get a nice smooth finish.
I will definately need more practice with that Alclad Aqua Gloss clear.
I started of with the rear wing. The clear seems quite durable but was nevertheless quite easy to sand smooth.
I also have started the body, but there is quite some work still there.
The rear wing however was nice and ready for its decals.
Which I duly applied last week.
Now I'll let the decals thoroughly dry before applying another layer of clear.
And here I'm still a bit undecided. Will I continu with the Alclad clear? I also have some Zero Paints 1K clear lying around...
I must say that I was very pleasantly surprised by the quality of the decals. Revell doesn't have the best of names if you believe all the stories on the internet. But for this particular kit they really are very good.
They're nice and thin, have good coverage, react well to Micro Set and Sol. A joy to work with.
Concerning the design of the decals I'm not so happy with the quality and I'm glad that I checked my references because Revell got it slightly wrong with the decals for the wing endplates. The decals should be the same for both left and right endplates, as correctly pictured in the instructions. But for some reason on the decal sheet they are opposites.
This was easily fixed by cutting the decal for one endplate in half. Nobody would have noticed of course, but it was just a minor effort to get it right, so I went for it.
Comments
Post a Comment