Painting the body
And what a body it is.
After glueing the PE parts to the body, I coated the model in a few thin layers of primer to create an even underground for the paint to adhere to. The primed body can be seen on the first page.
I decided to give this Ferrari F430 a black color. Red Ferrari's can be found all over the internet and forums. I just wanted something a little bit different and I also think that black is a very cool colour for this car. Gives it a bit of a menacing appearance.
After spraying a few light coats, I then proceeded with adding 3 wet coats to build up a nice layer of paint.
Which will probably be necessary as I'm going to use polishing compound and wax on this model. And as it is the first time that I'll be using those materials, I suspect that a sturdy layer of paint might come in very handy.
Below are several pictures of the current state of affairs.
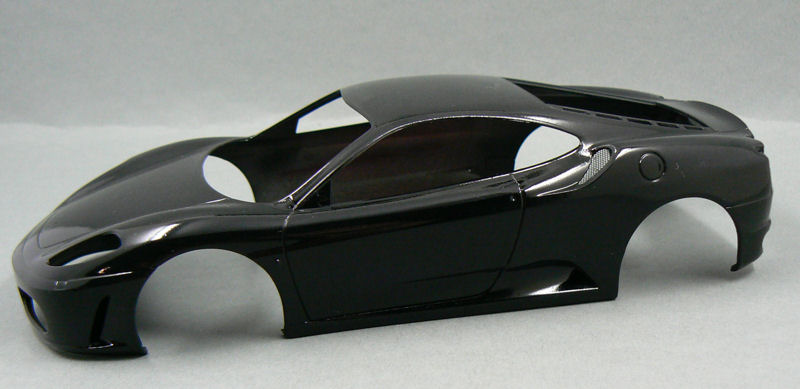
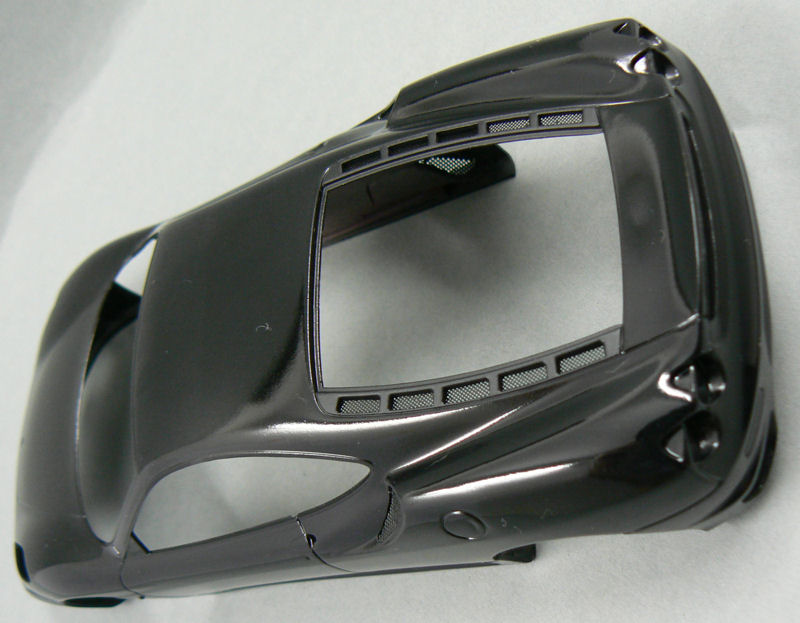
 When you look closely at the pictures, you can see that there is some overspray (very lightly) on the roof of the car.
When I painted the areas around the engine room vents, I thought that I had sufficiently masked the car. But apparently I didn't. But I'm guessing that I'll get this overspray removed with the polishing compound I'm intending to use.
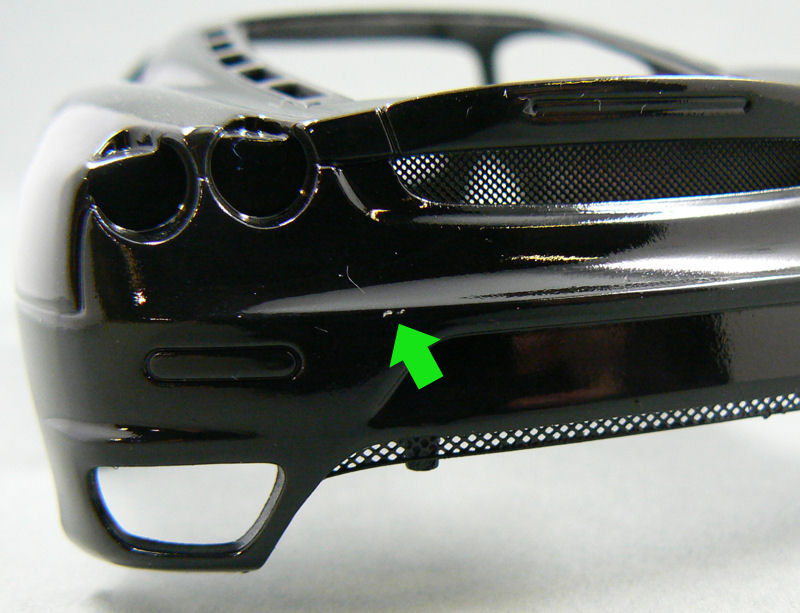
A bigger problem I have is the fact that, on the back of the car, a spot of paint got chipped. For some reason I felt like dropping my tweezers next to the car. So what's the problem ? I just said that it fell next to the car...
Sadly, my cutting mat felt quite elastic that day and the tweezers bounced right onto the back of the car (with the sharp point of course). But as it is only a really small spot, I'll try to mask it with a bit of paint and hope that after polishing and waxing, the damage can't be seen anymore.
 Details, details
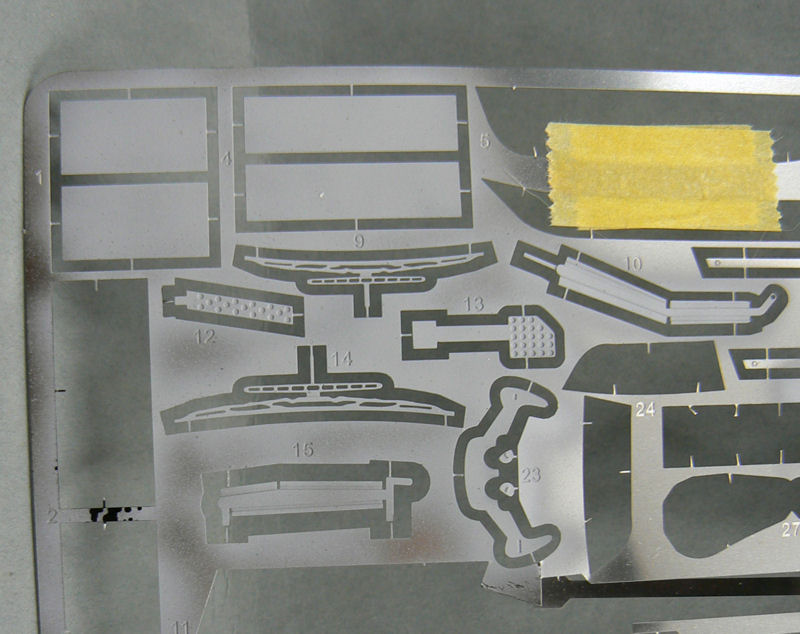
The final picture I'm going to show in this update is of several PE parts that I still have to paint and put onto the car.
I've already primed the parts, as can be seen in the picture.
 Apart from adding the PE parts, I'm also intending to do some extra
detailing in the engine bay. Not too much, but just a few things to
liven it up a bit.
Apart from adding the PE parts, I'm also intending to do some extra
detailing in the engine bay. Not too much, but just a few things to
liven it up a bit.
Until next time !
And what a body it is.
After glueing the PE parts to the body, I coated the model in a few thin layers of primer to create an even underground for the paint to adhere to. The primed body can be seen on the first page.
I decided to give this Ferrari F430 a black color. Red Ferrari's can be found all over the internet and forums. I just wanted something a little bit different and I also think that black is a very cool colour for this car. Gives it a bit of a menacing appearance.
After spraying a few light coats, I then proceeded with adding 3 wet coats to build up a nice layer of paint.
Which will probably be necessary as I'm going to use polishing compound and wax on this model. And as it is the first time that I'll be using those materials, I suspect that a sturdy layer of paint might come in very handy.
Below are several pictures of the current state of affairs.
When I painted the areas around the engine room vents, I thought that I had sufficiently masked the car. But apparently I didn't. But I'm guessing that I'll get this overspray removed with the polishing compound I'm intending to use.
A bigger problem I have is the fact that, on the back of the car, a spot of paint got chipped. For some reason I felt like dropping my tweezers next to the car. So what's the problem ? I just said that it fell next to the car...
Sadly, my cutting mat felt quite elastic that day and the tweezers bounced right onto the back of the car (with the sharp point of course). But as it is only a really small spot, I'll try to mask it with a bit of paint and hope that after polishing and waxing, the damage can't be seen anymore.
The final picture I'm going to show in this update is of several PE parts that I still have to paint and put onto the car.
I've already primed the parts, as can be seen in the picture.
Until next time !
Comments
Post a Comment