The next episode of the Corvette C5-R is here.
Looking at reference pictures on the internet I stumble upon more and more things that aren't correct when building a Le Mans 2003 Corvette C5-R.
This is what I've been doing thus far:
Around the door windows there was some kind of frame which wasn't present during Le Mans 2003. I removed the frames with my motortool.
I don't know which source Revell has used when deciding the frames should be there. I actually haven't seen anything like it on the reference images I've found.
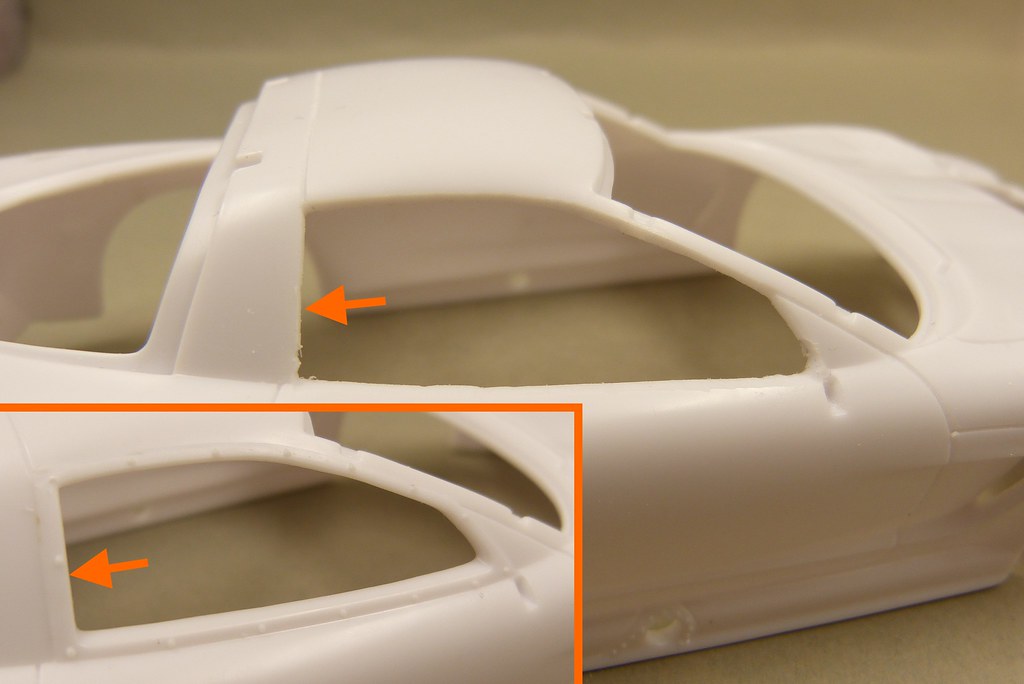
Here and there the surface is a bit rough... Maybe I should have been a bit more patient when removing the frames. But it's nothing that can't be solved with a bit of putty.
The outlet opening for the radiator has also been taken care of. Some touching up still needs to be done, but I'm happy with the progress so far.
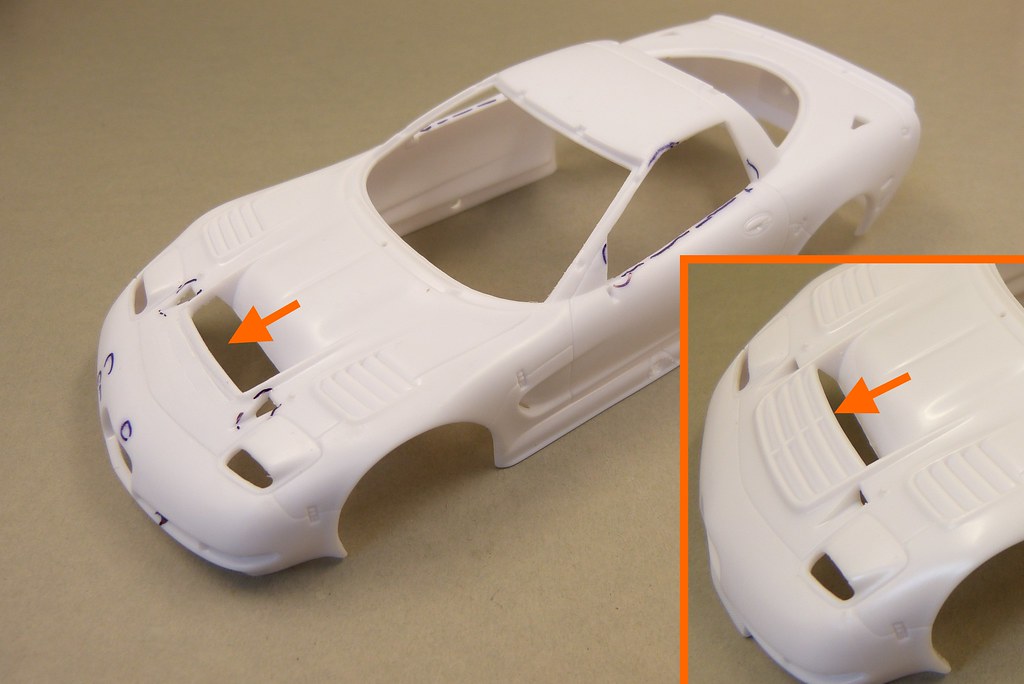
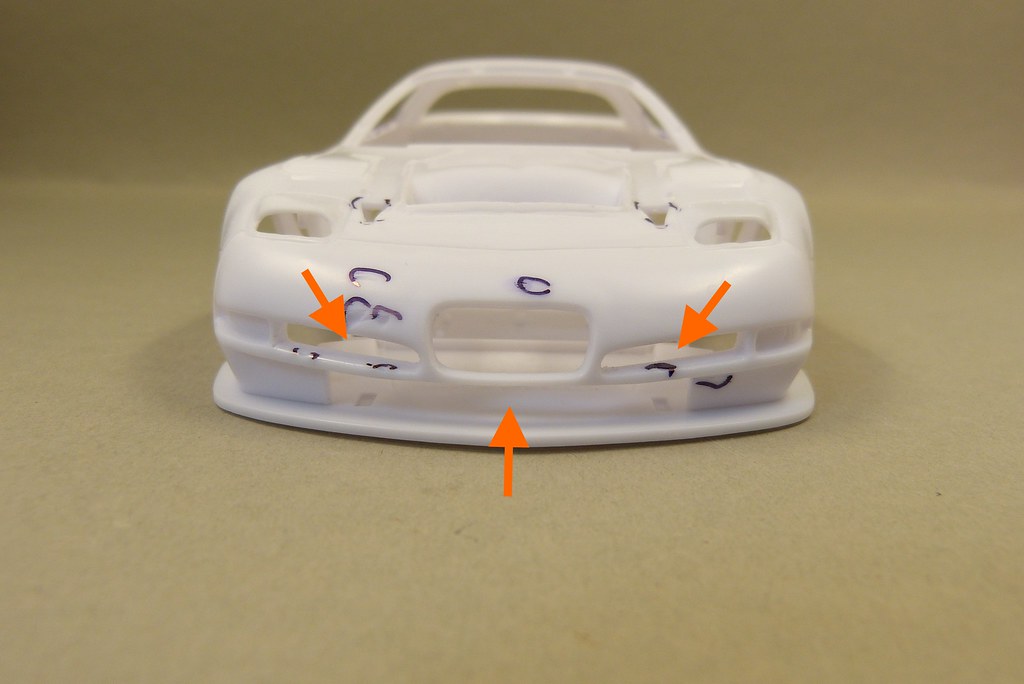
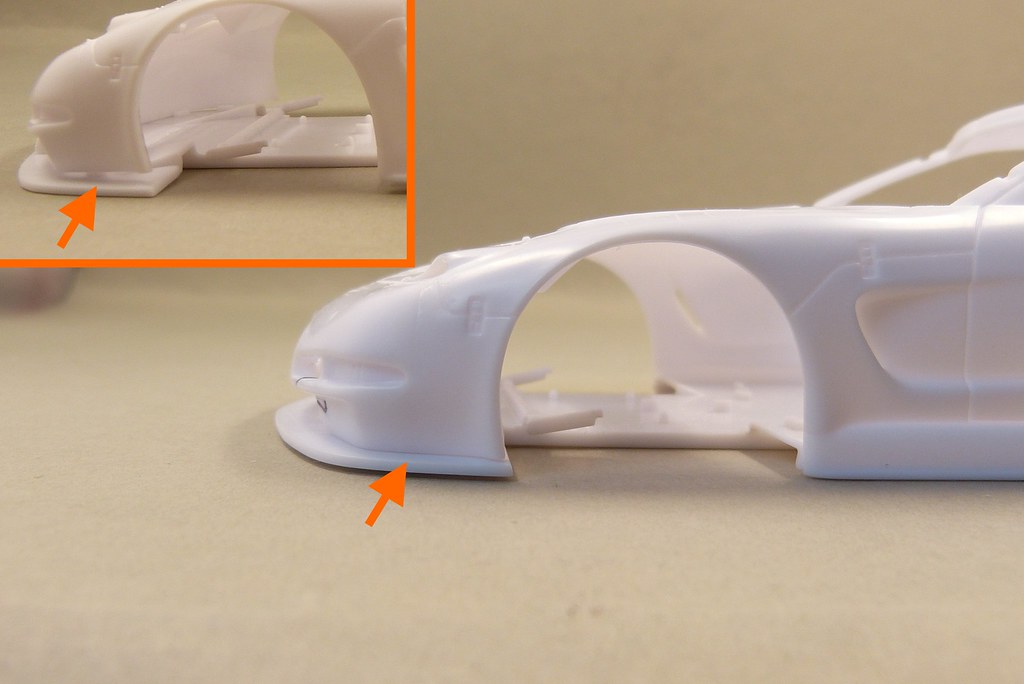
At the front of the body I have opened up the cooling openings next to the indicators and I also removed the main cooling opening, which I in the process also made a bit wider to indicate the new brake cooling openings.
PE mesh will be added at a later stage.
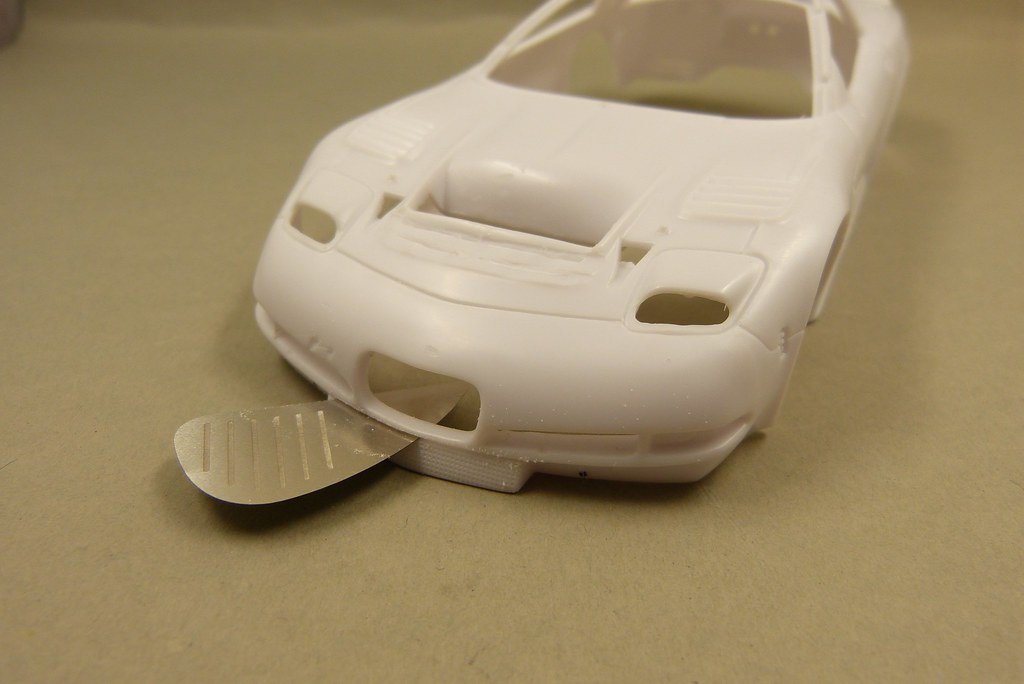
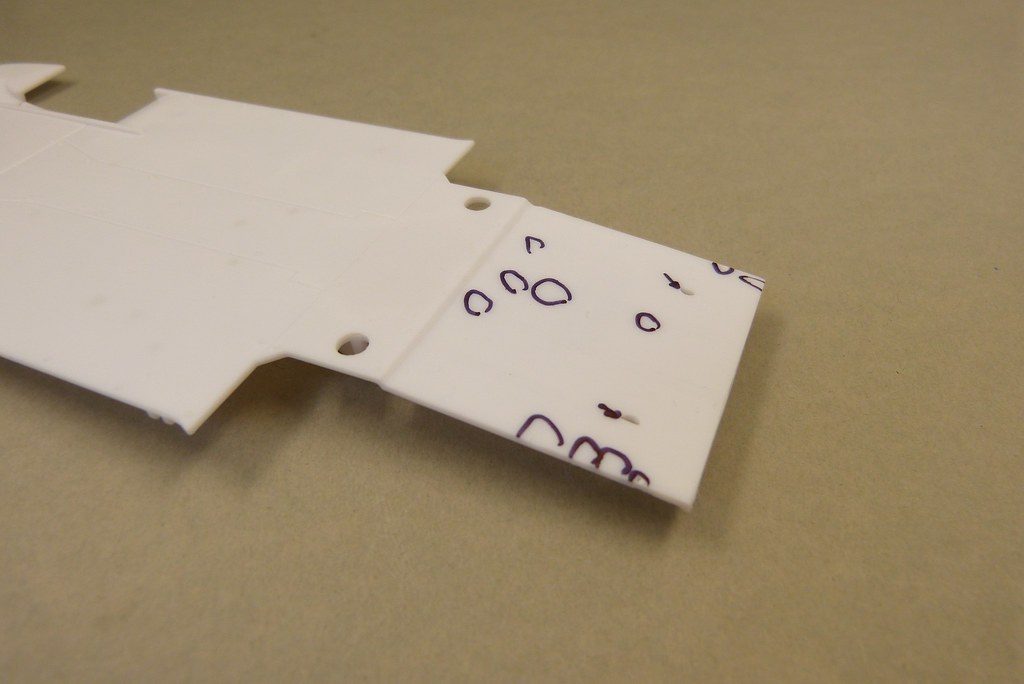
The diffusor was another area which received more work than originally planned.
At first I thought about thinning the strakes of the diffusor. Which I also had started to do but I wasn't really happy with the result. On top of that was the profile of the diffusor not correct for the later models of the C5-R so in the end I decided to cut off all the strakes and to rebuild the diffusor with plastic sheet.
Apart from that I did notice on my reference images that the diffusor should be shortened a bit.
Last but not least I also noticed that the angle of the diffusor relative to the ground is not correct. But I won't be changing that on this build, as that would also mean extensive modifications to the body.
I personally doubt that a lot of people would notice it anyway (safe for the three people reading this post...).
In the end I didn't wait until I had finished all the work on the body before trying to straighten it.
I taped the body to a solid and rigid piece of plastic and used my wife's hairdryer to soften the plastic of the body just enough to straigthen it.
This went without any difficulties and I'm totally pleased with the result.
As can be seen there's still some work left on the body trying to get everything to look smooth.
I hope that by the next update everything is ready for primer.
Looking at reference pictures on the internet I stumble upon more and more things that aren't correct when building a Le Mans 2003 Corvette C5-R.
This is what I've been doing thus far:
Around the door windows there was some kind of frame which wasn't present during Le Mans 2003. I removed the frames with my motortool.
I don't know which source Revell has used when deciding the frames should be there. I actually haven't seen anything like it on the reference images I've found.
Here and there the surface is a bit rough... Maybe I should have been a bit more patient when removing the frames. But it's nothing that can't be solved with a bit of putty.
The outlet opening for the radiator has also been taken care of. Some touching up still needs to be done, but I'm happy with the progress so far.
At the front of the body I have opened up the cooling openings next to the indicators and I also removed the main cooling opening, which I in the process also made a bit wider to indicate the new brake cooling openings.
PE mesh will be added at a later stage.
The diffusor was another area which received more work than originally planned.
At first I thought about thinning the strakes of the diffusor. Which I also had started to do but I wasn't really happy with the result. On top of that was the profile of the diffusor not correct for the later models of the C5-R so in the end I decided to cut off all the strakes and to rebuild the diffusor with plastic sheet.
Apart from that I did notice on my reference images that the diffusor should be shortened a bit.
Last but not least I also noticed that the angle of the diffusor relative to the ground is not correct. But I won't be changing that on this build, as that would also mean extensive modifications to the body.
I personally doubt that a lot of people would notice it anyway (safe for the three people reading this post...).
In the end I didn't wait until I had finished all the work on the body before trying to straighten it.
I taped the body to a solid and rigid piece of plastic and used my wife's hairdryer to soften the plastic of the body just enough to straigthen it.
This went without any difficulties and I'm totally pleased with the result.
As can be seen there's still some work left on the body trying to get everything to look smooth.
I hope that by the next update everything is ready for primer.
Comments
Post a Comment